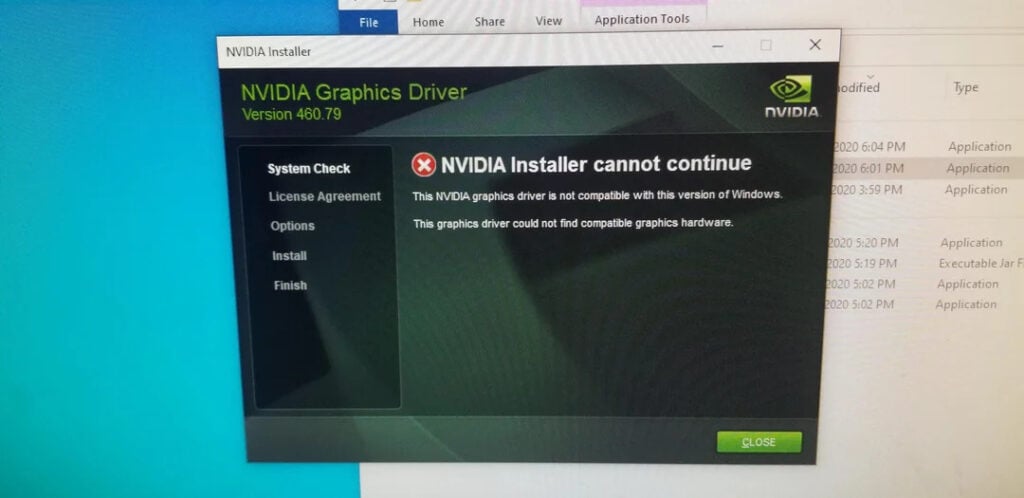
Unraveling the Enigma: The Perplexing Mystery Behind Nvidia GeForce Driver Installation
Recently, Fortect has become increasingly popular as a reliable and efficient way to address a wide range of PC issues. It's particularly favored for its user-friendly approach to diagnosing and fixing problems that can hinder a computer's performance, from system errors and malware to registry issues.
- Download and Install: Download Fortect from its official website by clicking here, and install it on your PC.
- Run a Scan and Review Results: Launch Fortect, conduct a system scan to identify issues, and review the scan results which detail the problems affecting your PC's performance.
- Repair and Optimize: Use Fortect's repair feature to fix the identified issues. For comprehensive repair options, consider subscribing to a premium plan. After repairing, the tool also aids in optimizing your PC for improved performance.
Troubleshooting NVIDIA Driver Installation Issues
If you’re experiencing issues installing NVIDIA GeForce drivers, there are a few troubleshooting steps you can follow to resolve the problem.
First, make sure you have downloaded the correct driver for your graphics card and operating system from the NVIDIA Driver Downloads page.
Next, try running the installer as an administrator by right-clicking on the installer file and selecting “Run as administrator.”
If you’re still encountering issues, try temporarily disabling your antivirus software as it may be interfering with the installation process.
Additionally, ensure that you have enough free space on your hard drive for the driver installation.
If none of these solutions work, you can try using the Display Driver Uninstaller tool to completely remove any existing NVIDIA drivers before attempting a fresh installation.
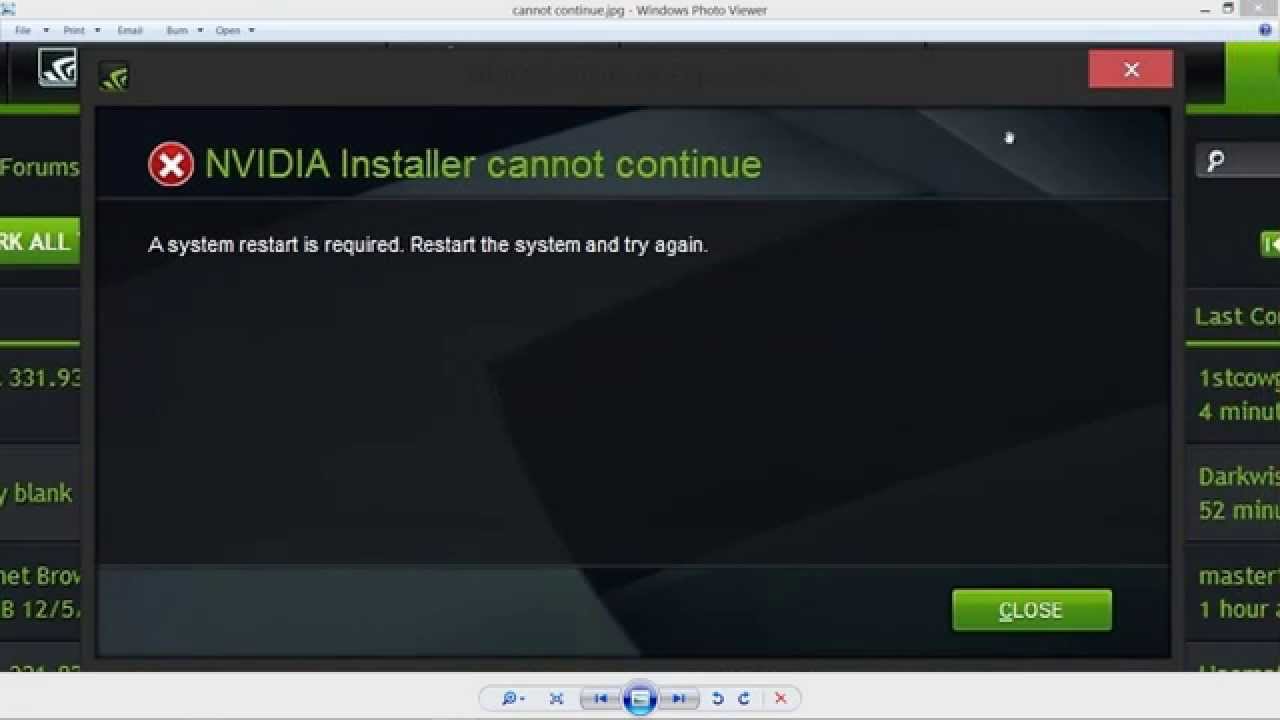
Remember to restart your PC after each step to ensure changes take effect.
For more detailed instructions and solutions, you can refer to the NVIDIA support page or seek assistance from the NVIDIA community forums.
Steps to Resolve NVIDIA Driver Installation Problems
- Click on the Start menu and select Restart.
- Wait for your computer to shut down and then turn it back on.
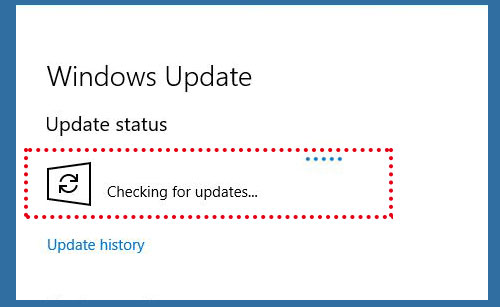
Update Windows
- Click on the Start menu and select Settings.
- In the Settings window, click on Update & Security.
- Click on Check for Updates and wait for Windows to search and install any available updates.
- Restart your computer after the update process is complete.
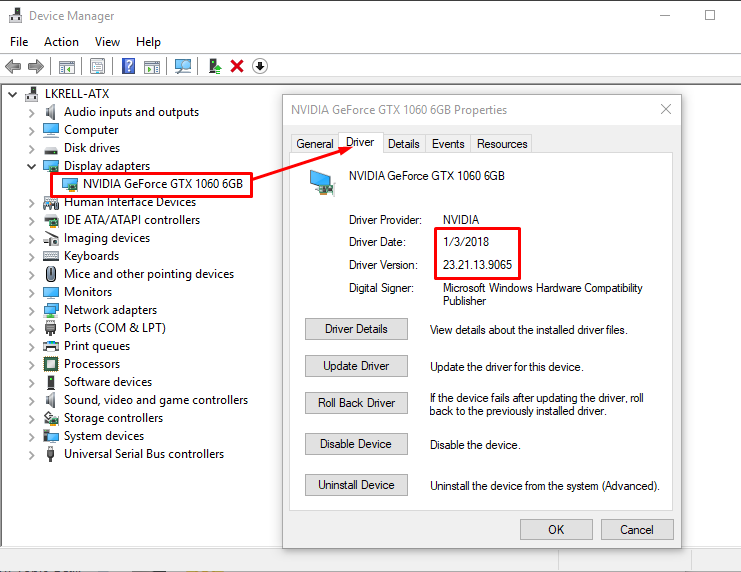
Uninstall Previous NVIDIA Drivers
- Press Win + X and select Device Manager from the menu.
- In the Device Manager window, expand the Display adapters category.
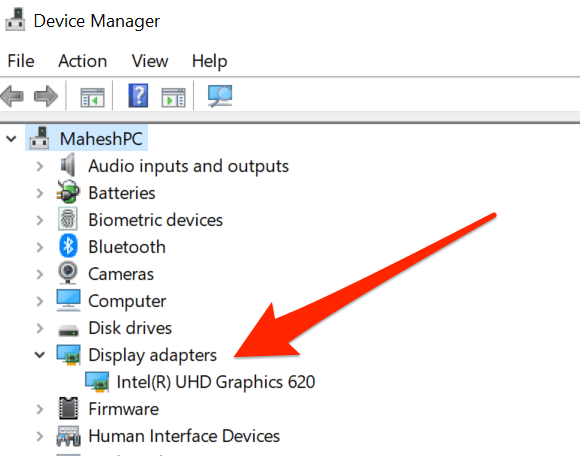
- Right-click on your NVIDIA graphics card and select Uninstall device.
- Check the box that says Delete the driver software for this device and click Uninstall.
- Follow the on-screen prompts to complete the uninstallation process.
Download and Install the Latest Driver
- Visit the official NVIDIA website and navigate to the Drivers section.
- Enter your graphics card details and click on Search.
- Download the latest driver compatible with your graphics card and operating system.
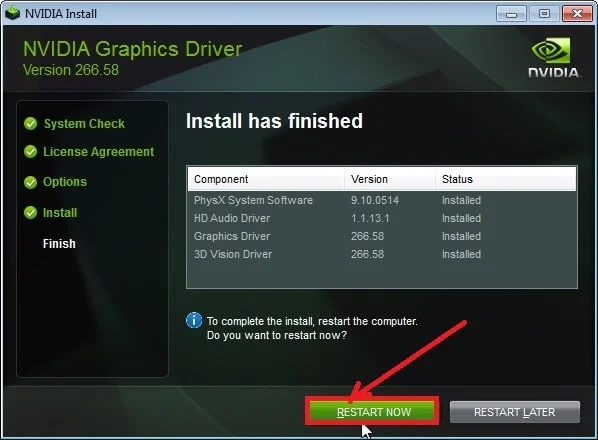
- Once the download is complete, run the installer and follow the on-screen instructions to install the driver.
- Restart your computer after the installation process is finished.
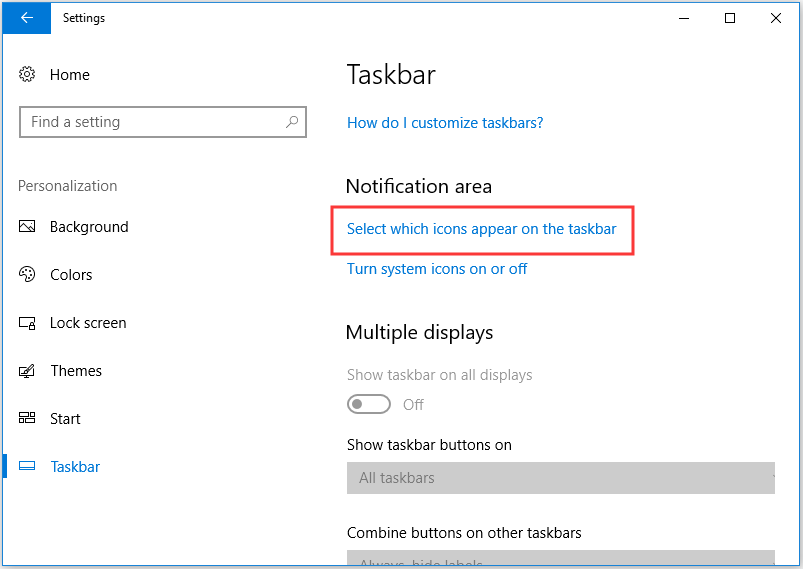
Disable Antivirus and Firewall Temporarily
- Click on the Start menu and select Settings.
- In the Settings window, click on Update & Security.
- Click on Windows Security and then select Virus & threat protection.
- Under Virus & threat protection settings, click on Manage settings.
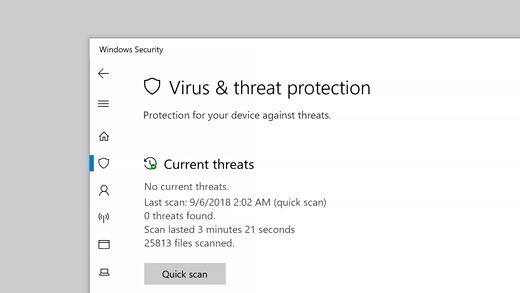
- Toggle off the Real-time protection switch.
- Similarly, toggle off any other antivirus or firewall software that may be running on your computer.

Perform a Clean Installation of the Driver
- Download the latest version of the Display Driver Uninstaller (DDU) tool from a trusted source.
- Restart your computer in Safe Mode. You can do this by pressing Win + R, typing msconfig, and then selecting the Boot tab and checking the Safe boot box.
- Run the Display Driver Uninstaller tool and follow the on-screen instructions to clean uninstall any remaining NVIDIA driver files.
- Once the uninstallation is complete, restart your computer normally.
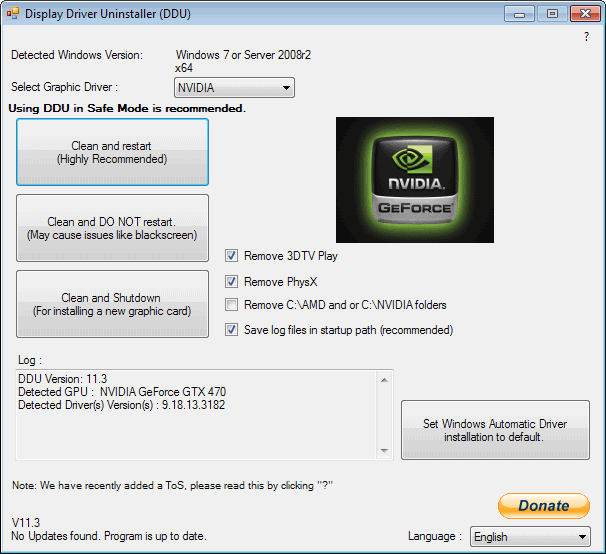
- Download and install the latest NVIDIA driver from the official website.
- Restart your computer after the installation process is finished.
Perform a Clean Installation of the NVIDIA Driver
Performing a clean installation of the NVIDIA driver can often resolve issues with the driver not installing properly. Here are the steps to follow:
1. Uninstall the existing NVIDIA driver by going to the Control Panel and selecting “Uninstall a program.” Look for any NVIDIA-related programs and uninstall them.
2. Download the latest NVIDIA driver from the official NVIDIA website. Make sure to select the correct product type, product series, and operating system (e.g., Windows 10).
3. Use a program like MiniTool Partition Wizard to completely wipe your hard drive, ensuring a clean installation.
4. Once the hard drive is wiped, double-click on the downloaded driver file to launch the display driver installer.
5. Follow the on-screen instructions to complete the installation.
Performing a clean installation can help resolve issues related to compatibility, failed installations, and error messages. It ensures the stability and proper functioning of your graphics driver.
Resolving Common Error Variations during GeForce Installation
To resolve common error variations during GeForce installation, follow these steps:
1. Update Windows 10: Ensure your operating system is up to date by running Windows Update.
2. Check for compatibility: Verify that your GPU drivers are compatible with your system. Visit the Nvidia website and select the appropriate product type and series.
3. Download the correct driver: Use the Driver Downloads section on the Nvidia website to download the appropriate driver for your graphics card.
4. Run the installer as an administrator: Right-click on the downloaded file and select “Run as administrator.”
5. Disable antivirus and firewall: Temporarily turn off any antivirus or firewall software that may be interfering with the installation process.
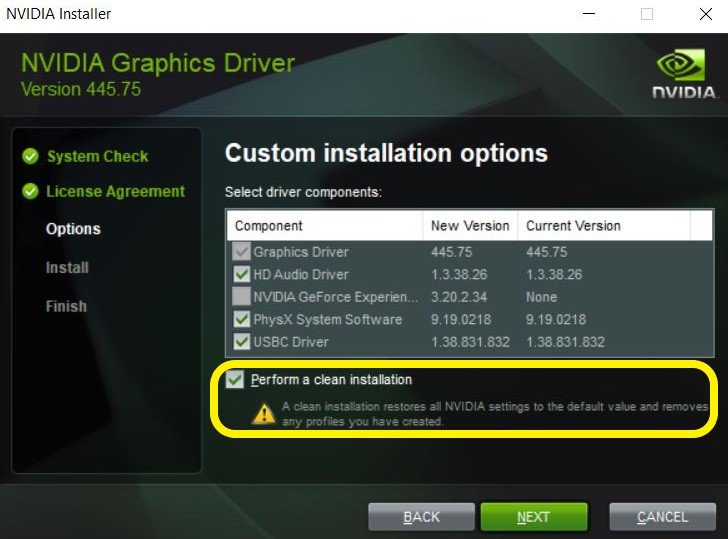
6. Clean installation: During the installation process, select the “Custom installation” option and check the “Perform a clean installation” box.
7. Restart your PC: After the installation completes, restart your computer to ensure the changes take effect.
If you’re still experiencing issues, consult Nvidia’s support articles or contact their customer support for further assistance.
Additional Fixes for Successful Installation of NVIDIA Drivers
- Perform a Clean Installation of the Drivers
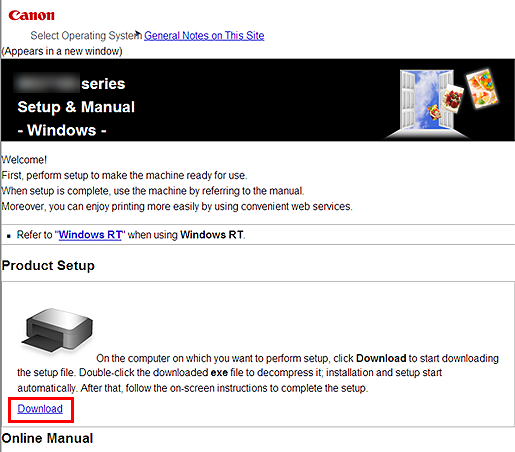
- Open the NVIDIA Driver Download page on the official website.
- Select your graphics card model and operating system.
- Click on the “Search” button to find the appropriate driver.
- Download the latest version of the driver.
- Open the downloaded file and select “Custom installation”.
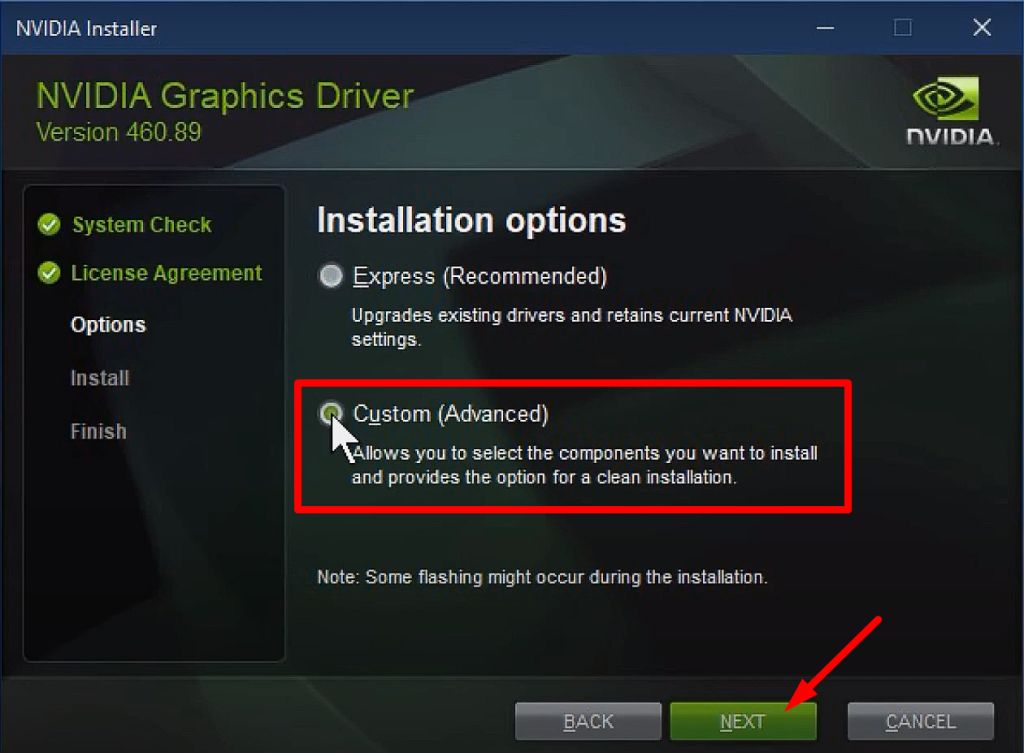
- Check the box that says “Perform a clean installation”.
- Follow the on-screen instructions to complete the installation process.
- Disable Antivirus and Firewall Programs
- Open the antivirus software installed on your computer.
- Locate the settings or preferences section.
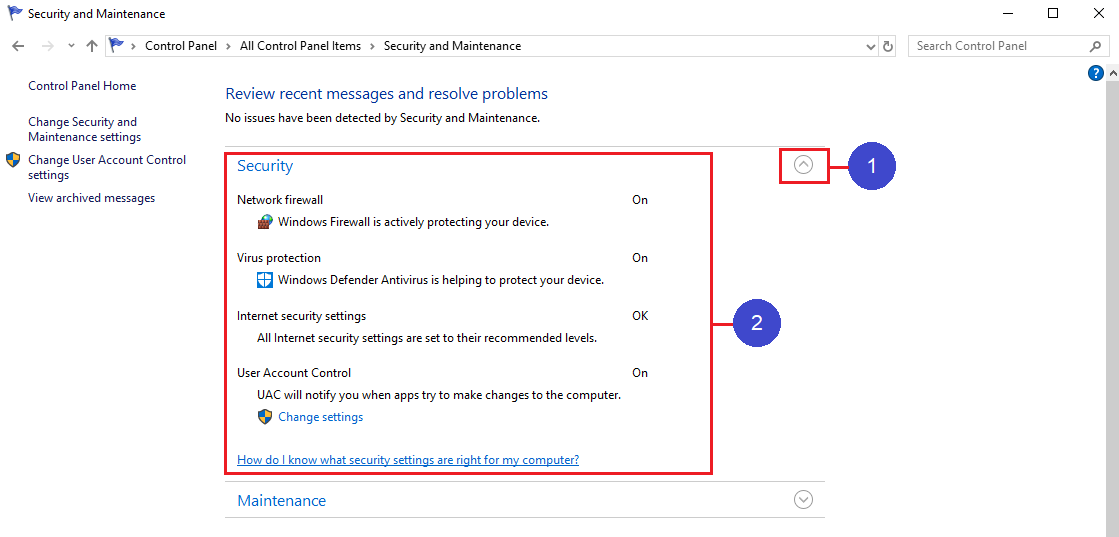
- Disable the real-time protection or temporarily turn off the antivirus program.
- If you have a firewall program, disable it as well.
- Restart your computer.
- Attempt to install the NVIDIA drivers again.
- Uninstall Previous NVIDIA Drivers
- Open the “Control Panel” from the Start menu.
- Click on “Uninstall a program” or “Programs and Features”.
- Locate the NVIDIA graphics driver in the list of installed programs.
- Right-click on the driver and select “Uninstall” or “Remove”.
- Follow the on-screen prompts to complete the uninstallation process.
- Restart your computer.
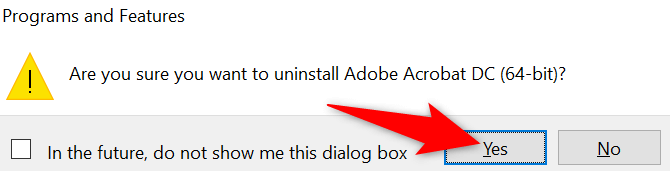
- Download and install the latest version of NVIDIA drivers.
- Update Windows
- Open the “Settings” app by pressing “Windows key + I”.
- Click on “Update & Security”.
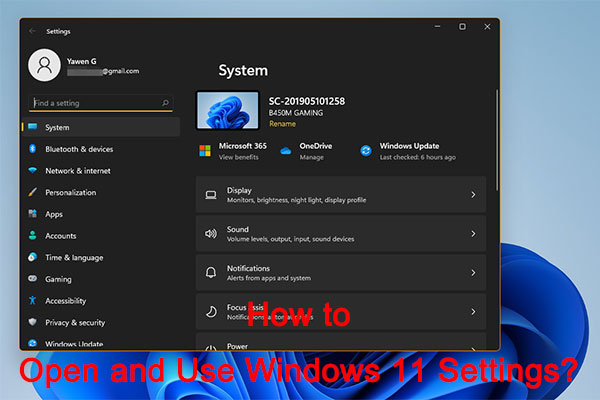
- Select “Windows Update” from the left menu.
- Click on the “Check for updates” button.
- If any updates are available, click on “Download and install”.
- Wait for the updates to be downloaded and installed.
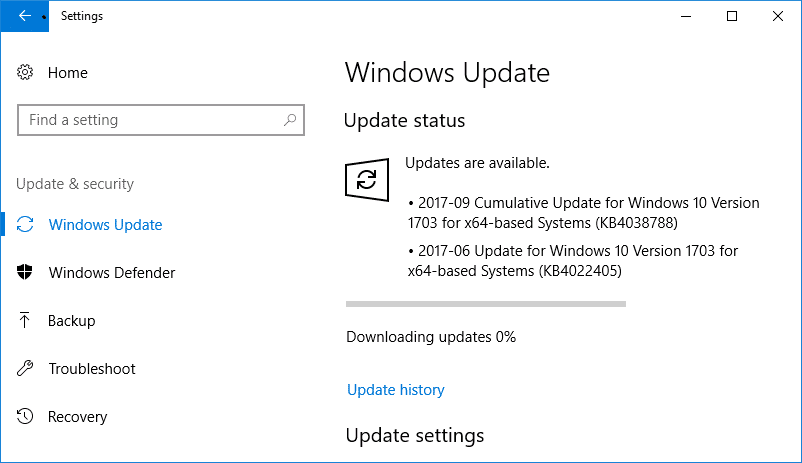
- Restart your computer.
- Try installing the NVIDIA drivers once again.
- Run the NVIDIA Installer in Compatibility Mode
- Locate the downloaded NVIDIA driver file.
- Right-click on the file and select “Properties”.
- Go to the “Compatibility” tab.
- Check the box that says “Run this program in compatibility mode for”.
- Select the appropriate operating system from the drop-down menu.
- Click on “Apply” and then “OK”.
- Double-click on the driver file to run the installer.
- Follow the on-screen instructions to complete the installation.
- Check for Hardware Issues
- Ensure that your graphics card is properly connected to the motherboard.
- If using an external graphics card, make sure it is securely seated in the expansion slot.
- If possible, try installing the graphics card in a different slot.
- Inspect the graphics card for any physical damage or loose components.
- If necessary, clean the graphics card and the PCIe slot using compressed air.
- Restart your computer and attempt to install the NVIDIA drivers again.