When it comes to being recognized on PC, there are a few key factors to keep in mind.
Recently, Fortect has become increasingly popular as a reliable and efficient way to address a wide range of PC issues. It's particularly favored for its user-friendly approach to diagnosing and fixing problems that can hinder a computer's performance, from system errors and malware to registry issues.
- Download and Install: Download Fortect from its official website by clicking here, and install it on your PC.
- Run a Scan and Review Results: Launch Fortect, conduct a system scan to identify issues, and review the scan results which detail the problems affecting your PC's performance.
- Repair and Optimize: Use Fortect's repair feature to fix the identified issues. For comprehensive repair options, consider subscribing to a premium plan. After repairing, the tool also aids in optimizing your PC for improved performance.
Testing Connection and Power Issues
If you are experiencing connection or power issues with your PC, it is important to troubleshoot the problem to determine the cause.
First, check all wire connections and ensure that the power supply is properly connected to your computer. Make sure that all cables are securely plugged in and that there are no loose connections.
Next, try using a different power outlet to see if the issue is related to the electrical supply. If the problem persists, it may be necessary to test the power supply unit itself to rule out any hardware issues.
In some cases, issues with USB hardware or device drivers can cause connection problems. Check the Device Manager in Windows to see if there are any devices with errors or warnings.
If you are still experiencing issues after checking the power and connections, it may be necessary to diagnose the problem using the Command Prompt or a troubleshooting tool in Windows. This will help identify any issues with the hardware or software that may be causing the connection problems.
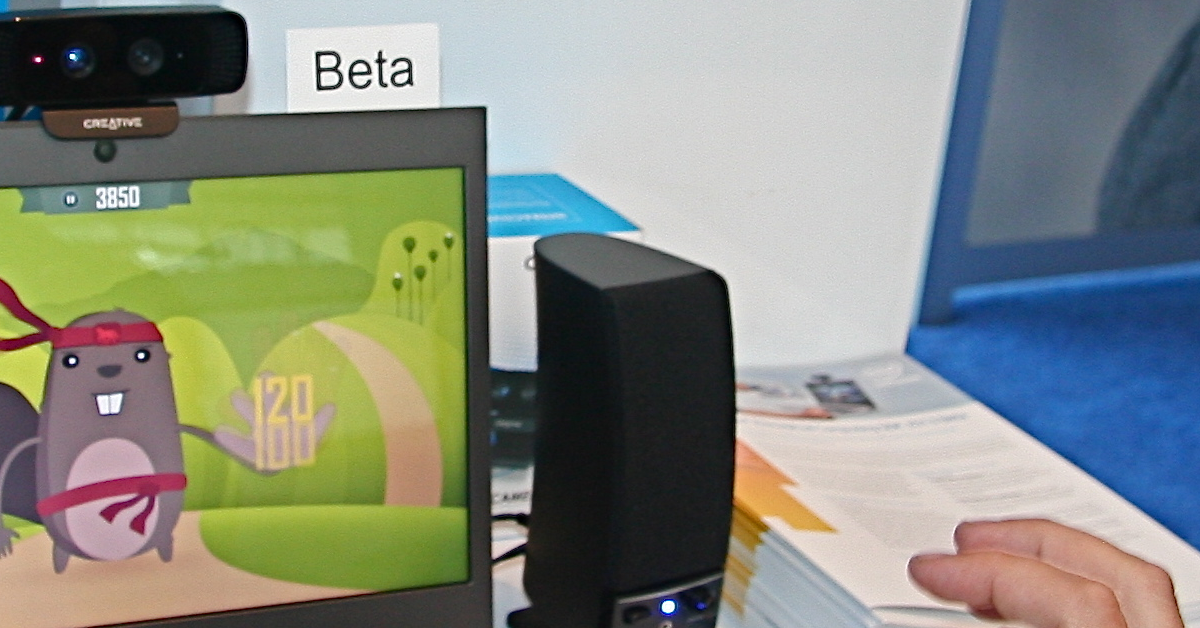
Utilizing an Alternative USB Port or Computer
First, try plugging the USB device into a different USB port on the same computer. Sometimes, the port itself may be the problem, and using a different port can help resolve the issue.
If the USB device is still not recognized, try plugging it into a different computer. This can help determine if the issue is with the USB device itself or with the original computer’s hardware or settings.
If the USB device is recognized on a different computer, the issue may be with the original computer’s hardware or settings. In this case, you may need to troubleshoot the computer’s USB ports or device drivers to resolve the issue.
By utilizing an alternative USB port or computer, you can quickly determine if the issue is specific to the original port or computer, and take the appropriate steps to resolve the problem.
Running Hardware and Device Troubleshooters
- Open Settings by clicking on the Start button and then selecting the Settings gear icon.
- Select Update & Security.
- Click on Troubleshoot in the left-hand panel.
- Click on Hardware and Devices and then click Run the troubleshooter.
Managing Drive Letters and Paths in Disk Management
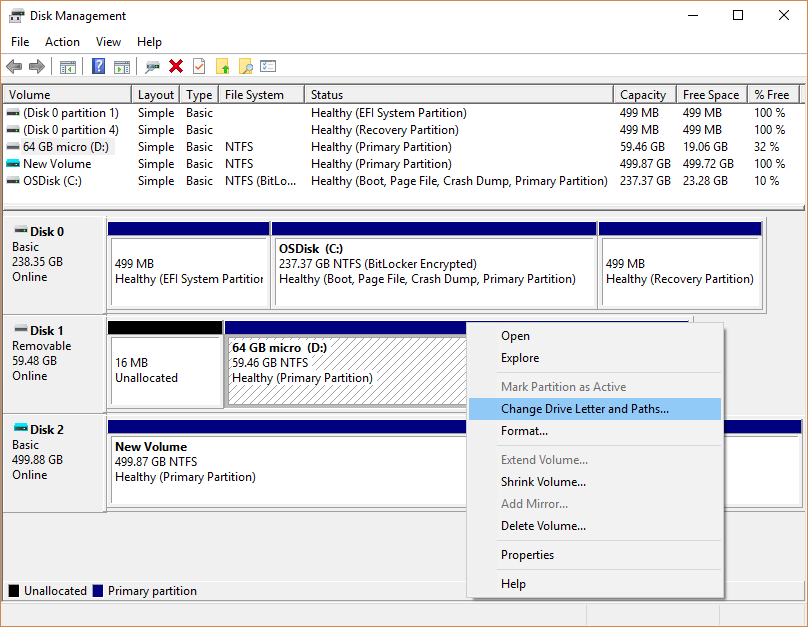
To manage drive letters and paths in Disk Management, open the tool by right-clicking on the Start button and selecting “Disk Management.” Once in Disk Management, right-click on the drive for which you want to change the letter or path and select “Change Drive Letter and Paths.” From there, you can assign, change, or remove drive letters as needed.
If you encounter any issues with drive letters or paths, you can use the Device Manager to troubleshoot any problems with device drivers or hardware. Additionally, you can use the Command Prompt to run diagnostic commands to identify and fix any issues with drive letters and paths.
It’s important to note that changing drive letters or paths can potentially cause issues with installed programs or shortcuts. Be sure to backup important data before making any changes, and proceed with caution.
Updating or Reinstalling Drivers and USB Controllers
To update or reinstall drivers and USB controllers on your PC, you can start by opening Device Manager by right-clicking on the Start button and selecting it from the context menu. Look for any devices with a yellow exclamation mark, as these indicate driver issues. Right-click on the device and select Update driver to automatically search for updated drivers online. If that doesn’t work, you can also try uninstalling the device and then scanning for hardware changes to reinstall the drivers.
For USB controllers, you can try updating the drivers in a similar manner through Device Manager. If that doesn’t work, you can also try physically disconnecting and reconnecting the USB device to prompt Windows to reinstall the drivers. Additionally, you can try using a different USB port or restarting your computer to see if that resolves the issue.
If you’re still experiencing problems after updating or reinstalling drivers, you may want to consider using a third-party driver update tool or reaching out to the manufacturer for support. It’s also a good idea to make sure that your Windows 10 is up to date, as Microsoft often releases driver updates through Windows Update.
In some cases, you may need to troubleshoot further by checking for hardware issues, such as a faulty USB port or device. You can also try using a different USB cable or device to see if that resolves the problem. If you suspect a hardware issue, you may want to consider seeking professional assistance or replacing the hardware altogether.
Disabling USB Selective Suspend Settings
To disable USB Selective Suspend Settings on your PC, first open the Control Panel on your Windows 10 computer. Then, navigate to the “Power Options” menu. Here, select “Change plan settings” for your current power plan.
Next, choose “Change advanced power settings” and locate the “USB settings” option. Expand this menu and find the “USB selective suspend setting.”
Disable this setting by selecting “Disabled” from the drop-down menu.
After making this change, click “Apply” and then “OK” to save your new power settings. This will prevent Windows from selectively suspending USB devices, which can sometimes cause connectivity issues with certain hardware.
Once this setting is disabled, your USB devices should remain active and connected at all times, without the risk of being suspended by the system. This can be particularly useful for preventing interruptions in communication with USB hardware, such as external drives or peripherals.
Running Anti-virus and Windows Diagnostic Tools
To ensure the optimal performance and security of your PC, it is essential to regularly run anti-virus scans and Windows diagnostic tools. Run a full system scan with your preferred anti-virus software to check for any malware, viruses, or other security threats. This will help to keep your system protected and running smoothly.
In addition to anti-virus scans, use Windows Diagnostic Tools to identify and fix any potential issues with your system. These tools can help to troubleshoot and resolve common problems related to hardware, software, and overall system performance.
When running anti-virus scans and Windows diagnostic tools, it is important to ensure that your software and tools are regularly updated to the latest versions. Regular updates are crucial for maintaining the effectiveness of these tools and for staying protected against the latest security threats.
After running these scans and diagnostic tools, be sure to review the results and take any necessary actions to address any issues that are identified. Addressing these issues promptly can help to prevent larger problems from arising in the future.
By regularly running anti-virus scans and Windows diagnostic tools, you can help to maintain the health and security of your PC, ensuring that it continues to run smoothly and efficiently.
Data Recovery and Protection Measures
| Data Recovery and Protection Measures |
|---|
| Regularly back up important files to an external hard drive or cloud storage. |
| Use a reliable antivirus and antimalware software to protect against data loss due to viruses and malware. |
| Encrypt sensitive data to prevent unauthorized access in case of theft or security breaches. |
| Implement a disaster recovery plan to minimize downtime and data loss in case of natural disasters or system failures. |
| Utilize data recovery software to retrieve lost or deleted files from storage devices. |
| Regularly update and maintain hardware and software to prevent data loss due to system crashes or errors. |


