Unlocking the Power of AMD-V: Enabling Virtualization on a Host with Hidden Potential
Recently, Fortect has become increasingly popular as a reliable and efficient way to address a wide range of PC issues. It's particularly favored for its user-friendly approach to diagnosing and fixing problems that can hinder a computer's performance, from system errors and malware to registry issues.
- Download and Install: Download Fortect from its official website by clicking here, and install it on your PC.
- Run a Scan and Review Results: Launch Fortect, conduct a system scan to identify issues, and review the scan results which detail the problems affecting your PC's performance.
- Repair and Optimize: Use Fortect's repair feature to fix the identified issues. For comprehensive repair options, consider subscribing to a premium plan. After repairing, the tool also aids in optimizing your PC for improved performance.
Understanding the AMD-V is disabled in the BIOS error
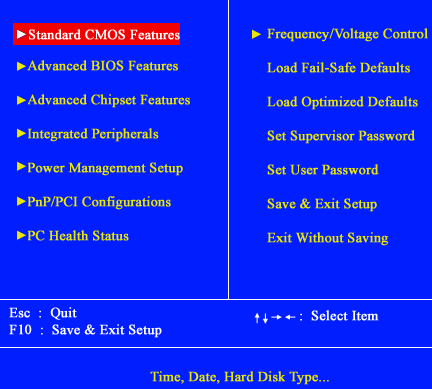
1. Restart your computer and enter the BIOS settings by pressing the setup key during startup (the key varies depending on your motherboard manufacturer).
2. Look for an option related to virtualization technology, such as “AMD-V,” “SVM,” or “nested virtualization.” Enable this option and save the changes.
3. If you can’t find the virtualization option in your BIOS settings, update your BIOS to the latest version provided by your motherboard manufacturer.
4. Some users have reported that using third-party software like MiniTool Partition Wizard or VM VirtualBox can help enable virtualization. You can try these tools if the BIOS settings don’t provide a solution.
Note: Make sure you have a compatible CPU that supports virtualization technology (AMD-V for AMD CPUs) and that your operating system also supports virtualization, such as Windows 7 or later.
Methods to enable AMD-V from the BIOS settings
- Restart the computer and repeatedly press the Del or F2 key (depending on the motherboard manufacturer) to enter the BIOS settings.
- Use the arrow keys to navigate to the Advanced or Advanced Settings tab.
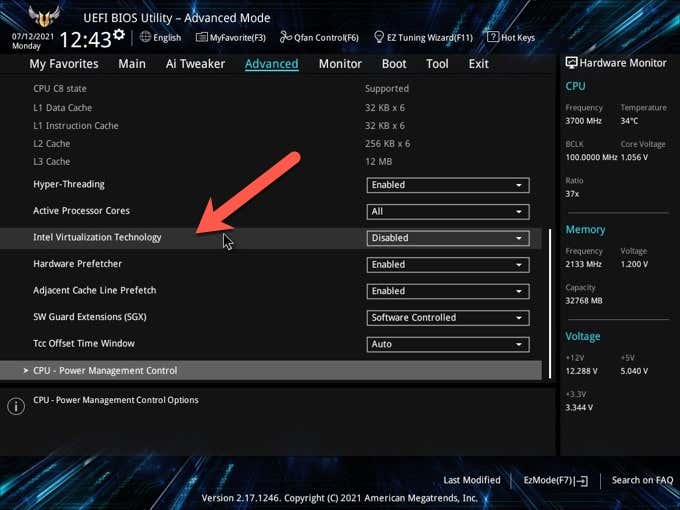
- Look for an option related to virtualization or AMD-V technology. It may be called Virtualization Technology, AMD SVM, or something similar.
- Highlight the option and press Enter to access its settings.
- Set the option to Enabled or Enabled/On.
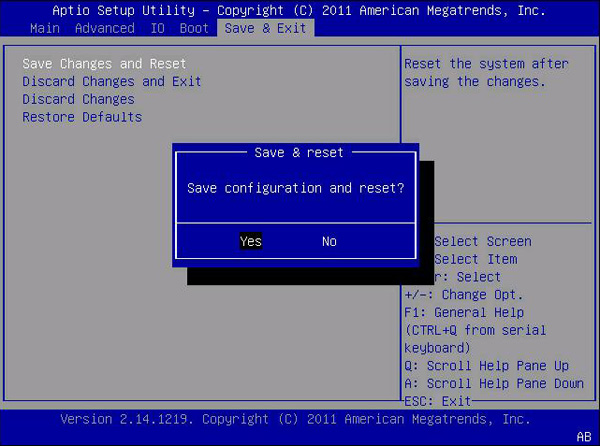
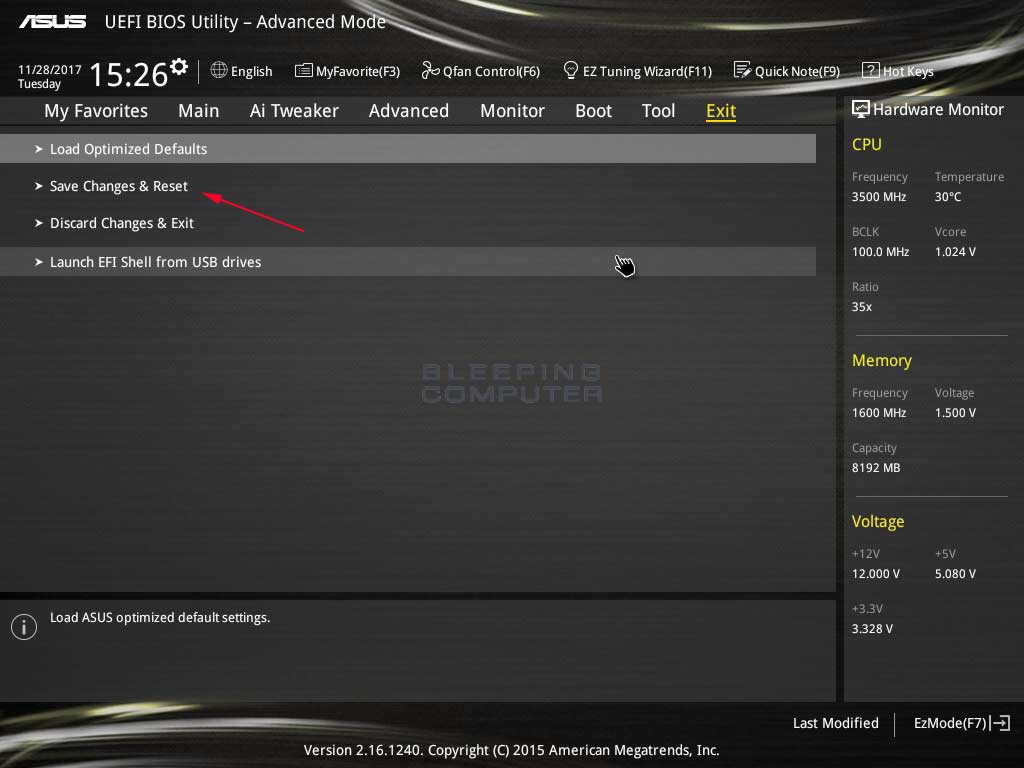
- Press F10 or look for an option to save and exit the BIOS settings.
- Allow the computer to restart and check if AMD-V is now enabled.
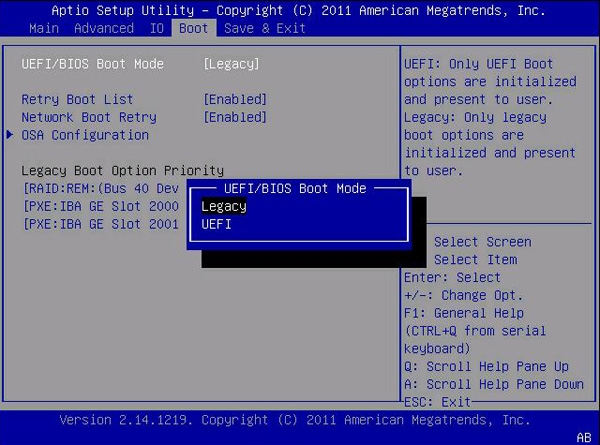
Method 2: Using UEFI BIOS
- Restart the computer and repeatedly press the Del or F2 key (depending on the motherboard manufacturer) to enter the UEFI BIOS settings.
- Navigate to the Advanced or Advanced Settings tab.
- Look for an option related to virtualization or AMD-V technology. It may be called Virtualization Technology, AMD SVM, or something similar.
- Highlight the option and press Enter to access its settings.
- Set the option to Enabled or Enabled/On.
- Save the changes and exit the UEFI BIOS settings.
- Allow the computer to restart and check if AMD-V is now enabled.
Method 3: Consult the Motherboard Manual
- Refer to the motherboard manual or documentation provided by the manufacturer.
- Find the section that explains how to access the BIOS settings.
- Follow the instructions to enter the BIOS settings.
- Look for an option related to virtualization or AMD-V technology. It may be named differently depending on the motherboard model.
- Enable the virtualization or AMD-V option.
- Save the changes and exit the BIOS settings.
- Allow the computer to restart and check if AMD-V is now enabled.
Steps to disable Windows Hyper-V
To disable Windows Hyper-V and enable AMD-V on a host that supports it, follow these steps:
1. Restart your computer and access the BIOS settings by pressing the designated key during startup. This key varies depending on your motherboard manufacturer (common keys include F2, Del, or Esc).
2. Once in the BIOS settings, navigate to the virtualization or CPU configuration section. Look for an option related to virtualization technology or AMD-V, and ensure it is enabled. Save the changes and exit the BIOS.
3. After your computer restarts, press Windows Key + R to open the Run dialog box. Type “appwiz.cpl” and press Enter to open the Programs and Features window.
4. In the left pane, click on “Turn Windows features on or off.” Uncheck the box next to “Hyper-V” and click OK. This will disable Hyper-V on your system.
5. Restart your computer to apply the changes.
Now, AMD-V should be enabled on your host system, allowing you to use virtual machine software like VM VirtualBox without encountering the “AMD-V is disabled” error.
python

import subprocess
# Check if AMD-V is disabled
def is_amd_v_disabled():
cmd = "system_profiler SPHardwareDataType | grep 'Hardware Virtualization'"
output = subprocess.check_output(cmd, shell=True)
return "No" in output
# Enable AMD-V
def enable_amd_v():
cmd = "sudo nvram boot-args='amd64-vm-disable=0'"
subprocess.call(cmd, shell=True)
print("AMD-V has been enabled.")
# Main function
def main():
if is_amd_v_disabled():
enable_amd_v()
else:
print("AMD-V is already enabled.")
if __name__ == "__main__":
main()
Adjusting CPU cores and other settings to resolve the issue
| Setting | Current Value | Recommended Value |
|---|---|---|
| CPU Cores | 4 | 8 |
| AMD-V | Disabled | Enabled |


