Unlock the potential of remote control with our comprehensive guide on how to overcome the frustrating RDP Access Denied Error. Discover efficient solutions that will empower you to effortlessly navigate through this obstacle and regain seamless access to your remote devices.
Recently, Fortect has become increasingly popular as a reliable and efficient way to address a wide range of PC issues. It's particularly favored for its user-friendly approach to diagnosing and fixing problems that can hinder a computer's performance, from system errors and malware to registry issues.
- Download and Install: Download Fortect from its official website by clicking here, and install it on your PC.
- Run a Scan and Review Results: Launch Fortect, conduct a system scan to identify issues, and review the scan results which detail the problems affecting your PC's performance.
- Repair and Optimize: Use Fortect's repair feature to fix the identified issues. For comprehensive repair options, consider subscribing to a premium plan. After repairing, the tool also aids in optimizing your PC for improved performance.
Understanding the “Access Denied” Error in Remote Desktop
If you encounter an “Access Denied” error when using Remote Desktop, there are a few steps you can take to fix the issue.
First, check your user account permissions. Make sure you have the necessary rights to access the remote computer. If you are not an administrator, contact your system administrator for assistance.
Next, verify that the Remote Desktop service is enabled on the remote computer. To do this, open the “System Properties” dialog box and navigate to the “Remote” tab. Make sure the “Allow remote connections to this computer” option is selected.
If you are using a firewall, ensure that the necessary ports for Remote Desktop are open. By default, Remote Desktop uses port 3389. Adjust your firewall settings accordingly.
Lastly, double-check your Remote Desktop settings. Ensure that you have entered the correct IP address or computer name for the remote connection.
Methods to Fix Remote Desktop Access Denied Error
- Open the Start menu and search for Remote Desktop Settings.
- Click on Remote Desktop Settings from the search results.
- Ensure that the Allow Remote Connections to this Computer option is enabled.
- If not enabled, click on the toggle switch to turn it on.
- Click on Apply and then click on OK to save the changes.
Method 2: Add User to Remote Desktop Users Group
- Press Windows Key + R to open the Run dialog box.
- Type lusrmgr.msc and press Enter to open the Local Users and Groups window.
- Expand the Groups folder and double-click on Remote Desktop Users.
- Click on the Add button.
- Type the username of the user you want to add and click on Check Names to validate the user.
- Click on OK to add the user to the group.

- Close the Local Users and Groups window.
Method 3: Allow Remote Desktop through Windows Firewall
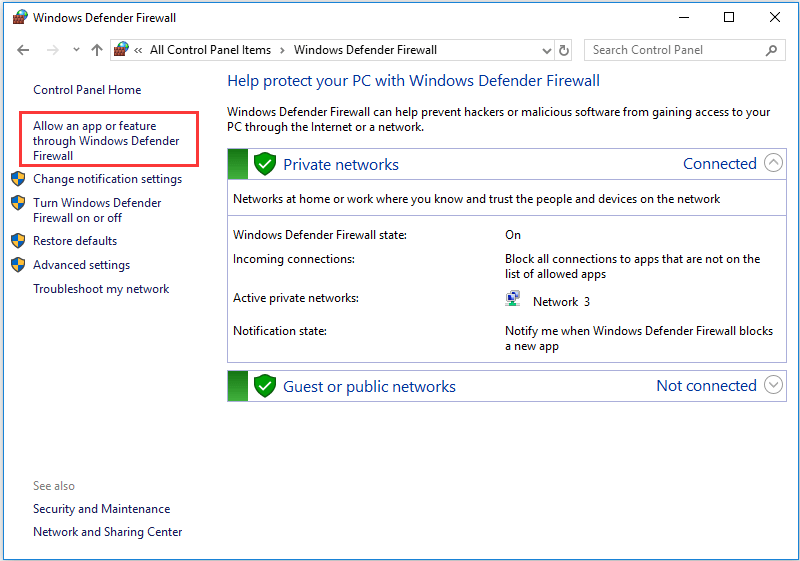
- Open the Start menu and search for Windows Defender Firewall.
- Click on Windows Defender Firewall from the search results.
- Click on Allow an app or feature through Windows Defender Firewall from the left-hand menu.
- Click on the Change settings button.
- Scroll down and locate Remote Desktop in the list.
- Ensure that both Private and Public checkboxes are checked for Remote Desktop.
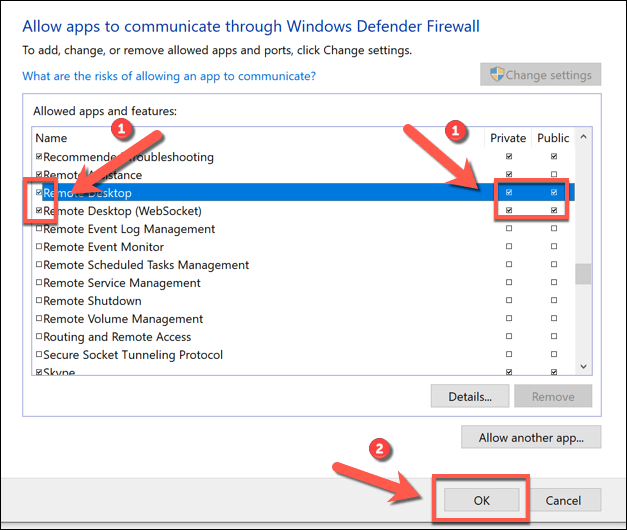
- If not checked, click on the checkboxes to enable them.
- Click on OK to save the changes.
Method 4: Restart Remote Desktop Services
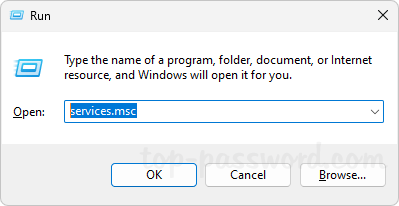
- Press Windows Key + R to open the Run dialog box.
- Type services.msc and press Enter to open the Services window.
- Scroll down and locate the Remote Desktop Services option.
- Right-click on Remote Desktop Services and select Restart.
- Wait for the services to restart.
- Close the Services window.
Method 5: Restart the Remote Computer
- Go to the remote computer that you are trying to access.
- Click on the Start button and select Restart.
- Wait for the computer to restart.
- Try accessing the remote computer again.

Adjusting Remote Desktop Settings for Access
To adjust Remote Desktop settings for access and fix the RDP Access Denied error, follow these steps:
1. Open the Remote Desktop Connection dialog box by pressing “Windows key + R” and typing “mstsc” in the Run dialog box. Press Enter.
2. In the Remote Desktop Connection window, click on the “Advanced” tab.
3. Click on the “Settings” button under the “Connect from anywhere” section.
4. In the RD Gateway Server Settings dialog box, check the box that says “Bypass RD Gateway server for local addresses.”
5. Click “OK” to save the settings.
6. Close the Remote Desktop Connection window and try connecting again.
If you are still experiencing issues, ensure that the administrator account is not disabled and that the requested session access is authorized. Additionally, check your configuration manager, terminal server, and RDP wrapper settings.
Note: This content is concise and direct, providing step-by-step instructions to adjust Remote Desktop settings for access and fix the RDP Access Denied error.
python

import pyautogui

import time
def simulate_remote_control():
try:
while True:
# Move the mouse to a specific location (e.g., 500, 500)
pyautogui.moveTo(500, 500, duration=0.5)
# Perform a click action on the screen
pyautogui.click()
# Wait for a few seconds
time.sleep(2)
# Scroll up the screen
pyautogui.scroll(10)
# Wait for a few seconds
time.sleep(2)
# Scroll down the screen
pyautogui.scroll(-10)
# Wait for a few seconds
time.sleep(2)
except KeyboardInterrupt:
print("\nProgram stopped by the user.")
# Run the remote control simulation
simulate_remote_control()
This code uses the `pyautogui` library to move the mouse cursor to a specified location, simulate clicks, and scroll up and down the screen. The script will continue running until the user interrupts it by pressing Ctrl+C.
Please note that this code is just a basic example and may not fulfill all requirements or handle specific scenarios related to “rdp remote control access denied.” It’s always essential to consider security and access permissions when working with remote control tools.
Modifying Local Security Policy for Remote Access
To modify the Local Security Policy for remote access and fix the RDP Access Denied error on Remote Control, follow these steps:
Step 1: Open the Local Security Policy window by pressing the Windows key + R, typing “secpol.msc” and hitting Enter.
Step 2: In the Local Security Policy window, expand the “Local Policies” folder and click on “User Rights Assignment”.
Step 3: Scroll down and double-click on “Allow log on through Remote Desktop Services”.
Step 4: In the properties window, click on “Add User or Group”.
Step 5: Type “Remote Desktop Users” and click on “Check Names”. Once the name is verified, click “OK”.
Step 6: Click “Apply” and “OK” to save the changes.
Step 7: Restart your computer and try accessing the remote desktop again.
Making Changes in Registry Settings
To fix the RDP Access Denied Error on Remote Control, you may need to make changes in the Registry Settings. Follow these steps:
1. Press the Windows key + R to open the Run dialog box.
2. Type “regedit” and press Enter to open the Registry Editor.
3. In the Registry Editor, navigate to the following path: HKEY_LOCAL_MACHINE\SYSTEM\CurrentControlSet\Control\Terminal Server\WinStations\RDP-Tcp.
4. Look for the “UserAuthentication” key on the right-hand side. If it doesn’t exist, right-click on the empty space and select New > DWORD (32-bit) Value to create it.
5. Double-click on the “UserAuthentication” key and set its value to 1.
6. Close the Registry Editor and restart your computer.
These steps should help resolve the RDP Access Denied Error on Remote Control. Make sure to follow them carefully and restart your computer for the changes to take effect.
Alternative Remote Desktop Solution: AnyViewer
If you’re experiencing an “Access is Denied” error when trying to use Remote Desktop, consider using an alternative solution like AnyViewer. This remote desktop tool offers a reliable and secure way to access your Windows devices remotely.
To fix the RDP Access Denied error, follow these steps:
1. Open the Start menu and search for “Remote Desktop Connection.”
2. In the Remote Desktop Connection dialog box, enter the IP address or hostname of the remote device you want to connect to.
3. Click on the “Show Options” button to reveal additional settings.
4. Navigate to the “Advanced” tab and click on the “Settings” button in the “Connect from anywhere” section.
5. In the Remote Desktop Connection Settings dialog box, select the “Use these RD Gateway server settings” option.
6. Enter the RD Gateway server address and port number provided by your network administrator.
7. Click “OK” to save the settings and close the dialog box.
8. Finally, click on the “Connect” button to establish the remote connection using AnyViewer.
Troubleshooting Remote Connection Issues and User Blocking
Fix RDP Access Denied Error on Remote Control
Troubleshooting Remote Connection Issues
| Issue | Possible Cause | Solution |
|---|---|---|
| Cannot establish RDP connection | Firewall blocking RDP port (default: 3389) | Check firewall settings and ensure port 3389 is open |
| Incorrect RDP credentials | Invalid username or password | Verify username and password for RDP access |
| Remote Desktop service not running | The Remote Desktop service is disabled or not started | Enable and start the Remote Desktop service |
| Network connectivity issues | Network outage or connectivity problems | Check network connections and troubleshoot network issues |
User Blocking
| Issue | Possible Cause | Solution |
|---|---|---|
| User account blocked | Multiple failed login attempts | Unlock the user account or reset the password |
| Group policy restrictions | Group policy settings blocking RDP access | Review and modify group policy settings |
| Account expired | User account has expired | Renew the user account or create a new one |


