Reviving Your Digital Aesthetics: A Guide to Retrieving Missing Icons and Revamping Your Start Menu
Recently, Fortect has become increasingly popular as a reliable and efficient way to address a wide range of PC issues. It's particularly favored for its user-friendly approach to diagnosing and fixing problems that can hinder a computer's performance, from system errors and malware to registry issues.
- Download and Install: Download Fortect from its official website by clicking here, and install it on your PC.
- Run a Scan and Review Results: Launch Fortect, conduct a system scan to identify issues, and review the scan results which detail the problems affecting your PC's performance.
- Repair and Optimize: Use Fortect's repair feature to fix the identified issues. For comprehensive repair options, consider subscribing to a premium plan. After repairing, the tool also aids in optimizing your PC for improved performance.
Restart the StartMenuExperienceHost.exe process
If you’re experiencing missing icons or a blank Start Menu on your Windows 10 or Windows 11 PC, restarting the StartMenuExperienceHost.exe process can often resolve the issue. Follow these simple steps to get your icons and Start Menu back:
1. Press Ctrl + Shift + Esc to open the Task Manager.
2. Locate the StartMenuExperienceHost.exe process in the “Processes” tab.
3. Right-click on it and select End Task.
4. Close the Task Manager.
After restarting the process, your missing icons and Start Menu should reappear. If the issue persists, you can also try rebuilding the icon cache by following these steps:
1. Press Win + R to open the Run dialog.
2. Type %APPDATA% and press Enter.
3. Open the Microsoft folder and then the Windows folder.
4. Delete the IconCache.db file.
5. Restart your PC.
This should refresh the icon cache and fix any issues with missing icons or a blank Start Menu.
Restart the Windows Explorer
To fix missing icons and start menu issues in Windows, you can try restarting the Windows Explorer. Here’s how:
1. Press Ctrl + Shift + Esc to open the Task Manager.
2. In the Task Manager, go to the “Processes” tab.
3. Scroll down and find “Windows Explorer” in the list.
4. Right-click on “Windows Explorer” and select “End Task”.
5. After the task is ended, click on “File” in the top-left corner of the Task Manager window.
6. Select “Run new task”.
7. In the “Create new task” window, type explorer.exe and click “OK”.
This will restart the Windows Explorer process, which should resolve any issues with missing icons and start menu. If the problem persists, you may need to try other troubleshooting steps or seek further assistance from Microsoft support.
Run a System File Scan
To fix missing icons and start menu issues on Windows 10 and Windows 11, you can run a System File Scan. This process will scan and repair any corrupted system files that may be causing the problem.
Here’s how to run a System File Scan:
1. Press the Windows key + X and select “Command Prompt (Admin)” or “Windows PowerShell (Admin)” from the menu.
2. In the command prompt window, type sfc /scannow and press Enter.
3. Wait for the scan to complete. It may take some time, so be patient.
4. Once the scan is finished, check if the missing icons and start menu issues have been resolved.
If the System File Scan doesn’t fix the problem, you can try other solutions such as resetting the Windows icon cache or performing a clean boot. These steps can help resolve the issue and restore the missing icons and start menu functionality.
Remember to restart your computer after applying any fixes to see if the changes take effect.
python

import tkinter as tk

from tkinter import messagebox
def create_window():
window = tk.Tk()
window.title("Custom Tool")
window.geometry("300x200") # Set window size
# Define button click actions
def show_message():
messagebox.showinfo("Message", "Hello, world!")
def exit_program():
window.destroy()
# Create buttons
message_button = tk.Button(window, text="Show Message", command=show_message)
message_button.pack(pady=10)
exit_button = tk.Button(window, text="Exit", command=exit_program)
exit_button.pack()
window.mainloop()
# Call the create_window function to launch the GUI
create_window()
This code creates a simple window with two buttons. Clicking the “Show Message” button displays a message box with the text “Hello, world!” while the “Exit” button closes the application. You can customize this code to add more functionality or create your own tool with a graphical interface.
Rebuild the icon cache
To fix the issue of missing icons on the Start Menu, you can try rebuilding the icon cache. This can be done by following these steps:
1. Press the Windows key + R to open the Run dialog box.
2. Type “%APPDATA%\Microsoft\Windows\” and press Enter.
3. In the folder that opens, locate and delete the file “IconCache.db“.
4. Open the Command Prompt as an administrator by right-clicking the Start button and selecting “Command Prompt (Admin)”.
5. In the Command Prompt window, type “cd /d %userprofile%\AppData\Local” and press Enter.
6. Type “del IconCache*” and press Enter.
7. Type “shutdown /r /f /t 00” and press Enter to restart your computer.
After restarting, Windows will rebuild the icon cache, which should resolve the issue of missing icons on the Start Menu.
Reregister the Start menu on Windows
To reregister the Start menu on Windows and fix missing icons or a non-functioning Start menu, follow these steps:
1. Press the Windows key + R to open the Run dialog box.
2. Type “PowerShell” and press Enter to open PowerShell.
3. In the PowerShell window, copy and paste the following command:
“`%%
Get-AppXPackage -AllUsers | Foreach {Add-AppxPackage -DisableDevelopmentMode -Register “$($_.InstallLocation)\AppXManifest.xml”}
“`
4. Press Enter to execute the command. This command will re-register all the default apps and restore the missing icons on your Start menu.
5. Once the command completes successfully, close PowerShell and restart your computer.
6. After rebooting, check if the Start menu icons have reappeared. If not, try the following additional steps:
– Right-click on the taskbar, go to “Taskbar settings,” and click on “Turn system icons on or off.”
– Make sure the “Windows Explorer” option is turned on. If it’s already on, turn it off and then back on again.
– If the icons are still missing or not functioning correctly, you may need to perform a system file check. Open a PowerShell window as administrator and run the following command:
“`%%
DISM /Online /Cleanup-Image /RestoreHealth
“`
After the command completes, restart your computer again.
These steps should help you fix missing icons or a non-functioning Start menu on Windows.
Update the graphics driver
To fix missing icons and start menu issues on your Windows device, updating the graphics driver can often be a solution. Follow these steps to update the graphics driver:
1. Press the Windows key + X and select “Device Manager” from the menu.
2. In the Device Manager window, expand the “Display adapters” category.
3. Right-click on your graphics driver and select “Update driver.”
4. Choose the option to automatically search for updated driver software.
5. If an update is found, follow the on-screen instructions to install it.
6. Restart your computer for the changes to take effect.
Updating the graphics driver can help resolve issues with missing icons, start menu glitches, and other graphical problems. If the issue persists, you may need to explore other troubleshooting steps or seek further assistance.
Remove Google Drive from your PC
To remove Google Drive from your PC and fix missing icons and start menu issues, follow these steps:
1. Open the Start menu and search for “Control Panel.”
2. Click on “Control Panel” in the search results to open it.
3. In the Control Panel, search for “Programs” and click on “Uninstall a program.”
4. Look for Google Drive in the list of installed programs and select it.
5. Click on the “Uninstall” button at the top of the list.
6. Follow the on-screen prompts to complete the uninstallation process.
7. Once Google Drive is removed, you may need to refresh your menu icons and start menu.
8. Press the Windows key + R to open the Run dialog box.
9. Type “%APPDATA%\Microsoft\Windows\Start Menu\Programs” and press Enter.
10. In the new window that opens, delete any shortcuts or link files related to Google Drive.
11. Restart your computer to apply the changes.
Enable folders in the Start menu
To enable folders in the Start menu and fix missing icons, follow these steps:
1. Right-click on the Start menu button and select “Settings.”
2. In the Settings window, click on “Personalization.”
3. From the left sidebar, choose “Start.”
4. Scroll down to the “More Start menu settings” section and click on “Choose which folders appear on Start.”
5. Toggle on the folders you want to appear in the Start menu. You can also rearrange them by dragging and dropping.
6. Click on the back arrow to go back to the “Start” section.
7. Scroll down and click on “Restart” under the “Customize list” section to apply the changes.
This will enable folders in the Start menu and restore any missing icons. If the issue persists, you can try resetting the Start menu using the PowerShell command “Get-AppXPackage -AllUsers | Foreach {Add-AppxPackage -DisableDevelopmentMode -Register “$($_.InstallLocation)\AppXManifest.xml”}.”
Remember to restart your computer after performing these steps for the changes to take effect.
Reset your Windows computer
To reset your Windows computer and fix missing icons and start menu issues, follow these simple steps:
1. Press the Windows key and the “I” key together to open the Settings app.
2. Click on “Update & Security” and then select “Recovery” from the left-hand menu.
3. Under the “Reset this PC” section, click on the “Get started” button.
4. You’ll be presented with two options: “Keep my files” or “Remove everything.” Choose the option that suits your needs.
5. Follow the on-screen instructions to complete the reset process. Your computer will restart and the missing icons and start menu should be resolved.
If the issue persists, you can try running the System File Checker tool to fix any corrupted system files. Here’s how:
1. Press the Windows key and the “X” key together, then select “Command Prompt (Admin)” from the menu.
2. In the Command Prompt window, type sfc /scannow and press Enter.
3. Wait for the scan to complete and follow any prompts if errors are found.
By resetting your Windows computer and running the System File Checker tool, you should be able to resolve missing icons and start menu issues.
Ensure The Desktop Icons Aren’t Disabled
To ensure that the desktop icons are not disabled and fix missing icons in the start menu, follow these steps:
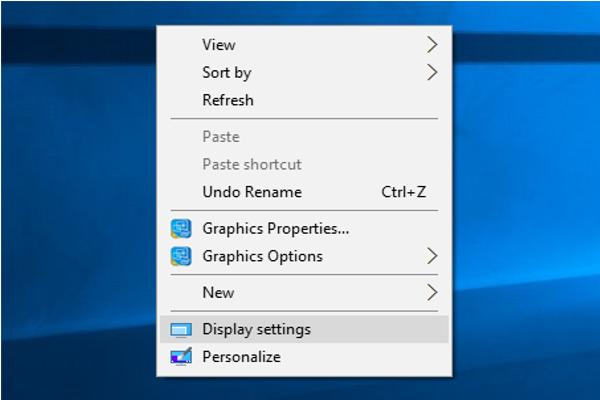
1. Right-click on the desktop and select “Personalize” from the context menu.
2. In the Personalization settings, click on “Themes” in the left sidebar.
3. Scroll down to the “Related Settings” section and click on “Desktop icon settings.”
4. In the Desktop Icon Settings window, make sure the checkboxes for the desired icons (e.g., Computer, Recycle Bin) are checked. If any of them are unchecked, tick the box next to them and click “Apply” to enable the icons.
If the icons are still missing, try resetting the icon cache by following these steps:
1. Press the Windows key + R to open the Run dialog box.
2. Type “cmd” and press Enter to open the Command Prompt.
3. In the Command Prompt window, type “cd /d %userprofile%\AppData\Local” and press Enter.
4. Then, type “del IconCache.db /a” and press Enter.
5. After executing the command, type “exit” and press Enter to close the Command Prompt.
This should fix the issue with missing icons on the desktop and in the start menu.
Re-Configure Your Desktop Icons’ Settings
- Reset Icon Cache
- Open Task Manager by pressing Ctrl+Shift+Esc
- In the Processes tab, locate and select Windows Explorer
- Click on the Restart button in the bottom-right corner of the Task Manager window

- Check Icon Display Settings
- Right-click on an empty area of the desktop and select Display settings
- In the Display settings window, scroll down and click on Advanced display settings
- Under the “Related settings” section, click on Desktop icon settings
- In the Desktop Icon Settings window, make sure the desired icons are selected
- Click on the Apply button, then click on OK
- Enable System Icons
- Right-click on the taskbar and select Taskbar settings
- In the Taskbar settings window, scroll down to the “Notification area” section and click on Select which icons appear on the taskbar
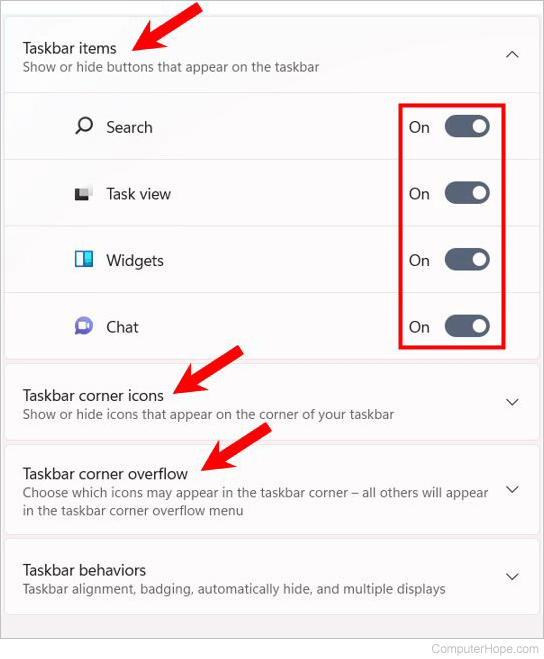
- Toggle the switch next to Always show all icons in the notification area to the On position
- Scroll down and click on Turn system icons on or off
- Toggle the switch next to the desired system icons to the On position
- Click on the OK button to save the changes

- Rebuild Icon Cache
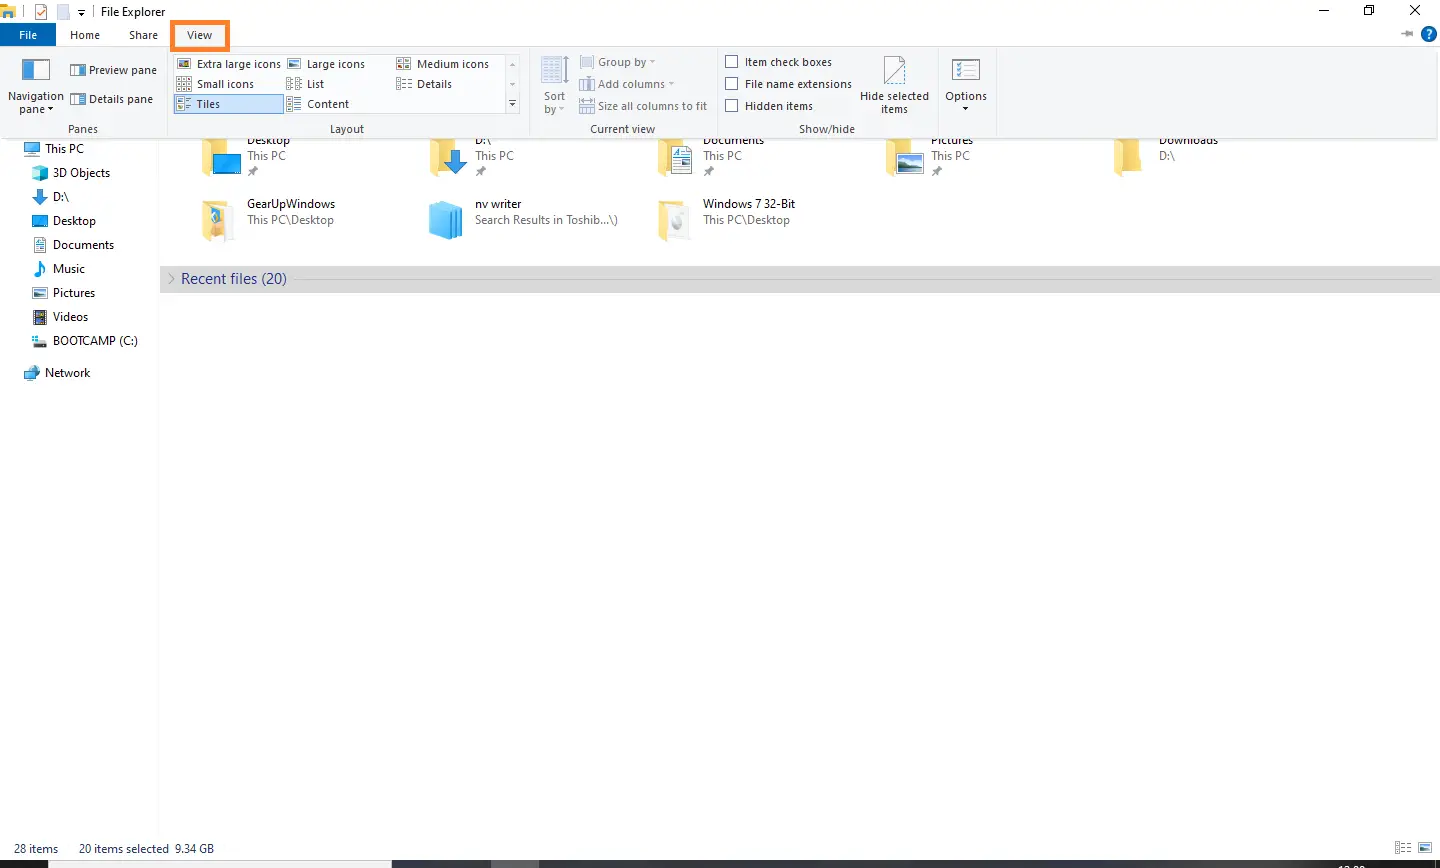
- Open File Explorer by pressing Windows key + E
- In the File Explorer window, navigate to the following folder: %userprofile%\AppData\Local
- Find and delete the file named IconCache.db
- Open Task Manager by pressing Ctrl+Shift+Esc
- In the Processes tab, locate and select Windows Explorer
- Click on the Restart button in the bottom-right corner of the Task Manager window


