Is your GPU constantly crashing? Find out how to fix this frustrating issue in no time.
Recently, Fortect has become increasingly popular as a reliable and efficient way to address a wide range of PC issues. It's particularly favored for its user-friendly approach to diagnosing and fixing problems that can hinder a computer's performance, from system errors and malware to registry issues.
- Download and Install: Download Fortect from its official website by clicking here, and install it on your PC.
- Run a Scan and Review Results: Launch Fortect, conduct a system scan to identify issues, and review the scan results which detail the problems affecting your PC's performance.
- Repair and Optimize: Use Fortect's repair feature to fix the identified issues. For comprehensive repair options, consider subscribing to a premium plan. After repairing, the tool also aids in optimizing your PC for improved performance.
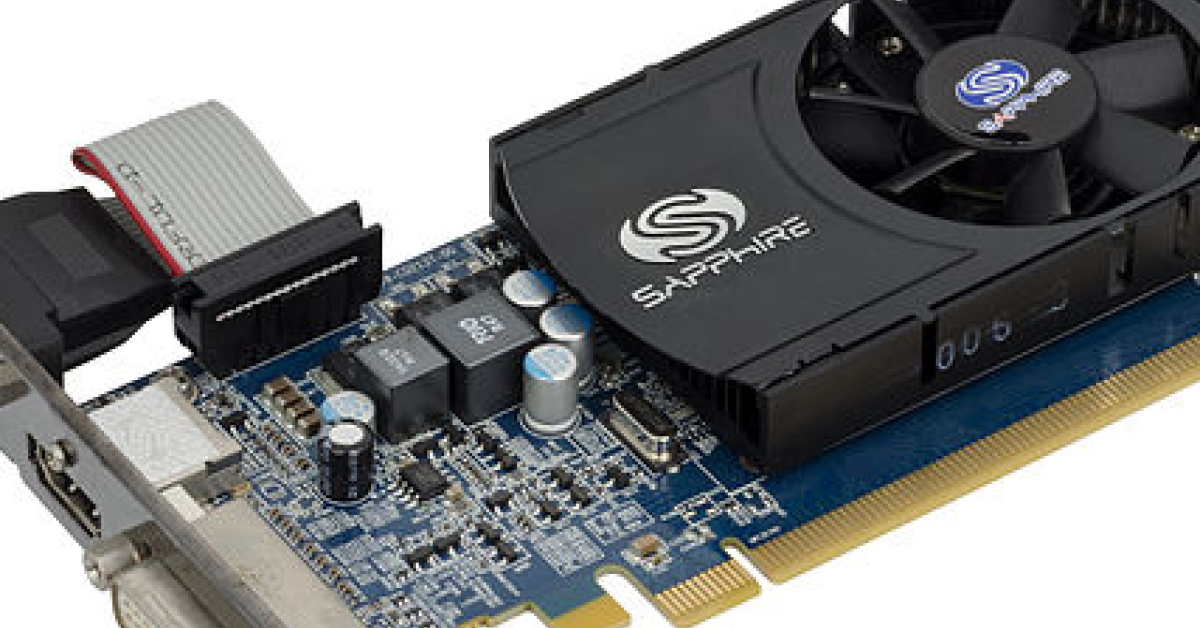
Understanding GPU Crashes
GPU crashes can be frustrating, but understanding the possible causes can help you fix the issue. Here are some common reasons for GPU crashes and how to address them:
1. Overheating: Excessive heat can cause GPU crashes. Ensure that your graphics card is getting proper airflow by cleaning any dust buildup and checking the fans. Consider using water cooling or improving the airflow in your computer case.
2. Power supply issues: Insufficient power supply can also lead to GPU crashes. Check if your power supply unit (PSU) is supplying enough voltage to your graphics card. Upgrade your PSU if necessary.
3. Outdated or faulty drivers: Device drivers play a crucial role in GPU performance. Update your graphics card drivers to the latest version compatible with your operating system, such as Nvidia GeForce or AMD Radeon drivers. If updating doesn’t help, try rolling back to a previous stable version.
4. Conflicts with software: Certain applications or software can conflict with your GPU, causing crashes. Disable or uninstall any recently installed software that may be causing the issue. You can also try running applications in compatibility mode or updating them to the latest version.
5. Hardware issues: Faulty hardware components, such as the graphics card itself or the motherboard BIOS settings, can lead to crashes. Check for any loose connections and update your BIOS if available. If the issue persists, consider testing your GPU on another system or seeking professional help.
6. Overclocking or underclocking: If you have overclocked your GPU or underclocked it for power-saving purposes, it may cause instability and crashes. Reset the clock settings to default and see if the crashes stop.
7. Windows updates: Sometimes, Windows updates can interfere with GPU drivers. Check for Windows updates and install any available updates to ensure compatibility with your GPU.
Troubleshooting GPU Crashes
If your GPU keeps crashing, there are several troubleshooting steps you can take to resolve the issue. First, check the temperature of your GPU using a monitoring tool such as MSI Afterburner. High temperatures can cause crashes, so make sure your GPU is not overheating.
Next, check for any dust or debris buildup on your GPU fans and heatsinks. Use compressed air to clean them if necessary. Additionally, ensure that your power supply unit (PSU) is providing enough power to your GPU. If it is underpowered, consider upgrading to a higher wattage PSU.
If you have recently installed new drivers or updates, they may be causing compatibility issues. Try rolling back your drivers to a previous version or updating to the latest drivers from the manufacturer’s website, such as Nvidia’s GeForce Experience for Nvidia GPUs.
Sometimes, overclocking your GPU can lead to crashes. If you have overclocked your GPU, try underclocking it slightly to see if that resolves the issue.
If you are experiencing crashes while playing specific games or using certain applications, try running them in compatibility mode or as an administrator. This can help in cases where the software is not fully optimized for your GPU or operating system.
Finally, if none of these steps resolve the issue, you may need to consider reinstalling your operating system. This should be a last resort option and should only be done if you have exhausted all other troubleshooting methods.
Checking for Power Supply Issues
If you are experiencing frequent crashes on your GPU, one of the potential causes could be power supply issues. Checking your power supply can help identify and resolve the problem. Here are some steps to follow:
1. Start by ensuring that your power supply unit (PSU) is connected properly to your computer. Check all the cables and connections to make sure they are secure.
2. Use the DirectX Diagnostic Tool to gather information about your GPU and its performance. To access this tool, press the Windows key + R, type “dxdiag” and hit Enter. Look for any error messages or warnings related to your GPU.
3. Check if your power supply is providing enough power to your GPU. To do this, you can use a multimeter to measure the voltage output from the PSU. If the voltage is significantly lower than the required specifications, you may need to replace your power supply.
4. Monitor the temperature of your GPU while it is under load. Excessive heat can cause crashes. Ensure that your GPU’s cooling system, whether it’s air or water cooling, is functioning properly. Clean any dust or debris that may be blocking the cooling vents.
5. Check for any software conflicts that may be causing the crashes. Update your graphics card drivers and make sure your operating system, such as Windows 10, is up to date with the latest patches and updates. Sometimes, outdated drivers or software can result in instability.
6. If you have recently made changes to your GPU settings, such as overclocking, revert them back to their default values. Overclocking can put additional strain on your GPU and lead to crashes.
7. If you have a separate power button on your GPU, give it a quick press to make sure it is not stuck or malfunctioning. A faulty power button can cause intermittent crashes.
8. If none of the above steps resolve the issue, consider contacting the manufacturer or bringing your computer to a professional for further diagnosis. They may be able to identify any hardware problems that are causing the crashes.
Addressing Overclocking and Overheating
When your GPU keeps crashing, it could be due to overclocking or overheating issues. To address these problems, follow these steps:
1. Check your GPU’s temperature using the DirectX Diagnostic Tool or third-party software. If it’s consistently running hot (above 80°C), it may be overheating. Clean the GPU and fans to remove any dust or debris that could be obstructing airflow.
2. If you’ve overclocked your GPU, revert it to its default settings. Overclocking can put a strain on the GPU and cause instability. Use the software you used for overclocking to reset the clock speeds and voltages.
3. Ensure your power supply unit (PSU) is providing enough power for your GPU. Insufficient power can lead to crashes. Check the recommended power requirements for your GPU model and consider upgrading your PSU if necessary.
4. Update your graphics drivers to the latest version. Outdated drivers can cause compatibility issues and crashes. Visit the manufacturer’s website or use a driver update software to download and install the latest drivers for your GPU.
5. Check for Windows updates as well. Sometimes, system updates can include fixes for GPU-related issues. Open the Windows Update settings and install any available updates.
Updating GPU Drivers and DirectX
Updating your GPU drivers and DirectX can often fix issues with your GPU crashing. Here’s how you can do it:
1. Start by identifying which GPU you have installed in your computer. You can find this information in the Device Manager or by using third-party software.
2. Once you know your GPU model, visit the manufacturer’s website (such as Nvidia or AMD) and navigate to their support or drivers section.
3. Download the latest driver for your GPU model. Make sure to select the correct version for your operating system (e.g., Windows 10).
4. Before installing the new driver, it’s important to uninstall the old one. To do this, open the Control Panel and go to “Programs and Features” (or “Apps & Features” in Windows 10). Find the old GPU driver in the list and uninstall it.
5. After uninstalling the old driver, restart your computer.
6. Now, install the new GPU driver that you downloaded earlier. Follow the installation wizard’s instructions, and make sure to select the appropriate options for your system.
7. Once the installation is complete, restart your computer again to apply the changes.
8. Updating DirectX can also be beneficial for resolving GPU crashes. To check if you have the latest version, press the Windows key + R to open the Run dialog box, then type “dxdiag” and hit Enter.
9. The DirectX Diagnostic Tool will open. Look for the “DirectX Version” field on the System tab. If your version is outdated, visit the Microsoft website and download the latest version of DirectX.
10. Install DirectX by running the downloaded file and following the on-screen instructions.
By updating your GPU drivers and DirectX, you can ensure that your system is running with the latest optimizations and bug fixes. This can often resolve GPU crashes and improve overall performance in 3D graphics, gaming, and video editing scenarios.
Removing Old Drivers and Changing Game Settings
Next, adjust your game settings to optimize performance and stability. Open the game settings and look for options related to graphics, such as resolution, texture quality, and anti-aliasing. Experiment with different settings to find the right balance between visual quality and performance. Lowering the resolution and disabling graphics-intensive features can help reduce the strain on your GPU and prevent crashes.
It’s also important to ensure that your computer is running on the latest updates. Check for Windows updates and install any available updates. These updates often include bug fixes and performance improvements that can help resolve GPU crashes.
If the crashes persist, it may be worth checking your power supply unit (PSU). A faulty or insufficient PSU can cause instability and crashes. Consider upgrading to a higher wattage PSU if necessary.
Considering GPU Replacement and Common Questions
- Check for physical damage or overheating:
- Inspect the GPU for any visible physical damage, such as broken components or burnt marks.
- Clean the GPU and surrounding area to remove any dust or debris that may be causing overheating.
- Ensure that the GPU fan is working properly and not obstructed.
- Verify compatibility and power requirements:
- Check if the new GPU is compatible with your computer’s motherboard and power supply.
- Review the power requirements of the new GPU and ensure that your power supply can handle it.
- If necessary, upgrade your power supply to meet the requirements of the new GPU.
- Backup data and drivers:
- Create a backup of important files and data in case any issues arise during the GPU replacement process.
- Download the latest drivers for the new GPU from the manufacturer’s website.
- Uninstall the old GPU drivers using the appropriate software or through Device Manager.
- Remove old GPU and install new GPU:
- Power off your computer and disconnect it from the power source.
- Open the computer case and locate the current GPU.
- Carefully remove any power cables or connectors attached to the GPU.
- Unscrew or unclip the GPU from the motherboard and gently remove it.
- Insert the new GPU into the appropriate slot on the motherboard.
- Secure the new GPU by screwing it in or using any clips provided.
- Reconnect any power cables or connectors to the new GPU.
- Update drivers and test:
- Power on your computer and wait for it to boot up.
- Install the downloaded drivers for the new GPU.
- Restart your computer to apply the driver changes.
- Test the new GPU by running graphics-intensive applications or benchmarking tools.
- Monitor for any signs of crashing or instability.
- Consider seeking professional help:
- If the issue persists after GPU replacement, it may indicate a deeper hardware or software problem.
- Contact a professional technician or the manufacturer’s support for further assistance.
- Provide detailed information about the issue and the steps you have already taken.


