Unlock the hidden potential of your Windows 7 operating system as we delve into effective troubleshooting techniques and clever tips to accelerate your startup process.
Recently, Fortect has become increasingly popular as a reliable and efficient way to address a wide range of PC issues. It's particularly favored for its user-friendly approach to diagnosing and fixing problems that can hinder a computer's performance, from system errors and malware to registry issues.
- Download and Install: Download Fortect from its official website by clicking here, and install it on your PC.
- Run a Scan and Review Results: Launch Fortect, conduct a system scan to identify issues, and review the scan results which detail the problems affecting your PC's performance.
- Repair and Optimize: Use Fortect's repair feature to fix the identified issues. For comprehensive repair options, consider subscribing to a premium plan. After repairing, the tool also aids in optimizing your PC for improved performance.
Remove peripherals and disable startup programs
To start, disconnect any external devices such as printers, scanners, or USB drives that are connected to your PC. These peripherals can sometimes cause boot issues or slow down the startup process.
Next, disable unnecessary startup programs that are set to auto-start when your computer boots. Press Ctrl + Shift + Esc to open the Task Manager and navigate to the Startup tab. Disable any programs that you don’t need to run at startup.
You can also update your device drivers to fix any driver-related issues. Go to the manufacturer’s website and download the latest drivers for your devices.
Another tip is to scan your system for malware using a reliable antivirus program. Malware can significantly slow down your computer’s startup.
Lastly, consider adding more RAM to your system if you have a low amount. RAM memory affects the speed and functionality of your computer.
By following these instructions, you can improve your Windows 7 startup speed and resolve any boot or performance issues.
Update drivers and scan for malware and viruses
Update Device Drivers and Scan for Malware and Viruses
To troubleshoot and speed up a slow Windows 7 startup, it’s essential to update your device drivers and scan for malware and viruses. Outdated or incompatible drivers can cause boot issues and slow down your system, while malware and viruses can also impact performance and security.
1. Update Device Drivers: Ensure all your device drivers are up to date. Visit the manufacturer’s website or use Windows Update to download and install the latest drivers for your hardware.
2. Scan for Malware and Viruses: Run a thorough scan using reliable antivirus software to detect and remove any malicious programs. This will help improve performance and protect your system from potential threats.
Remember to regularly update your drivers and perform scans to maintain optimal performance and security.
Add more RAM and install an SSD
To troubleshoot and speed up slow Windows 7 startup, consider adding more RAM and installing an SSD. This can significantly improve the performance of your PC.
Adding More RAM: Increasing the amount of RAM memory in your computer can help it run faster and handle multiple tasks more efficiently. Check your PC’s specifications to determine the maximum amount of RAM it supports. Purchase the appropriate RAM modules and install them following the manufacturer’s instructions.
Installing an SSD: Upgrading your hard drive to a solid-state drive (SSD) can drastically reduce startup times. SSDs are faster and more reliable than traditional hard drives. Clone your existing hard drive to the new SSD using software like Macrium Reflect. Then, replace the old hard drive with the SSD and boot your computer from it. Remember to back up your important files before making any changes to your system.
By following these steps, you can significantly speed up your Windows 7 startup and enjoy a smoother computing experience.
python

import psutil
def get_startup_time():
boot_time = psutil.boot_time()
return boot_time
def get_startup_programs():
startup_programs = []
reg_path = r"SOFTWARE\Microsoft\Windows\CurrentVersion\Run"
try:
import winreg as wr
except ImportError:
import _winreg as wr
reg_key = wr.OpenKey(wr.HKEY_CURRENT_USER, reg_path, 0, wr.KEY_READ)
try:
i = 0
while True:
startup_programs.append(wr.EnumValue(reg_key, i)[0])
i += 1
except OSError:
pass
return startup_programs
def analyze_startup():
print("System Startup Information:")
print("============================")
print(f"System Boot Time: {get_startup_time()}")
startup_programs = get_startup_programs()
print("\nStartup Programs:")
print("================")
if startup_programs:
for program in startup_programs:
print(program)
else:
print("No startup programs found.")
analyze_startup()
Please note that this code snippet only provides a basic starting point and doesn’t directly address the issue of a slow startup. It retrieves the system boot time and lists the startup programs for the current user. You can further enhance this code by analyzing the startup programs’ impact, checking for any background processes consuming excessive resources, or using additional performance monitoring tools available for Windows 7.
Run Disk Clean and adjust BIOS settings
To troubleshoot and speed up a slow Windows 7 startup, there are a few key actions you can take.
First, run a disk clean to remove unnecessary files and free up space on your hard drive. To do this, open the Start menu and type “Disk Cleanup” into the search bar. Select the Disk Cleanup utility and follow the prompts to clear out temporary files and other clutter.
Next, adjust your BIOS settings. Restart your computer and press the appropriate key (usually F2, F8, or Del) to enter BIOS setup. Look for options related to boot order or boot devices, and make sure your hard drive is listed as the first boot device.
If you’re experiencing boot issues due to a driver problem, try starting your computer in safe mode and uninstall any recently installed drivers.
By following these steps, you can improve your Windows 7 startup time and ensure a smoother experience.
Tweak startup programs and disable unnecessary Windows services
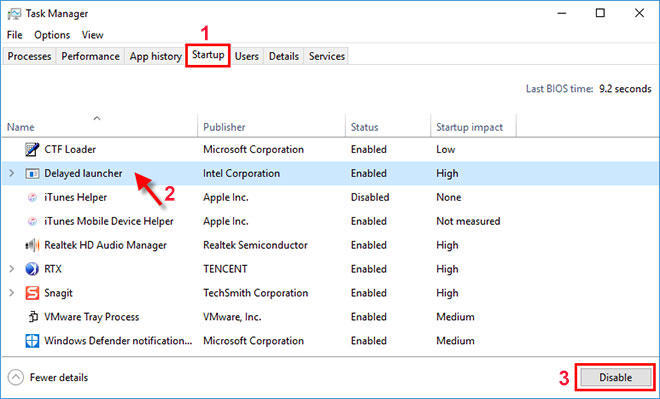
- Open Task Manager by pressing Ctrl+Shift+Esc
- Click on the “Startup” tab
- Disable unnecessary startup programs by right-clicking on them and selecting “Disable”
- Restart your computer to apply the changes
Disable unnecessary Windows services
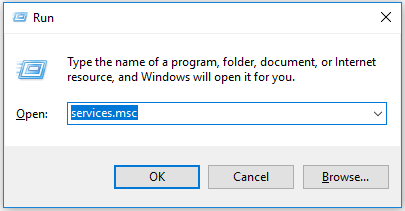
- Open the “Run” dialog box by pressing Win+R
- Type “services.msc” and hit Enter
- Locate unnecessary services that are set to start automatically
- Right-click on each unnecessary service and select “Properties”
- Select “Disabled” or “Manual” from the “Startup type” dropdown menu
- Click “Apply” and then “OK”
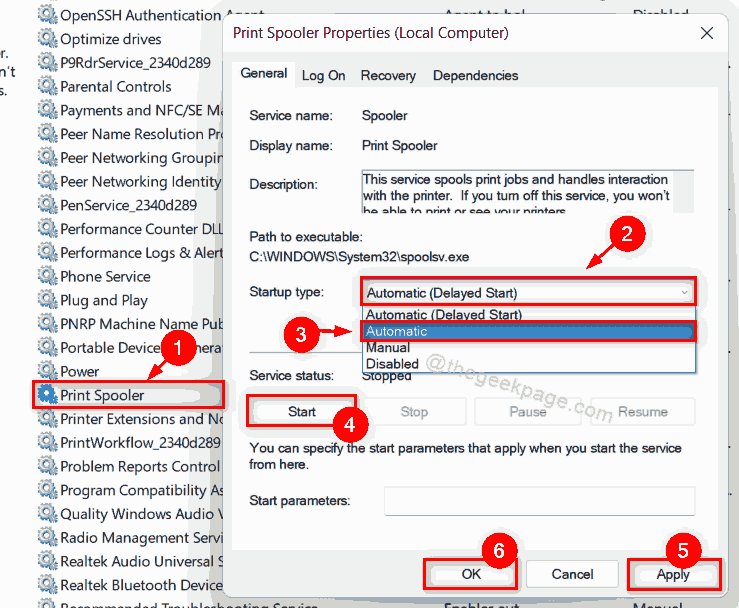
- Restart your computer to apply the changes
Change boot menu timeout values and streamline registry
To change the boot menu timeout values and streamline the registry in Windows 7, follow these steps:
1. Press the Windows key + R to open the Run dialog box.
2. Type regedit and press Enter to open the Registry Editor.
3. Navigate to the following registry key: HKEY_LOCAL_MACHINE\SYSTEM\CurrentControlSet\Control
4. Look for the WaitToKillServiceTimeout value on the right-hand side. Double-click on it to modify the value.
5. Change the value to a lower number (e.g., 5000 for 5 seconds) and click OK.
6. Next, navigate to the following registry key: HKEY_CURRENT_USER\Control Panel\Desktop
7. Look for the WaitToKillAppTimeout value on the right-hand side. Double-click on it to modify the value.
8. Change the value to a lower number (e.g., 2000 for 2 seconds) and click OK.
9. Close the Registry Editor and restart your computer for the changes to take effect.
By reducing the timeout values, you can speed up the boot process of your Windows 7 computer. Remember to be cautious when modifying the registry and make a backup before making any changes.
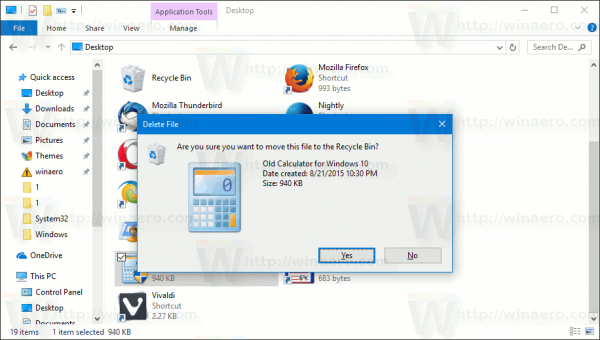
Delete unnecessary fonts and defragment disk
- Open the Control Panel by clicking on the Start button and selecting Control Panel.
- Click on Appearance and Personalization.

- Under Fonts, click on Preview, delete, or show and hide fonts.
- Select the unnecessary fonts you want to delete by clicking on them while holding the Ctrl key.
- Right-click on any of the selected fonts and choose Delete from the context menu.
- Confirm the deletion by clicking Yes in the confirmation dialog box.
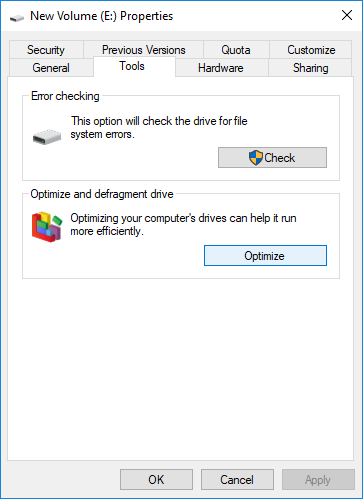
Defragment disk:
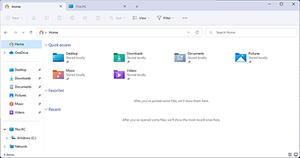
- Open File Explorer by clicking on the Start button and selecting Computer.
- Right-click on the disk you want to defragment (usually the C: drive) and select Properties.
- In the Properties window, click on the Tools tab.
- Under the Optimize and defragment drive section, click on Optimize.
- Select the disk you want to defragment and click on the Analyze button to check its fragmentation level.
- If the disk is heavily fragmented, click on the Optimize button to start the defragmentation process.
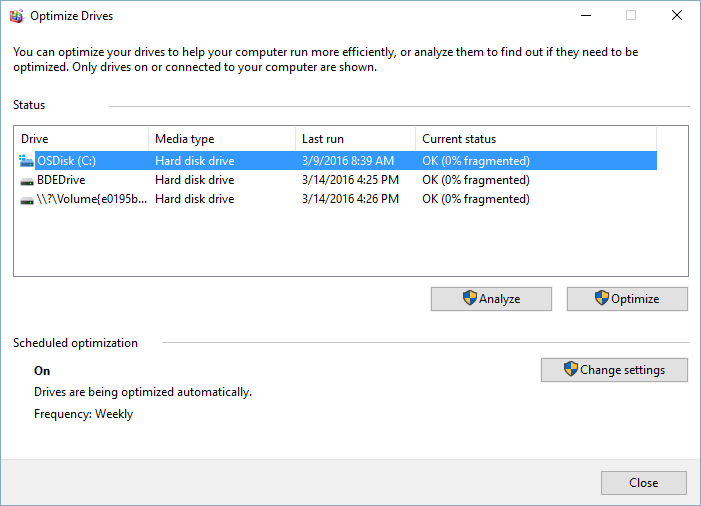
- Wait for the defragmentation process to complete. This may take some time depending on the size and fragmentation level of the disk.
- Once the process is finished, click on Close to exit the Optimize Drives window.
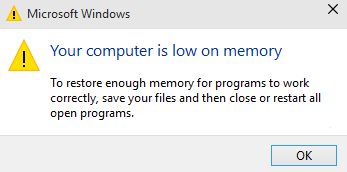
Check HDD and RAM, delete temporary files, and check for viruses
- Open Task Manager by pressing Ctrl+Shift+Esc
- Click on the Performance tab
- Under the Memory section, check the Available value to ensure it is not too low
- If available memory is low, consider upgrading RAM
- Click on the Processes tab
- Sort processes by Memory (click on the Memory column header)
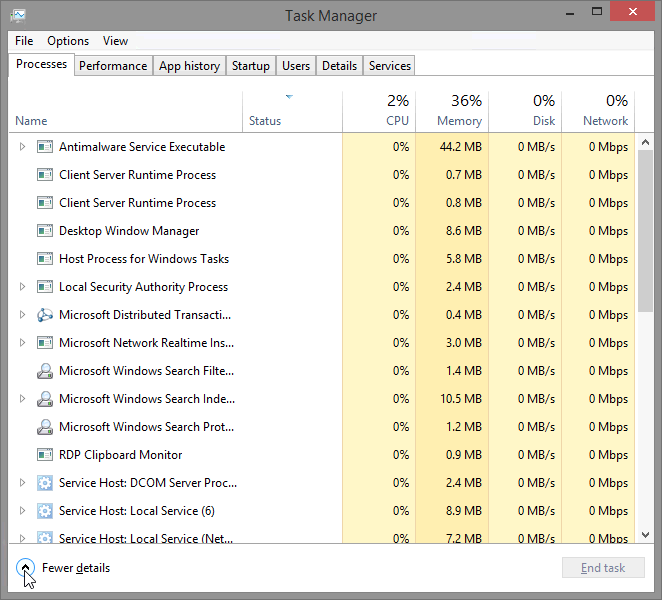
- Identify any memory-intensive processes and consider closing them if not necessary
- Open File Explorer by pressing Windows Key + E
- Right-click on the C: drive and select Properties
- Under the General tab, check the Free space value
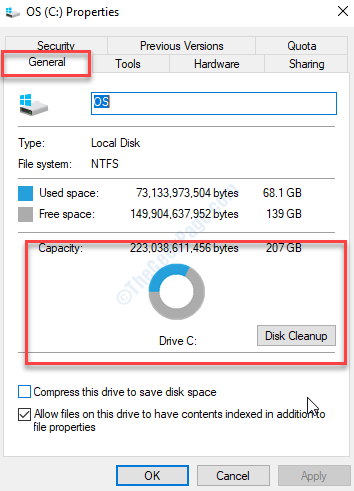
- If free space is low, consider deleting unnecessary files or moving them to an external storage device
Delete temporary files:
- Open File Explorer by pressing Windows Key + E
- Click on the C: drive
- Navigate to C:\Windows\Temp
- Select all files and folders in the Temp folder
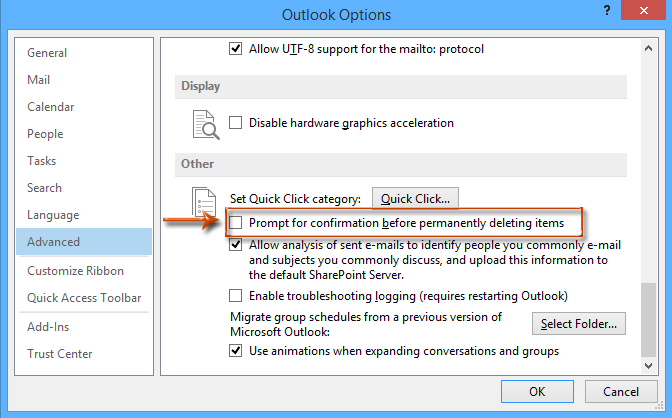
- Press Shift + Delete to permanently delete them
- Confirm the deletion when prompted
- Navigate to C:\Users\Username\AppData\Local\Temp
- Select all files and folders in the Temp folder
- Press Shift + Delete to permanently delete them
- Confirm the deletion when prompted
Check for viruses:
- Open your preferred antivirus software
- Update the antivirus software to ensure you have the latest virus definitions
- Perform a full system scan
- If any viruses or malware are detected, follow the recommendations provided by the antivirus software to remove them
- Consider installing additional antivirus software for added protection
Run Startup Repair, chkdsk, and sfc
To troubleshoot and speed up a slow Windows 7 startup, you can try running Startup Repair, chkdsk, and sfc. These tools can help identify and fix issues that may be causing your computer to start slowly.
1. Startup Repair: If your computer is experiencing boot issues or driver problems, running Startup Repair can help fix them. This tool is built into Windows 7 and can be accessed by booting from the installation disc or using the Advanced Boot Options menu.
2. chkdsk: Running chkdsk can help identify and fix errors on your hard drive, which may be slowing down your startup. Open Command Prompt as an administrator and type “chkdsk C: /f” to scan and fix any issues on your main drive.
3. sfc: The System File Checker (sfc) scans for and repairs corrupted system files that may be causing startup problems. Open Command Prompt as an administrator and type “sfc /scannow” to run the scan.
By running these tools, you can increase the chances of a faster startup and a smoother overall experience.