Unlock the secret to resolving Chrome’s puzzling inability to save passwords for a single website with our expert guide.
Recently, Fortect has become increasingly popular as a reliable and efficient way to address a wide range of PC issues. It's particularly favored for its user-friendly approach to diagnosing and fixing problems that can hinder a computer's performance, from system errors and malware to registry issues.
- Download and Install: Download Fortect from its official website by clicking here, and install it on your PC.
- Run a Scan and Review Results: Launch Fortect, conduct a system scan to identify issues, and review the scan results which detail the problems affecting your PC's performance.
- Repair and Optimize: Use Fortect's repair feature to fix the identified issues. For comprehensive repair options, consider subscribing to a premium plan. After repairing, the tool also aids in optimizing your PC for improved performance.
Troubleshooting Chrome’s Password Saving Issue
If Chrome is not saving a password for a specific site, follow these steps to fix the issue:
1. Check your Chrome settings: Go to “Settings” > “Passwords” to ensure that the “Offer to save passwords” toggle is enabled.
2. Clear saved passwords for the problematic site: Type “chrome://settings/passwords” in the address bar, find the site in question, and click the three-dot menu next to it. Select “Remove” to delete the saved password.
3. Disable extensions: Some extensions may interfere with Chrome’s password-saving feature. Temporarily disable them by going to “Settings” > “Extensions” and toggling off the ones you suspect might be causing the problem.
4. Update Chrome: Make sure you have the latest version of Chrome installed. Go to “Settings” > “About Chrome” to check for updates.
If these steps don’t resolve the issue, you can reach out to the Chrome Help Center or seek assistance from the Chrome Community for further solutions.
Create a New User Account
To create a new user account in Google Chrome and fix the issue of it not saving passwords for one site, follow these steps:
1. Open Google Chrome on your device.
2. Click on the profile icon at the top right corner of the browser window.
3. In the drop-down list, select “Manage people.”
4. Click on “Add person.”
5. Enter a name for the new user account and choose an avatar.
6. Click on “Add.”
7. A new browser window will open, and you can now sign in to the website that was not saving your password.
8. If you want to delete saved passwords, go to chrome://settings/passwords or click on the profile icon and select “Passwords.”
9. From there, you can manage and delete passwords stored in the Chrome browser.
By creating a new user account, you can separate your logins and fix the issue of Chrome not saving passwords for one specific site.
Use a Password Manager
Use a password manager like Dashlane to fix the issue of Chrome not saving passwords for one specific site. First, ensure that you have Dashlane installed on your device. Then, follow these steps:
1. Open Dashlane and sign in to your account.
2. Locate the website for which Chrome is not saving passwords.
3. Click on the website to view its details.
4. In the “Logins” tab, click on the drop-down list next to the website’s URL.
5. Select the option to “Delete passwords for this website.”
6. Confirm the deletion to remove any saved passwords for that site.
7. Return to the website and sign in again.
8. Dashlane will prompt you to save the password. Click “Save” to store it securely.
Using a password manager like Dashlane not only helps fix this issue but also offers convenience and security for all your online logins.
json

{

  "manifest_version": 2,

  "name": "Password Manager Extension",

  "version": "1.0",

  "permissions": [

    "passwords",

    "https://*/*"  // Permission to access all websites

  ],

  "background": {

    "scripts": ["background.js"],

    "persistent": false

  },

  "browser_action": {

    "default_popup": "popup.html",

    "default_icon": "icon.png"

  }

}
2. Create a background script file (`background.js`) to interact with the password manager APIs:
javascript
chrome.browserAction.onClicked.addListener(function(tab) {
chrome.passwords.getAll({}, function(credentials) {
// Do something with retrieved credentials, such as displaying them in the popup or performing further actions
console.log(credentials);
});
});
3. Create a popup HTML file (`popup.html`) to display the saved passwords:
html
Saved Passwords
4. Create a popup script file (`popup.js`) to dynamically populate the saved passwords in the popup HTML:
javascript
document.addEventListener('DOMContentLoaded', function() {
chrome.passwords.getAll({}, function(credentials) {
var passwordList = document.getElementById('passwordList');
credentials.forEach(function(credential) {
var listItem = document.createElement('li');
listItem.textContent = credential.username + ' : ' + credential.password;
passwordList.appendChild(listItem);
});
});
});
Please note that this sample code only demonstrates accessing and displaying saved passwords using a Chrome extension. It does not specifically address the issue of Chrome not saving passwords for a particular site. For troubleshooting specific issues, it’s recommended to check Chrome’s settings, clear browsing data, disable extensions, or contact Chrome support for further assistance.
Allow Chrome to Save Passwords
To fix the issue of Chrome not saving passwords for one specific site, follow these steps:
1. Open Chrome browser and go to the website where you’re experiencing the problem.
2. Click on the lock icon located at the left side of the address bar.
3. In the pop-up window, select “Cookies” and then click on the “See all cookies and site data” link.
4. In the search bar on the top right, enter the website’s domain name.
5. Find the specific cookie related to the website and click on the trash icon next to it to delete it.
6. Close the cookie window and refresh the website.
7. Enter your login credentials and make sure to check the “Save password” prompt.
8. Chrome should now save your password for that particular site.
If the issue persists, try clearing all the cookies and cache from Chrome settings or check for any conflicting extensions. If you need more assistance, you can visit the Microsoft Help Center or seek help from the Microsoft Community.
Sign Out and Sign Back In to Google Account
If you’re experiencing issues with Chrome not saving passwords for a specific site, a quick fix is to sign out and sign back in to your Google Account. This simple solution can resolve any glitches or hiccups that may be preventing Chrome from properly saving your passwords.
To do this, follow these steps:
1. Click on your profile picture or initials in the top right corner of Chrome.
2. Select “Sign out” from the dropdown menu.
3. Once signed out, click on the profile picture or initials again.
4. Choose “Sign in” and enter your Google Account credentials.
5. After signing back in, try visiting the problematic website again and enter your credentials. Chrome should now prompt you to save the password.
By signing out and signing back in to your Google Account, you can refresh the connection between Chrome and your account, ensuring that passwords are properly saved and stored.
Reset Chrome to Default Settings
Resetting Chrome to its default settings can help fix the issue of Chrome not saving passwords for a specific site. Here’s how you can do it:
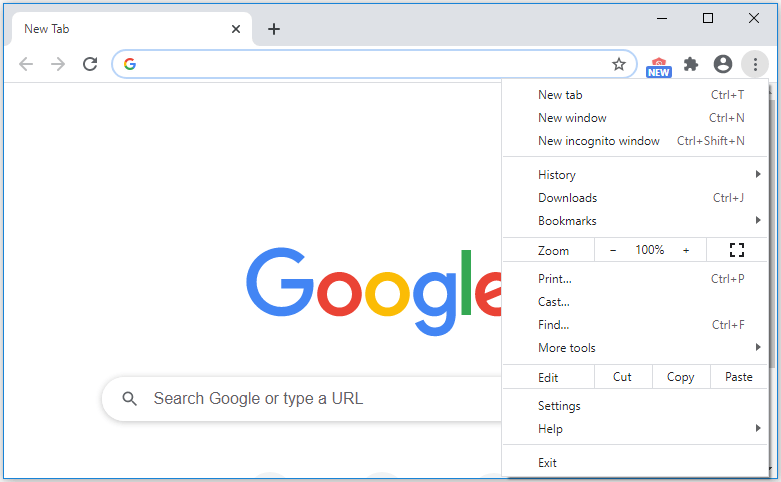
1. Open Chrome and click on the three-dot menu in the top right corner.
2. From the dropdown menu, select “Settings.”
3. Scroll down and click on “Advanced” to expand the advanced settings.
4. Scroll down further and under the “Reset and clean up” section, click on “Restore settings to their original defaults.”
5. A confirmation window will appear, click on “Reset settings” to proceed.
6. Chrome will restart and all settings will be reset to their default values.
After resetting, try saving your password for the specific site again and see if the issue is resolved. Remember to reconfigure any preferences or extensions you had before the reset.
If the problem persists, you may need to explore other solutions or seek additional assistance from Microsoft support.
Disable Problematic Extensions
- Open Google Chrome on your computer.
- Locate and click on the three-dot menu icon in the top-right corner of the browser window.
- A drop-down menu will appear.
- From the menu, select More tools, then choose Extensions.
- You will be redirected to the Extensions page.
- Review the list of installed extensions.
- Identify any extensions that might be causing the issue with Chrome not saving passwords for one specific site.
- To disable an extension, simply uncheck the Enabled box next to it.
- Alternatively, you can click on the Remove button to completely uninstall the extension.
- Once you have disabled or removed the problematic extension(s), close the Extensions tab.
- Restart Google Chrome to apply the changes.
Update Chrome to Latest Version
To fix Chrome not saving passwords for one site, the first step is to update Chrome to the latest version. This ensures that you have the most up-to-date features and fixes. Follow these steps to update Chrome:
1. Open Chrome and click on the three dots in the top-right corner of the browser.
2. From the drop-down menu, hover over “Help” and click on “About Google Chrome”.
3. Chrome will automatically check for updates and install them if available.
4. Once the update is complete, restart Chrome.
After updating Chrome, try saving the password for the problematic site again. If the issue persists, you may need to clear the saved passwords for that site and re-enter them. To do this, follow these steps:
1. Open Chrome and click on the three dots in the top-right corner.
2. Go to “Settings”, then scroll down and click on “Passwords”.
3. Find the site with the password-saving issue and click on the three dots next to it.
4. Select “Remove” to delete the saved password.
5. Visit the site again and enter your username and password when prompted. Chrome should now save the password correctly.
Clear Cache and Cookies
To fix Chrome not saving passwords for one site, you may need to clear your cache and cookies. Here’s how:
1. Open Chrome and click on the three dots in the top-right corner.
2. Select “Settings” from the dropdown menu.
3. Scroll down and click on “Privacy and security.”
4. Under “Privacy and security,” click on “Clear browsing data.”
5. In the popup window, select “Cached images and files” and “Cookies and other site data.”
6. Choose the time range for which you want to clear the data.
7. Click on “Clear data.”
Note: Clearing your cache and cookies will remove stored data such as saved passwords for all websites, not just the one causing the issue. Make sure you’re aware of this before proceeding.
After clearing your cache and cookies, revisit the website where Chrome wasn’t saving your password and try logging in again. This should resolve the issue.
Remove Unwanted Programs
To remove unwanted programs causing Chrome to not save passwords for a specific site, follow these steps:
1. Open the Control Panel on your Windows 10 computer.
2. Click on “Programs” or “Programs and Features.”
3. Look for the unwanted program in the list and select it.
4. Click on the “Uninstall” button to remove the program.
5. Follow the on-screen prompts to complete the uninstallation process.
If you’re using a Mac, follow these steps instead:
1. Open Finder and click on “Applications” in the sidebar.
2. Locate the unwanted program and drag it to the Trash.
3. Right-click on the Trash icon and select “Empty Trash” to permanently delete the program.
Removing unwanted programs can help resolve issues with Chrome not saving passwords for a specific site.
Clear Chrome Password Folder and Check Registry Files
To clear the Chrome password folder and check registry files, follow these steps:
1. Open Google Chrome and click on the three-dot menu in the top right corner.
2. Select “Settings” from the drop-down menu.
3. Scroll down to the bottom and click on “Advanced” to expand more options.
4. Under the “Passwords and forms” section, click on “Manage passwords.”
5. In the “Saved passwords” section, click on the three-dot menu next to the website for which you want to clear the password.
6. Select “Remove” to delete the saved password.
To check the registry files:
1. Press the Windows key + R to open the Run dialog box.
2. Type “regedit” and press Enter to open the Registry Editor.
3. Navigate to the following path: HKEY_CURRENT_USER\Software\Google\Chrome\Profile\PasswordManager
4. In the right pane, look for any entries related to the website for which you are experiencing password-saving issues.
5. Right-click on the entry and select “Delete” to remove it.
By following these steps, you can clear the Chrome password folder and check registry files to fix Chrome not saving passwords for one site.