Troubleshooting Windows 10 Setup Installation: Streamlining Your Experience
Recently, Fortect has become increasingly popular as a reliable and efficient way to address a wide range of PC issues. It's particularly favored for its user-friendly approach to diagnosing and fixing problems that can hinder a computer's performance, from system errors and malware to registry issues.
- Download and Install: Download Fortect from its official website by clicking here, and install it on your PC.
- Run a Scan and Review Results: Launch Fortect, conduct a system scan to identify issues, and review the scan results which detail the problems affecting your PC's performance.
- Repair and Optimize: Use Fortect's repair feature to fix the identified issues. For comprehensive repair options, consider subscribing to a premium plan. After repairing, the tool also aids in optimizing your PC for improved performance.
Common Errors during Windows 10 Setup
If you encounter errors during the Windows 10 setup process, don’t worry. We’ve got you covered with some solutions.
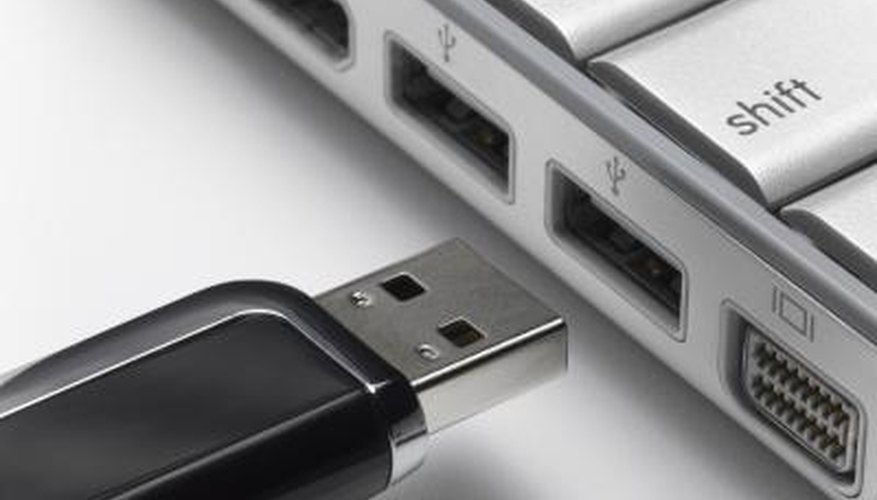
1. Error Code 0x8007025D: This error usually occurs when there’s an issue with your installation media. To fix it, try using a different USB flash drive or DVD for the installation.
2. Media Driver Missing: If you see an error message stating that a media driver is missing, make sure to disconnect any peripherals like scanners or speakers. Then, restart the installation process.
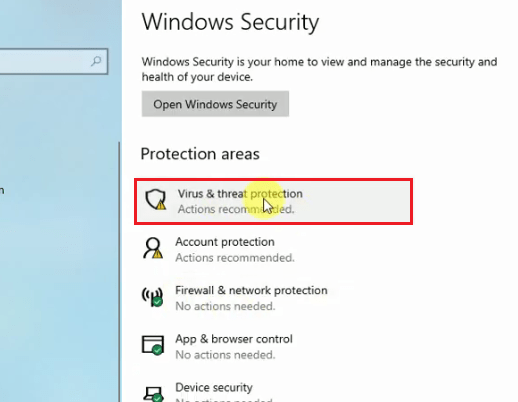
3. Install Required Files: Sometimes, the setup process may fail to install required files. To resolve this, disconnect from the internet, disable any antivirus software, and try the installation again.
4. Hardware Driver Compatibility: If your hardware devices, such as mouse or keyboard, are not working after the installation, update your hardware drivers to the latest version.
Troubleshooting 0xC1900101 Errors
- Ensure compatibility: Make sure your device meets the minimum system requirements for Windows 10 installation.
- Update device drivers: Update all drivers, especially graphics and network drivers, to their latest versions.
- Disconnect external devices: Disconnect any unnecessary external devices like printers, scanners, or USB drives before starting the installation.
- Free up disk space: Ensure that you have enough free space on your hard drive to accommodate the Windows 10 installation.
- Disable antivirus software: Temporarily disable any third-party antivirus or security software during the installation process.
- Uninstall problematic software: Remove any software that has known compatibility issues with Windows 10 before attempting the installation.
- Perform a clean boot: Start your computer with a minimal set of drivers and startup programs to avoid any conflicts during installation.
- Check for Windows updates: Ensure that your current version of Windows is up to date with the latest updates and patches.
- Run Windows Update Troubleshooter: Use the built-in Windows Update Troubleshooter to detect and resolve any issues with Windows updates.
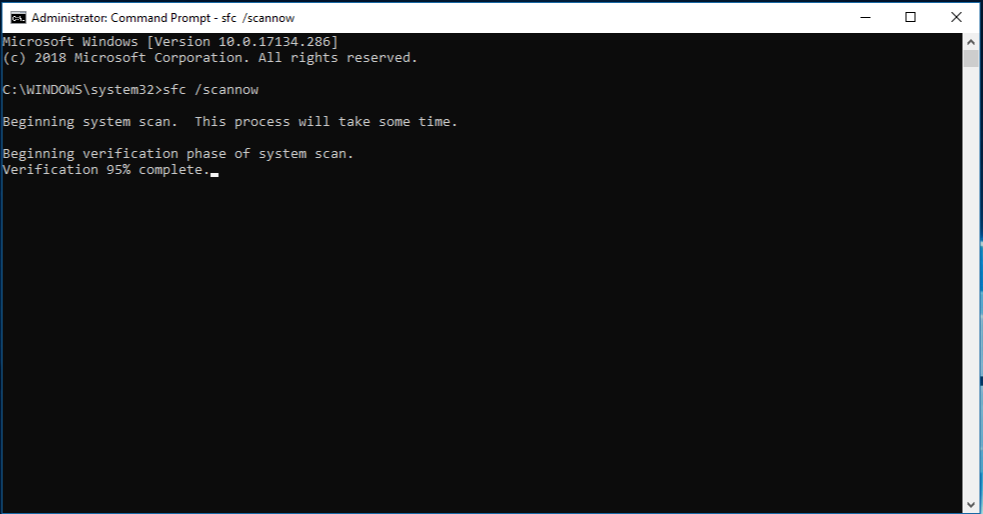
- Perform a system file check: Run the System File Checker tool to scan and repair any corrupted system files that may be causing the error.
- Disable overclocking: If you have overclocked your CPU or GPU, revert the settings to their default values before installing Windows 10.
- Check hardware components: Verify that all hardware components, such as RAM or hard drives, are properly connected and functioning correctly.
- Use Media Creation Tool: Create a bootable USB or DVD using the official Microsoft Media Creation Tool and perform a clean installation of Windows 10.
- Contact Microsoft Support: If the error persists, reach out to Microsoft Support for further assistance and guidance.
Resolving Other Common Setup Errors
If you encounter other common setup errors during your Windows 10 installation, follow these steps to resolve them:
1. Disconnect any peripherals: To avoid any installation issues, disconnect any external devices such as USB flash drives, scanners, speakers, and LAN cables.
2. Check hardware drivers: Ensure that you have the latest drivers for your hardware devices, such as your mouse and keyboard. Visit the manufacturer’s website to download and install the appropriate drivers.
3. Verify installation media: If you’re using a USB flash drive or DVD for installation, make sure it’s not damaged. Try using a different installation media or create a new one if needed.
4. Clean install: If you’re experiencing persistent problems, consider performing a clean install of Windows 10. This will erase all data on your hard drive, so make sure to back up any important files before proceeding.
5. Troubleshoot error codes: If you encounter specific error codes, search for solutions online or on the Microsoft Support website. Often, there are specific fixes available for different error codes.
python

import subprocess
def check_windows_setup():
try:
setup_process = subprocess.Popen('start ms-settings:activation', shell=True)
# Open Windows activation settings to check if setup is working properly
setup_process.wait()
return True
except Exception as e:
print(f"An error occurred: {str(e)}")
return False
def run_windows_setup():
try:
setup_process = subprocess.Popen('start ms-settings:activation', shell=True)
# Open Windows activation settings to run the setup again
setup_process.wait()
except Exception as e:
print(f"An error occurred: {str(e)}")
# Main program
if __name__ == '__main__':
print("Checking Windows 10 setup...")
if check_windows_setup():
print("Windows 10 setup is working properly.")
else:
print("Windows 10 setup is not working.")
# Uncomment the following line to run the setup again
# run_windows_setup()
In the above code, we define two functions: `check_windows_setup()` and `run_windows_setup()`. The `check_windows_setup()` function attempts to open the Windows activation settings using the `subprocess` module. If the process succeeds, it indicates that the setup is working properly. Otherwise, it catches any exceptions that occur and returns `False`.
The `run_windows_setup()` function also uses `subprocess` to open the Windows activation settings. You can uncomment the last line in the main program to use this function and run the Windows 10 setup again.
Please note that this code simply demonstrates a basic approach to check and run Windows 10 setup. In a real-world scenario, you might need to consider additional checks, error handling, and specific actions for troubleshooting.
Additional Help and Options
If you’re experiencing installation issues during the setup of Windows 10, we’re here to assist you. Follow these steps to resolve common installation errors:
1. Disconnect peripherals: To eliminate potential conflicts, unplug any USB flash drives, scanners, speakers, or other devices connected to your PC.
2. Check your hardware: Ensure that your laptop or PC meets the system requirements for Windows 10. If you encounter error code 0x8007025d, it may indicate an issue with your hard disk. Run diagnostics to identify and resolve any hardware problems.
3. Use a wired connection: If you’re using a LAN cable, it can help stabilize your internet connection during the installation process.
4. Try a clean install: If you’re upgrading from Windows 7, 8.1, or another version, consider performing a clean install of Windows 10. This can often resolve compatibility issues.
5. Seek further assistance: If you’re still encountering problems, visit our support page or reach out to our experts for more troubleshooting tips and guidance.
Dealing with Product Key Prompt Issues
If you’re experiencing issues with the product key prompt during the Windows 10 setup installation, there are a few steps you can take to resolve the problem.
First, make sure you have entered the correct product key. Double-check the key and ensure there are no typos or mistakes.
If you’re still encountering the prompt, try the following steps:
1. Disconnect any peripherals such as scanners or speakers. Sometimes, these devices can interfere with the installation process.
2. If you’re using a laptop, disconnect it from the LAN cable. This can help eliminate any network-related issues that may be causing the problem.
3. Make sure you have enough free space on your hard disk. Windows 10 requires a certain amount of space to install properly.
4. If you’re using a Microsoft account to sign in, try using a local account instead.
If none of these steps resolve the issue, it may be worth reaching out to Microsoft Support for further assistance.
Addressing Installer Hangs and Continuous Reboots
If you’re experiencing installer hangs or continuous reboots during your Windows 10 setup installation, here are some tips to help you resolve the issue:
1. Disconnect peripherals: Unplug any external devices such as scanners, speakers, or printers before starting the installation process.
2. Check for error messages: Look out for any error messages that may provide clues to the problem. Follow the suggested troubleshooting steps if available.
3. Update drivers: Make sure your drivers are up to date. Visit the manufacturer’s website to download and install the latest drivers for your hardware.
4. Run Windows setup in compatibility mode: Right-click on the setup.exe file, select Properties, go to the Compatibility tab, and check the box that says “Run this program in compatibility mode.” Choose an older version of Windows (e.g., Windows 7 or Windows 8.1) and click Apply.
5. Try a clean boot: Temporarily disable non-Microsoft services and startup programs using the System Configuration tool. This can help identify any conflicting software causing the installation issue.
Fixing Error: “Something Happened 0x80070005-0x90002”
If you encounter the error message “Something Happened 0x80070005-0x90002” during your Windows 10 setup installation, there are a few steps you can take to fix it.
First, double-check that your internet connection is stable and try running the setup.exe file again. If the error persists, follow these steps:
1. Press the Windows key + X and select “Control Panel.”
2. In the Control Panel, click on “Troubleshooting” and then select “View all” on the left-hand side.
3. Choose “Windows Update” from the list and follow the on-screen instructions to run the troubleshooter.
4. Restart your computer and attempt the installation again.
If these steps don’t resolve the issue, it’s possible there may be other underlying reasons for the error. In that case, we recommend reaching out to Microsoft Support or consulting online forums for further assistance.
Troubleshooting Error: 0xC1900101-0x20017, -0x30018, -0x20004, and others
- Check for hardware compatibility and requirements:
- Ensure that your computer meets the minimum system requirements for Windows 10 installation.
- Check if your hardware components, such as the processor, RAM, and storage, are compatible with Windows 10.
- Disable antivirus and other security software:
- Temporarily disable any antivirus or security software installed on your computer.
- Some security software may interfere with the installation process, causing errors.
- Disconnect unnecessary peripherals:
- Remove any external devices, such as printers, scanners, or USB drives, connected to your computer.
- Disconnect any non-essential devices to eliminate potential conflicts during the installation.
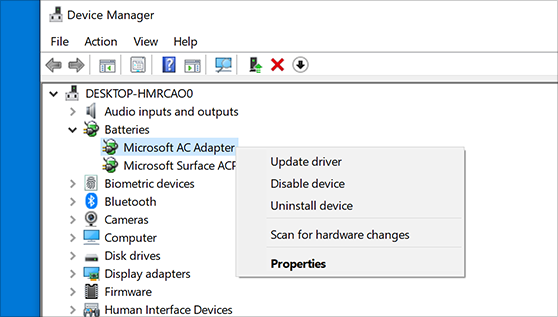
- Update device drivers:
- Open Device Manager by pressing Win + X and selecting Device Manager from the menu.
- Expand the categories and look for any devices with a yellow exclamation mark.
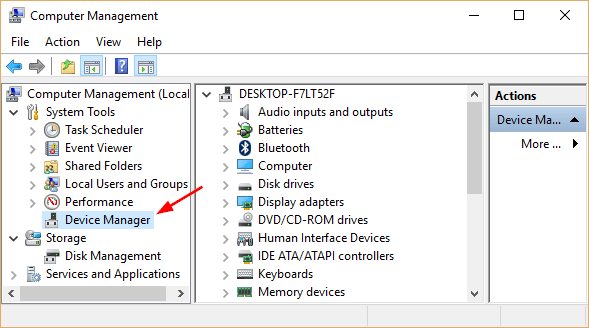
- Right-click on the device and select Update driver.
- Choose to search automatically for updated driver software.
- If updates are found, follow the on-screen instructions to install them.
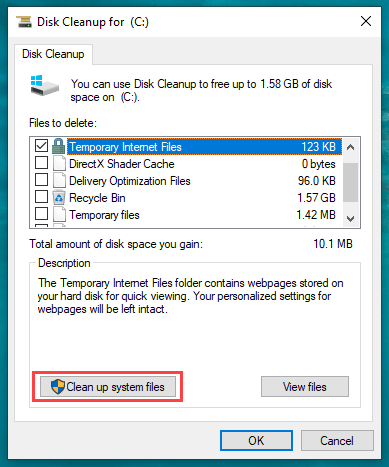
- Free up disk space:
- Press Win + R to open the Run dialog box.
- Type cleanmgr and press Enter.
- Select the drive where Windows is installed (usually C:).
- Click on OK to run the Disk Cleanup tool.
- Select the types of files you want to delete and click on OK.
- Wait for the cleanup process to finish.
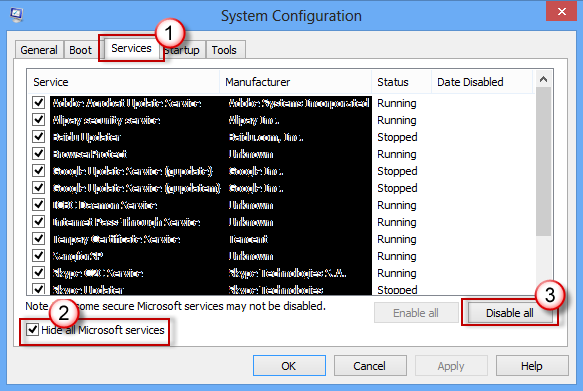
- Perform a clean boot:
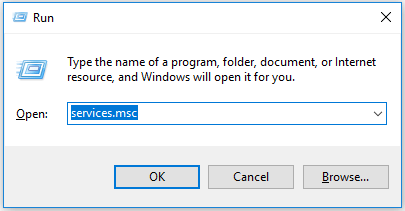
- Press Win + R to open the Run dialog box.
- Type msconfig and press Enter.
- In the System Configuration window, go to the Services tab.
- Check the box that says Hide all Microsoft services.
- Click on Disable all to disable all non-Microsoft services.
- Go to the Startup tab and click on Open Task Manager.
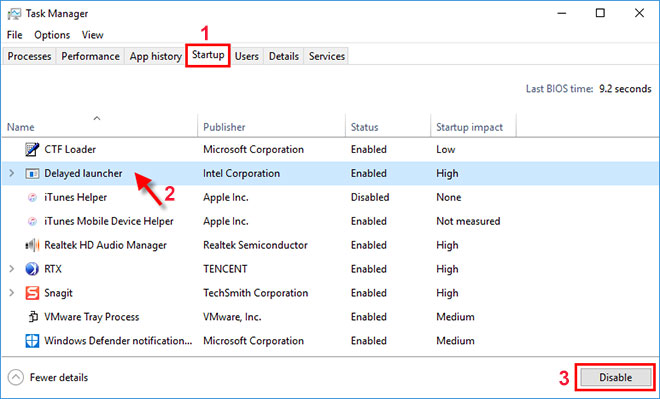
- In the Task Manager, disable all startup items.
- Close the Task Manager and click on OK in the System Configuration window.
- Restart your computer and try to install Windows 10 again.
- Run the Windows Update Troubleshooter:
- Open Settings by pressing Win + I.
- Go to Update & Security and select Troubleshoot.
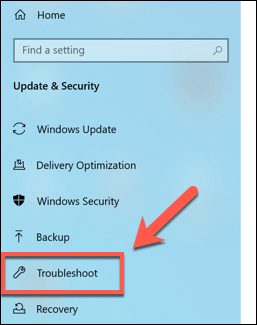
- Click on Additional troubleshooters.
- Scroll down and click on Windows Update.
- Click on Run the troubleshooter and follow the on-screen instructions.
- If any issues are found, the troubleshooter will attempt to fix them automatically.
- Perform a system restore:
- Press Win + R to open the Run dialog box.
- Type rstrui and press Enter.
- Follow the instructions in the System Restore wizard to choose a restore point and restore your system to a previous state.
- After the restore process is complete, try installing Windows 10 again.
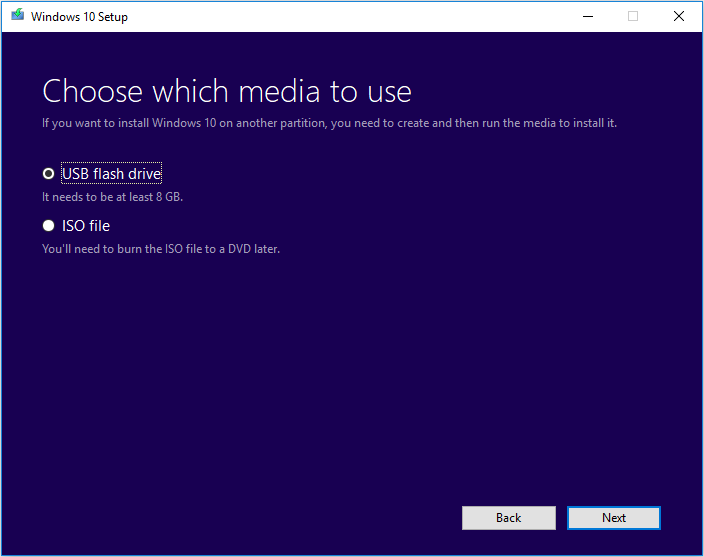
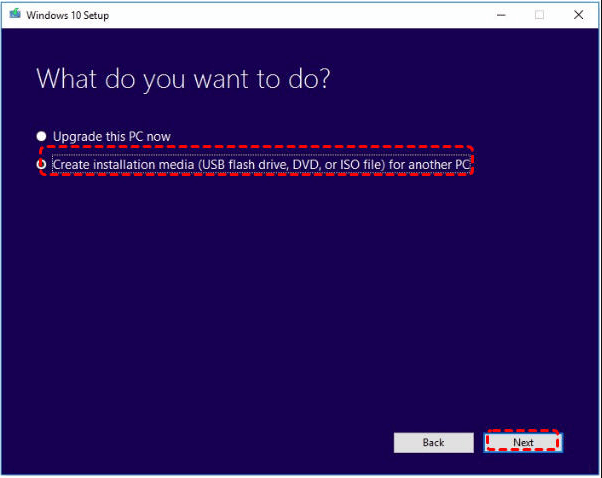
- Recreate Windows installation media:
- Download the Windows 10 Media Creation Tool from the official Microsoft website.
- Run the tool and select the option to create installation media.
- Choose the language, edition, and architecture of Windows 10 you want to install.
- Select the option to create a USB flash drive or ISO file.
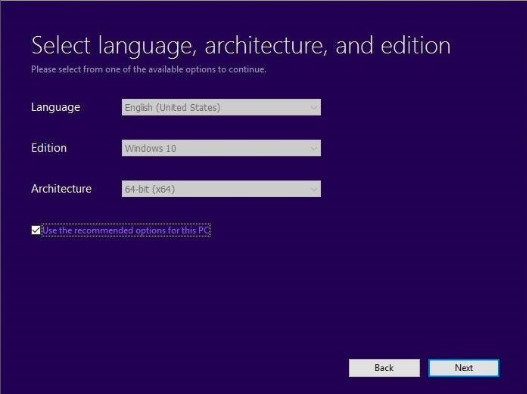
- Follow the on-screen instructions to create the installation media.
- Use the newly created installation media to install Windows 10.
Activation Problems and Solutions
If you’re experiencing activation problems during your Windows 10 setup installation, there are a few solutions you can try.
First, ensure that you have a stable internet connection. Activation requires an active internet connection to communicate with Microsoft’s servers.
If you’re using a product key, make sure it’s entered correctly. Double-check for any typos or mistakes.
If you’re using a digital license tied to your Microsoft account, ensure that you’re signed in with the correct account.
If these steps don’t resolve the issue, try using the Activation Troubleshooter. Press the Windows key, type “Activation Troubleshooter,” and select the matching result. Follow the on-screen instructions to troubleshoot and resolve any activation problems.
If you’re still having trouble activating Windows 10, consider contacting Microsoft Support for further assistance. They can provide guidance and help resolve any lingering issues.
Ownership of PC: Who Owns It?
When it comes to owning a PC, the user is ultimately responsible for its maintenance and troubleshooting. Whether you are encountering installation issues with Windows 10 or any other operating system, there are ways to resolve them and get your PC up and running smoothly.
Firstly, ensure that you have administrative privileges on your PC. This will allow you to make necessary changes and resolve installation errors.
If you are experiencing issues during the Windows 10 setup installation, here are a few steps you can take:
1. Check system requirements: Make sure your PC meets the minimum requirements for Windows 10 installation. Refer to the official Microsoft website for detailed specifications.
2. Update drivers: Outdated drivers can cause compatibility issues during installation. Visit the manufacturer’s website for updated drivers for your hardware.
3. Perform a clean boot: Temporarily disable non-essential startup programs and services that may interfere with the installation process.
4. Run the Windows Update Troubleshooter: This tool can automatically detect and fix common installation problems.
If you continue to experience difficulties, it may be beneficial to seek assistance from Microsoft support or consult online forums where experts and fellow users can offer guidance.
Troubles with Video, Sound, and Other Drivers
Having troubles with video, sound, and other drivers during your Windows 10 setup installation? Don’t worry, we’ve got you covered with some helpful fixes.
Firstly, ensure that all your drivers are up to date. Use Device Manager to check for any outdated or incompatible drivers. If there are any issues, update them manually or use a reliable driver update tool.
If updating the drivers doesn’t solve the problem, try uninstalling and reinstalling them. Open Device Manager, find the problematic driver, right-click on it, and select “Uninstall device.” Restart your computer and let Windows automatically reinstall the driver.
If the issue persists, you can try running the built-in Windows Troubleshooter. Go to Settings > Update & Security > Troubleshoot, and select the appropriate troubleshooter for your specific problem.
If all else fails, you can try a clean boot to eliminate any software conflicts. Press the Windows key + R, type “msconfig,” and hit Enter. In the System Configuration window, go to the Services tab, check “Hide all Microsoft services,” and click “Disable all.” Then, go to the Startup tab and click “Open Task Manager.” Disable all startup items, close Task Manager, and click OK in the System Configuration window. Restart your computer.
Creating a Local Account during Setup
During the Windows 10 setup process, you may encounter issues with the installation. One common problem is creating a local account. To fix this, follow these steps:
1. On the setup screen, click on “Create a local account” instead of “Sign in with a Microsoft account.”
2. Enter a username and password for your local account. Remember to choose a strong password to ensure security.
3. You can also add a password hint to help you remember your password if needed.
4. Click on “Next” to proceed with the setup.
By creating a local account, you can use your computer without linking it to a Microsoft account. This can be helpful for various reasons, such as privacy concerns or if you prefer to manage your account locally. Remember to keep your local account credentials secure and avoid sharing them with anyone.
If you encounter any other installation problems or need further assistance, feel free to reach out to our support team or explore our knowledge base for more helpful information.
Fixing Windows 10 Store Startup Issues
If you’re experiencing issues with the Windows 10 Store not starting up, there are a few troubleshooting steps you can try. First, make sure your internet connection is stable. If that’s not the issue, try resetting the Windows Store cache. To do this, press the Windows key + R to open the Run dialog, then type “wsreset. exe” and hit Enter. This will clear the Store cache and may resolve any startup issues.
If that doesn’t work, you can also try running the Windows Store Apps troubleshooter. Go to Settings > Update & Security > Troubleshoot, then select “Windows Store Apps” and follow the on-screen instructions. Hopefully, one of these steps will help you get the Windows 10 Store up and running again.
Troubleshooting Windows 10 Mail Sync Problems
If you’re experiencing issues with Windows 10 Mail syncing, here are some troubleshooting steps to help you resolve the problem.
First, ensure that you have a stable internet connection. This is crucial for syncing to work properly.
Next, check your account settings in Windows 10 Mail. Make sure that your email account is properly configured and that the server settings are correct.
If the issue persists, try resetting the Mail app. To do this, open the Settings app, go to Apps, and locate Mail. Click on it and select Advanced options. Then, click on the Reset button to reset the app to its default settings.
If none of these steps resolve the issue, try removing and re-adding your email account to Windows 10 Mail. To do this, open the Mail app, go to Settings, and select Manage Accounts. Choose the account you want to remove and click on the Delete account button. Then, add the account again using the Add account option.
These troubleshooting steps should help you resolve any syncing issues you may be experiencing with Windows 10 Mail.
Solutions for Failed Windows 10 Installation Attempts
Here is an example of an HTML table providing solutions for failed Windows 10 installation attempts:
“`html
Fixing Windows 10 Setup Installation Issues
| Error Code | Possible Solution |
|---|---|
| 0x80070070 | Free up disk space by deleting unnecessary files or programs. Ensure you have at least 20 GB of free space on your system drive. |
| 0x80070570 | Run a memory test using Windows Memory Diagnostic tool to check for any faulty RAM modules. |
| 0x8007001F | Disconnect any external devices (such as printers or USB drives) before attempting the installation. Also, make sure your system BIOS is up to date. |
| 0x80240020 | Disable any third-party antivirus software temporarily, as it may interfere with the installation process. Re-enable it after the installation is complete. |
| 0x80070003 | Ensure your system date and time settings are correct. Also, disable any VPN or proxy connections during the installation. |
| 0x800704DD | Perform a clean boot to start the installation with a minimal set of drivers and startup programs. This can help identify any conflicting software causing the issue. |
| 0x80070005 | Make sure you are logged in as an administrator or use an administrator account to run the setup. Also, temporarily disable any firewall or security software during the installation. |
“`
You can customize the table further by adding more error codes and their corresponding solutions according to your article’s content.


