Welcome to the comprehensive guide on cleaning up C Windows Installer files.
Recently, Fortect has become increasingly popular as a reliable and efficient way to address a wide range of PC issues. It's particularly favored for its user-friendly approach to diagnosing and fixing problems that can hinder a computer's performance, from system errors and malware to registry issues.
- Download and Install: Download Fortect from its official website by clicking here, and install it on your PC.
- Run a Scan and Review Results: Launch Fortect, conduct a system scan to identify issues, and review the scan results which detail the problems affecting your PC's performance.
- Repair and Optimize: Use Fortect's repair feature to fix the identified issues. For comprehensive repair options, consider subscribing to a premium plan. After repairing, the tool also aids in optimizing your PC for improved performance.
Understanding the Windows Installer Folder
The Windows Installer folder is a critical component of the Windows operating system. It stores important files related to the installation and removal of software on your computer. Over time, the folder can accumulate unnecessary files, taking up valuable disk space. To ensure optimal performance, it is recommended to periodically clean up the Windows Installer folder.
To clean up the Windows Installer folder, follow these steps:
1. Open the Control Panel by clicking on the Start menu and selecting “Control Panel.”
2. In the Control Panel, click on “Programs” and then “Programs and Features.”
3. In the Programs and Features window, click on “View installed updates” on the left-hand side.
4. Scroll through the list and locate any updates labeled with “KB” followed by a number. These are Windows Installer files.
5. Right-click on each update and select “Uninstall” to remove it from your system.
6. Repeat this process for all relevant updates.
7. Once you have uninstalled all the unnecessary updates, you can safely delete the files from the Windows Installer folder.
8. To locate the folder, open File Explorer and navigate to “C:\Windows\Installer.”
9. Select all the files in the folder and press the “Delete” key on your keyboard.
10. Confirm the deletion when prompted.
Cleaning up the Windows Installer folder can help free up disk space and improve the performance of your computer. It is important to note that deleting any files from this folder will prevent you from uninstalling or repairing the associated software in the future. Therefore, it is recommended to only remove updates that you are certain are no longer needed.
Troubleshooting Issues with the Installer Folder
If you are experiencing issues with the Installer folder on your Windows computer, there are a few troubleshooting steps you can take to resolve the problem.
First, check if the Installer folder is taking up a significant amount of disk space. Open the File Explorer and navigate to the C:\Windows\Installer directory. If you notice that the folder is unusually large, it may be due to unnecessary or outdated files.
To clean up the Installer folder, you can use the Disk Cleanup utility. Open the Control Panel and search for “Disk Cleanup.” Select the drive where Windows is installed (usually C:) and click “OK.” In the Disk Cleanup window, click on the “Clean up system files” button. Check the box next to “Windows Installer” and click “OK” to begin the cleanup process.
If the issue persists, you can also try resetting the Installer folder. Open the Command Prompt as an administrator and type the following command: “msiexec /unregister“. Press Enter, and then type “msiexec /regserver” and press Enter again. This will reset the Windows Installer service and may resolve any issues.
Remember to always back up your important files before making any changes to your computer.
For more detailed instructions and troubleshooting tips, you can refer to the Microsoft TechNet website or contact Microsoft support for further assistance.
Efficiently Managing the Windows Installer Files
-
Identify unnecessary Windows Installer files:
- Open File Explorer by pressing Win + E.
- Navigate to the C:\Windows\Installer directory.
- Sort the files by Date Modified to easily identify older files.
- Look for files that are no longer associated with installed programs or have unnecessary duplicates.
-
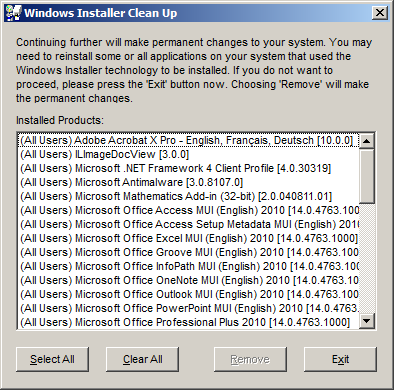
Use Windows Installer Cleanup Utility:
- Download and install the Windows Installer Cleanup Utility from Microsoft’s official website.
- Launch the utility and review the list of installed programs.
- Select the programs that have unnecessary Windows Installer files and click Remove.
- Follow any additional prompts or instructions provided by the utility.
-
Manually delete unnecessary Windows Installer files:
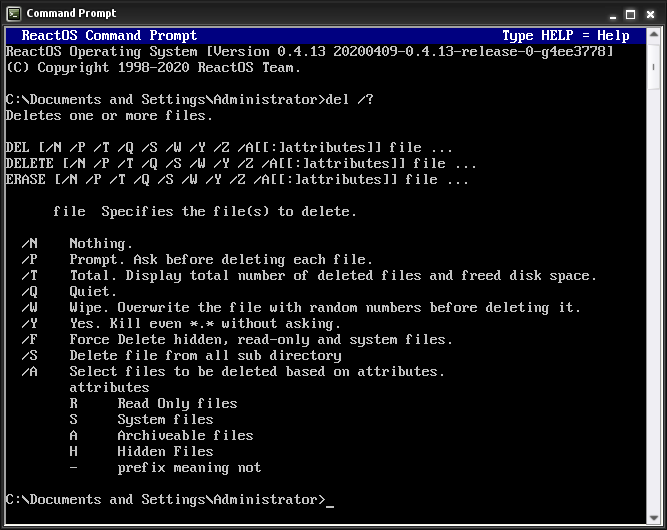
- Open Command Prompt by pressing Win + R, typing cmd, and pressing Enter.
- Type cd C:\Windows\Installer to navigate to the Installer directory.
- Use the del command followed by the file name to delete unnecessary files.
- Confirm the deletion by pressing Y when prompted.
- Repeat the previous two steps for each file you want to delete.
-
Use third-party cleanup software:
- Research and download a reliable third-party cleanup software such as CCleaner.
- Install the software and launch it.
- Select the option to clean up unnecessary Windows Installer files.
- Review the scan results and confirm the deletion of the identified files.
- Follow any additional prompts or instructions provided by the software.
-
Regularly perform system maintenance:
- Implement a regular system maintenance routine to prevent the accumulation of unnecessary Windows Installer files.
- Use disk cleanup tools, such as Windows Disk Cleanup, to remove temporary files and unnecessary system files.
- Uninstall unused programs through the Control Panel or Settings app.
- Regularly update your operating system and installed software to ensure optimal performance and security.
Final Thoughts and Recommendations
Cleaning up C Windows Installer files is an important step in maintaining your computer’s performance and freeing up valuable storage space. By following the steps outlined in this guide, you can ensure that your system remains clutter-free and optimized for better functionality.
Here are some key takeaways and recommendations to keep in mind:
1. Regularly clean up your C Windows Installer files to prevent accumulation of unnecessary data. This will help improve system performance and free up storage space on your hard disk drive.
2. Take caution when deleting files from the Installer folder. Make sure to only delete files that are no longer needed or associated with uninstalled applications.
3. Utilize the Control Panel (Windows) to uninstall any unwanted or unused programs from your computer. This will help reduce the number of unnecessary files in the Installer folder.
4. Consider using an uninstaller tool to thoroughly remove programs and associated files from your system. This can help ensure a more complete cleanup process.
5. If you encounter any issues during the cleanup process, consult the Microsoft TechNet or seek professional assistance to avoid any potential data loss or system instability.


