Welcome to the ASRock UEFI BIOS Recovery Guide, your go-to resource for troubleshooting and reviving your system’s BIOS. Delve into this article to uncover the secrets of recovering and restoring your ASRock UEFI BIOS, ensuring a seamless and hassle-free computing experience.
Recently, Fortect has become increasingly popular as a reliable and efficient way to address a wide range of PC issues. It's particularly favored for its user-friendly approach to diagnosing and fixing problems that can hinder a computer's performance, from system errors and malware to registry issues.
- Download and Install: Download Fortect from its official website by clicking here, and install it on your PC.
- Run a Scan and Review Results: Launch Fortect, conduct a system scan to identify issues, and review the scan results which detail the problems affecting your PC's performance.
- Repair and Optimize: Use Fortect's repair feature to fix the identified issues. For comprehensive repair options, consider subscribing to a premium plan. After repairing, the tool also aids in optimizing your PC for improved performance.
Understanding BIOS Recovery Methods
If you encounter any issues with your ASRock UEFI BIOS, there are a few recovery methods you can try.
First, ensure that your system is powered on and connected to a stable power supply (PSU).
If your PC is not booting properly, you can use the BIOS recovery utility provided by ASRock. This utility can help you recover your BIOS and fix any errors that may be causing the problem.
Follow the upgrade instruction guide provided by ASRock to avoid any potential issues.
If you experience a power outage during a BIOS update or encounter any other issues, you can use the BIOS recovery feature on ASRock motherboards.
Make sure to back up your important data before attempting any BIOS recovery.
If the BIOS recovery utility doesn’t work, you can try resetting the CMOS by using the CMOS jumper or removing the battery from the motherboard.
If none of these methods work, you may need to contact ASRock Tech Support or submit a support form for further assistance.
Loading Default BIOS Settings
If you’re experiencing issues with your ASRock UEFI BIOS and need to load the default settings, follow these simple steps:
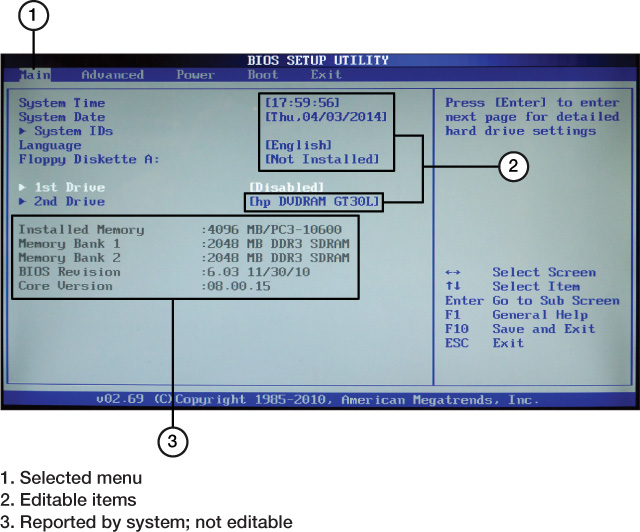
1. Start by accessing the UEFI BIOS setup utility. Restart your PC and press the Delete key (or another key specified by ASRock) to enter the BIOS.
2. Once inside the BIOS, navigate to the Exit tab using the arrow keys on your keyboard.
3. Look for an option called Load UEFI Defaults or Load Setup Defaults and select it.
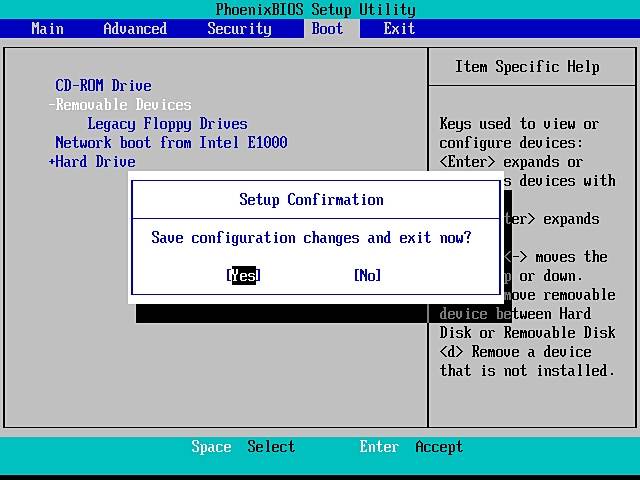
4. Confirm your selection and save the changes by selecting Exit and Save Changes or a similar option.
5. Your BIOS settings will now be reset to their default values. This can help resolve various issues such as boot errors, unstable overclocking, or compatibility problems.
Remember to adjust any necessary settings after loading the default BIOS settings, such as boot order or enabling virtualization if needed. If you continue to experience issues, consider reaching out to ASRock’s Tech Support or submitting a support form for further assistance.
Thanks for choosing ASRock!
Clearing CMOS and Removing CMOS Battery
To clear CMOS and remove the CMOS battery on an ASRock motherboard, follow these steps:
1. Power off your computer and disconnect the power supply cable from the PSU.
2. Open your computer case to access the motherboard.
3. Locate the CMOS jumper or clear CMOS pins on your motherboard. Refer to your motherboard’s manual for the exact location.
4. Use a jumper cap or a metal conductor to short the CMOS jumper or the clear CMOS pins for a few seconds. This will reset the CMOS settings.
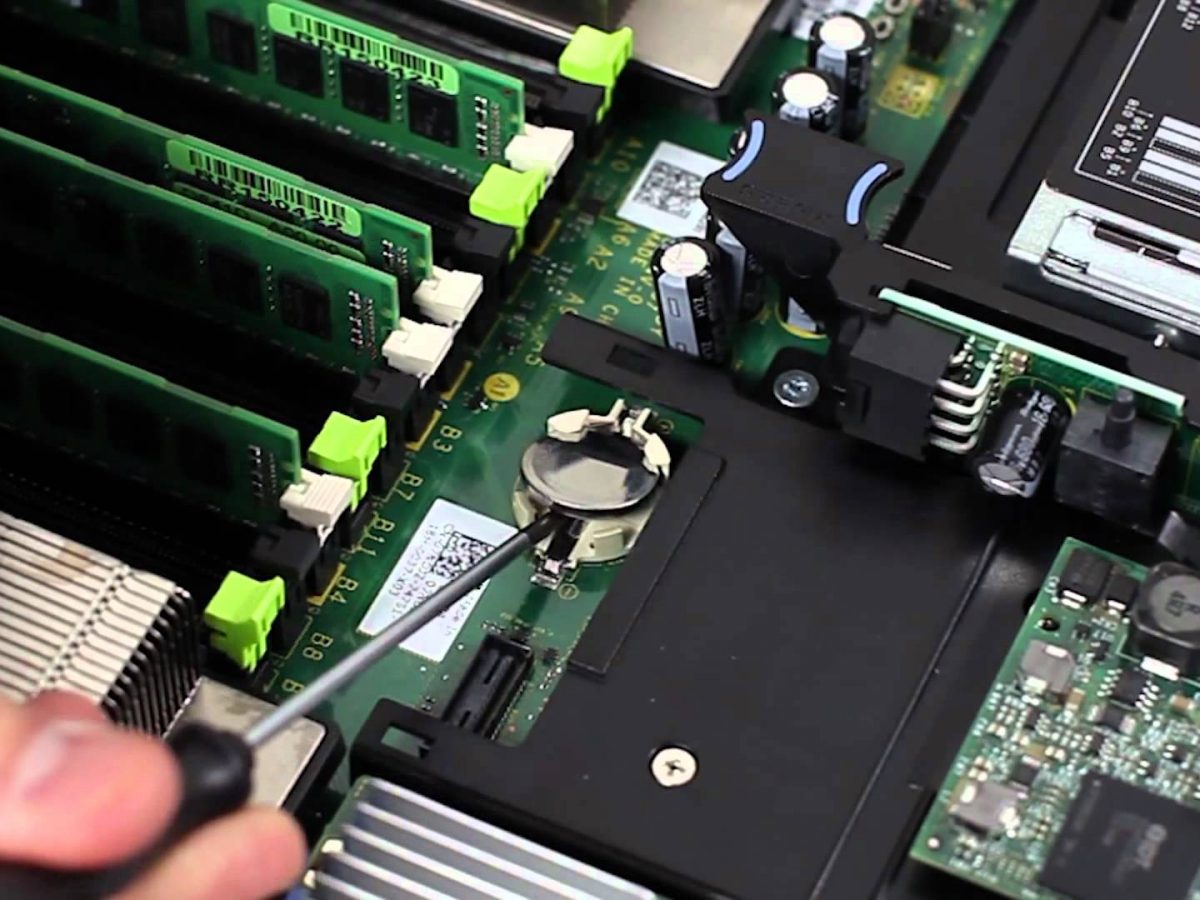
5. If your motherboard doesn’t have a CMOS jumper or clear CMOS pins, you can remove the CMOS battery instead. Gently pry the battery from its socket and leave it out for a few minutes.
6. After clearing the CMOS, reinsert the CMOS battery (if removed) and put the jumper cap back in its original position or remove the metal conductor.
7. Close your computer case and reconnect the power supply cable.
8. Power on your computer and access the UEFI BIOS setup utility to reconfigure your settings.
python

import os
def recover_bios():
# Implement the necessary steps to recover the BIOS
# This could involve flashing firmware, resetting CMOS, etc.
# Please refer to official documentation or specific guidelines for your motherboard
# Example code: Flashing the BIOS using a file
bios_file_path = "path_to_bios_file.bin"
if os.path.exists(bios_file_path):
# Flash the BIOS using the provided file
# This code is a placeholder, and the actual implementation will vary based on the motherboard
flash_bios(bios_file_path)
print("BIOS recovery successful!")
else:
print("BIOS file not found. Unable to recover BIOS.")
def flash_bios(bios_file_path):
# Code to flash the BIOS using the provided file
# This is a placeholder and will differ based on the motherboard manufacturer
# Use manufacturer-provided tools or documented methods for flashing the BIOS
pass
# Entry point of the tool
if __name__ == "__main__":
print("ASRock UEFI BIOS Recovery Tool")
# Call the recover_bios function to initiate the recovery process
recover_bios()
Troubleshooting BIOS Update Issues
- Check for power supply issues:
- Make sure the power cable is properly connected to the computer and the power outlet.
- Verify that the power outlet is working by plugging in another device.
- Check if the power supply unit (PSU) is functioning correctly.
- Reset the BIOS settings:
- Power off the computer and disconnect the power cable.
- Locate the CMOS battery on the motherboard.
- Remove the CMOS battery and wait for a few minutes.
- Reinsert the CMOS battery and reconnect the power cable.
- Power on the computer and enter the BIOS settings.
- Restore the default BIOS settings.
- Use the BIOS recovery feature:
- Check the motherboard manual or manufacturer’s website for instructions on using the BIOS recovery feature.
- Download the appropriate BIOS recovery file from the manufacturer’s website.
- Copy the BIOS recovery file to a USB flash drive.
- Insert the USB flash drive into the computer.
- Power on the computer and enter the BIOS settings.
- Navigate to the BIOS recovery option and select the USB flash drive as the source.
- Follow the on-screen instructions to complete the BIOS recovery process.
- Update the BIOS using a bootable USB drive:
- Download the latest BIOS update from the manufacturer’s website.
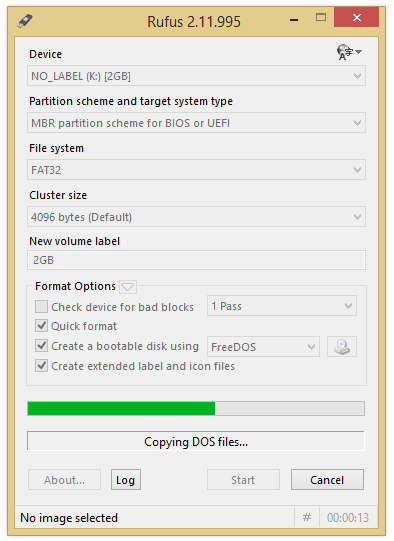
- Create a bootable USB drive using a tool like Rufus.
- Copy the BIOS update file to the bootable USB drive.
- Power off the computer and insert the bootable USB drive.
- Power on the computer and enter the BIOS settings.
- Navigate to the BIOS update option and select the bootable USB drive as the source.
- Follow the on-screen instructions to update the BIOS.


