Having trouble with the Windows 7 Service Pack 1 64-bit installation? Let’s troubleshoot the issue together.
Recently, Fortect has become increasingly popular as a reliable and efficient way to address a wide range of PC issues. It's particularly favored for its user-friendly approach to diagnosing and fixing problems that can hinder a computer's performance, from system errors and malware to registry issues.
- Download and Install: Download Fortect from its official website by clicking here, and install it on your PC.
- Run a Scan and Review Results: Launch Fortect, conduct a system scan to identify issues, and review the scan results which detail the problems affecting your PC's performance.
- Repair and Optimize: Use Fortect's repair feature to fix the identified issues. For comprehensive repair options, consider subscribing to a premium plan. After repairing, the tool also aids in optimizing your PC for improved performance.
Pre-Installation Checklist
- Ensure there is enough disk space available for installation
- Check for any conflicting software or hardware
- Verify system requirements are met
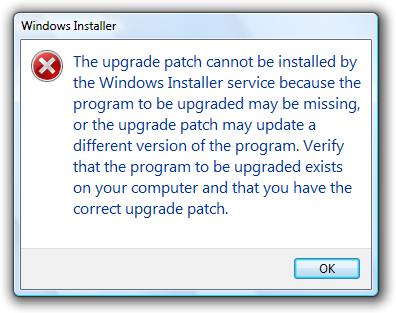
Troubleshooting Installation Errors
If you are experiencing installation errors with Windows 7 Service Pack 1 64-bit, there are a few troubleshooting steps you can take to resolve the issue.
First, ensure that your computer meets the minimum system requirements for the service pack. Check that you have enough free disk space and that your computer is running a genuine version of Windows 7.
Next, try running the System File Checker tool to scan for and repair any corrupted system files. To do this, open a Command Prompt as an administrator and type “sfc /scannow” and press Enter.
It’s also a good idea to temporarily disable your antivirus software during the installation process, as it may be interfering with the installation. Make sure to re-enable it once the installation is complete.
If you continue to experience issues, you can try performing a clean boot of your system to rule out any third-party software conflicts. To do this, open the System Configuration tool by typing “msconfig” in the Start menu search bar, navigate to the Services tab, check the “Hide all Microsoft services” checkbox, and then click “Disable all”.
If all else fails, you can try using the Windows Update troubleshooter or download the service pack from the Microsoft Update Catalog and install it manually.
Running System Restore and Update Tools
| Step | Description |
|---|---|
| Step 1 | Open the Control Panel and select “System and Security.” |
| Step 2 | Click on “System” and then select “System Protection” from the left-hand menu. |
| Step 3 | Click on “System Restore” and follow the on-screen instructions to restore your system to a previous working state. |
| Step 4 | After running System Restore, navigate back to the Control Panel and select “System and Security” again. |
| Step 5 | Click on “Windows Update” and then select “Check for updates” to ensure your system is up to date. |
| Step 6 | Install any available updates and restart your computer if prompted to do so. |
Manual Installation Guidelines
If the Windows 7 Service Pack 1 64-bit installation has failed, you can try manually installing it to troubleshoot the issue.
First, make sure you have a backup of all your important data in case anything goes wrong during the installation process.
Next, download the Windows 7 Service Pack 1 64-bit installation file from the Microsoft Update Catalog or another trusted source.
Once the file is downloaded, double-click on it to start the installation process.
If you encounter any errors during the installation, you can use the System File Checker tool to scan for and repair any corrupted system files. To do this, open a Command Prompt as an administrator and type sfc /scannow.
You can also try checking the Windows Registry for any issues that may be preventing the installation. Be cautious when making changes to the registry, as incorrect modifications can cause serious problems with your operating system.
In some cases, antivirus software can interfere with the installation process. Temporarily disable your antivirus software before attempting to install the service pack.
If all else fails, consider using the Windows Assessment and Deployment Kit to create a custom installation image that may bypass the issues you are encountering.
Post-Installation Recommendations
- Check system requirements:
- Ensure that your computer meets the minimum system requirements for Windows 7 Service Pack 1 64-bit installation.
- Run Windows Update:
- Open Windows Update by clicking on the Start button, then clicking on All Programs, and then clicking on Windows Update.
- Click on Check for updates and install any available updates.
- Check for conflicting software:
- Uninstall any security software, such as antivirus or firewall programs, that may be conflicting with the installation of Windows 7 Service Pack 1.
- Run System File Checker:
- Open Command Prompt by clicking on the Start button, then typing cmd in the search box, and then right-clicking on Command Prompt and selecting Run as administrator.
- Type sfc /scannow and press Enter to run the System File Checker.
- Perform a clean boot:
- Open System Configuration by clicking on the Start button, then typing msconfig in the search box, and then clicking on System Configuration in the list of results.
- On the General tab, click on Selective startup, and then uncheck the Load startup items box.
- Click on the Services tab, check the Hide all Microsoft services box, and then click on Disable all.
- Click on OK and then restart your computer.


