In this article, I will discuss how to manage sound output devices in Windows 10.
Recently, Fortect has become increasingly popular as a reliable and efficient way to address a wide range of PC issues. It's particularly favored for its user-friendly approach to diagnosing and fixing problems that can hinder a computer's performance, from system errors and malware to registry issues.
- Download and Install: Download Fortect from its official website by clicking here, and install it on your PC.
- Run a Scan and Review Results: Launch Fortect, conduct a system scan to identify issues, and review the scan results which detail the problems affecting your PC's performance.
- Repair and Optimize: Use Fortect's repair feature to fix the identified issues. For comprehensive repair options, consider subscribing to a premium plan. After repairing, the tool also aids in optimizing your PC for improved performance.
Preparatory Steps
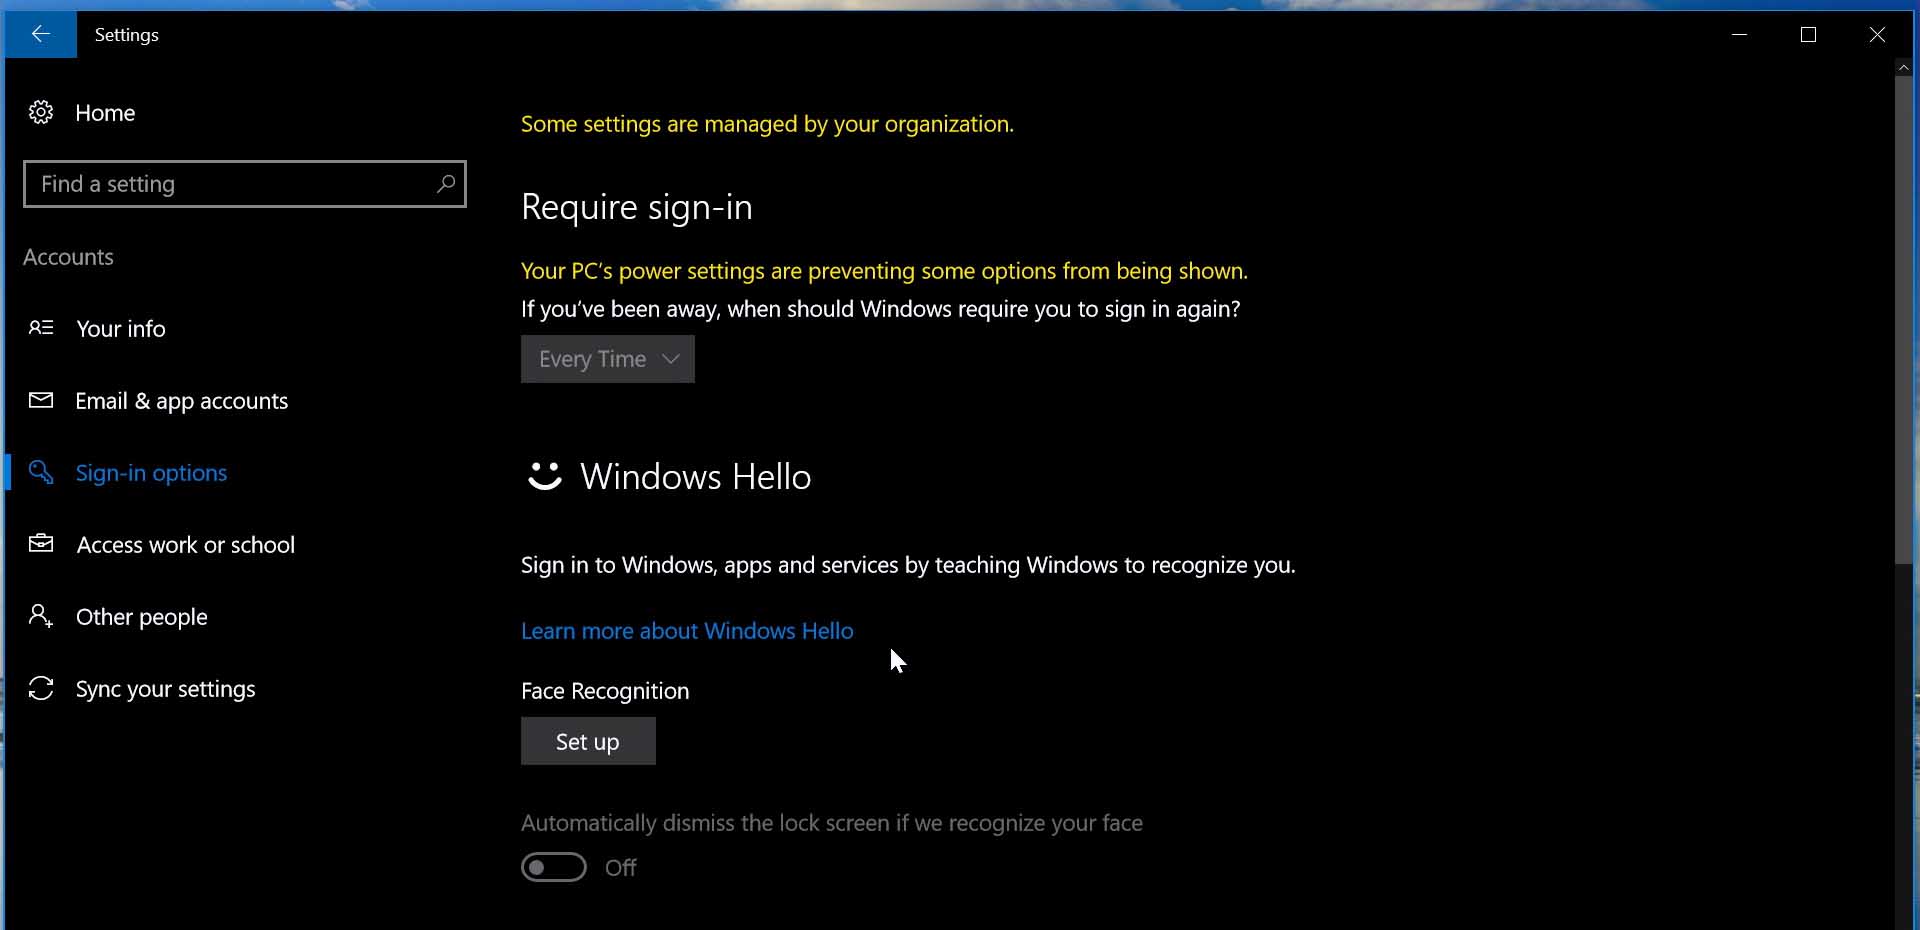
Next, right-click on the speaker icon in the taskbar at the bottom right corner of your screen. Select Open Sound settings from the drop-down list that appears. This will open the Sound settings window where you can manage your output devices.
In the Sound settings window, you will see a list of all the output devices connected to your computer. Choose the device you want to manage and click on it. You can then set it as the default device by clicking on the Set as Default button. This will ensure that all sound output is directed to that device.
If you’re having trouble with a specific output device, you may need to update the device driver. To do this, go to the Device Manager by searching for it in the Windows search bar. Locate your output device in the list of devices and right-click on it. Select Update driver and follow the on-screen instructions to update the driver.
If you’re still experiencing issues with your sound output devices, you may need to check for Windows updates. Go to Settings, then Update & Security, and click on Check for updates. If there are any updates available, download and install them to ensure that your system is up-to-date.
It’s also a good idea to check the sound settings in the BIOS of your computer. Restart your computer and enter the BIOS by pressing the appropriate key (usually F2 or Delete) during the boot process. Look for the sound settings and make sure they are configured correctly.
Once you have completed these preparatory steps, you should be able to successfully manage your sound output devices in Windows 10. If you continue to experience issues, consider seeking additional help or feedback from a technical support professional.
Installing a New Microphone
To install a new microphone on your Windows 10 computer, follow these steps:
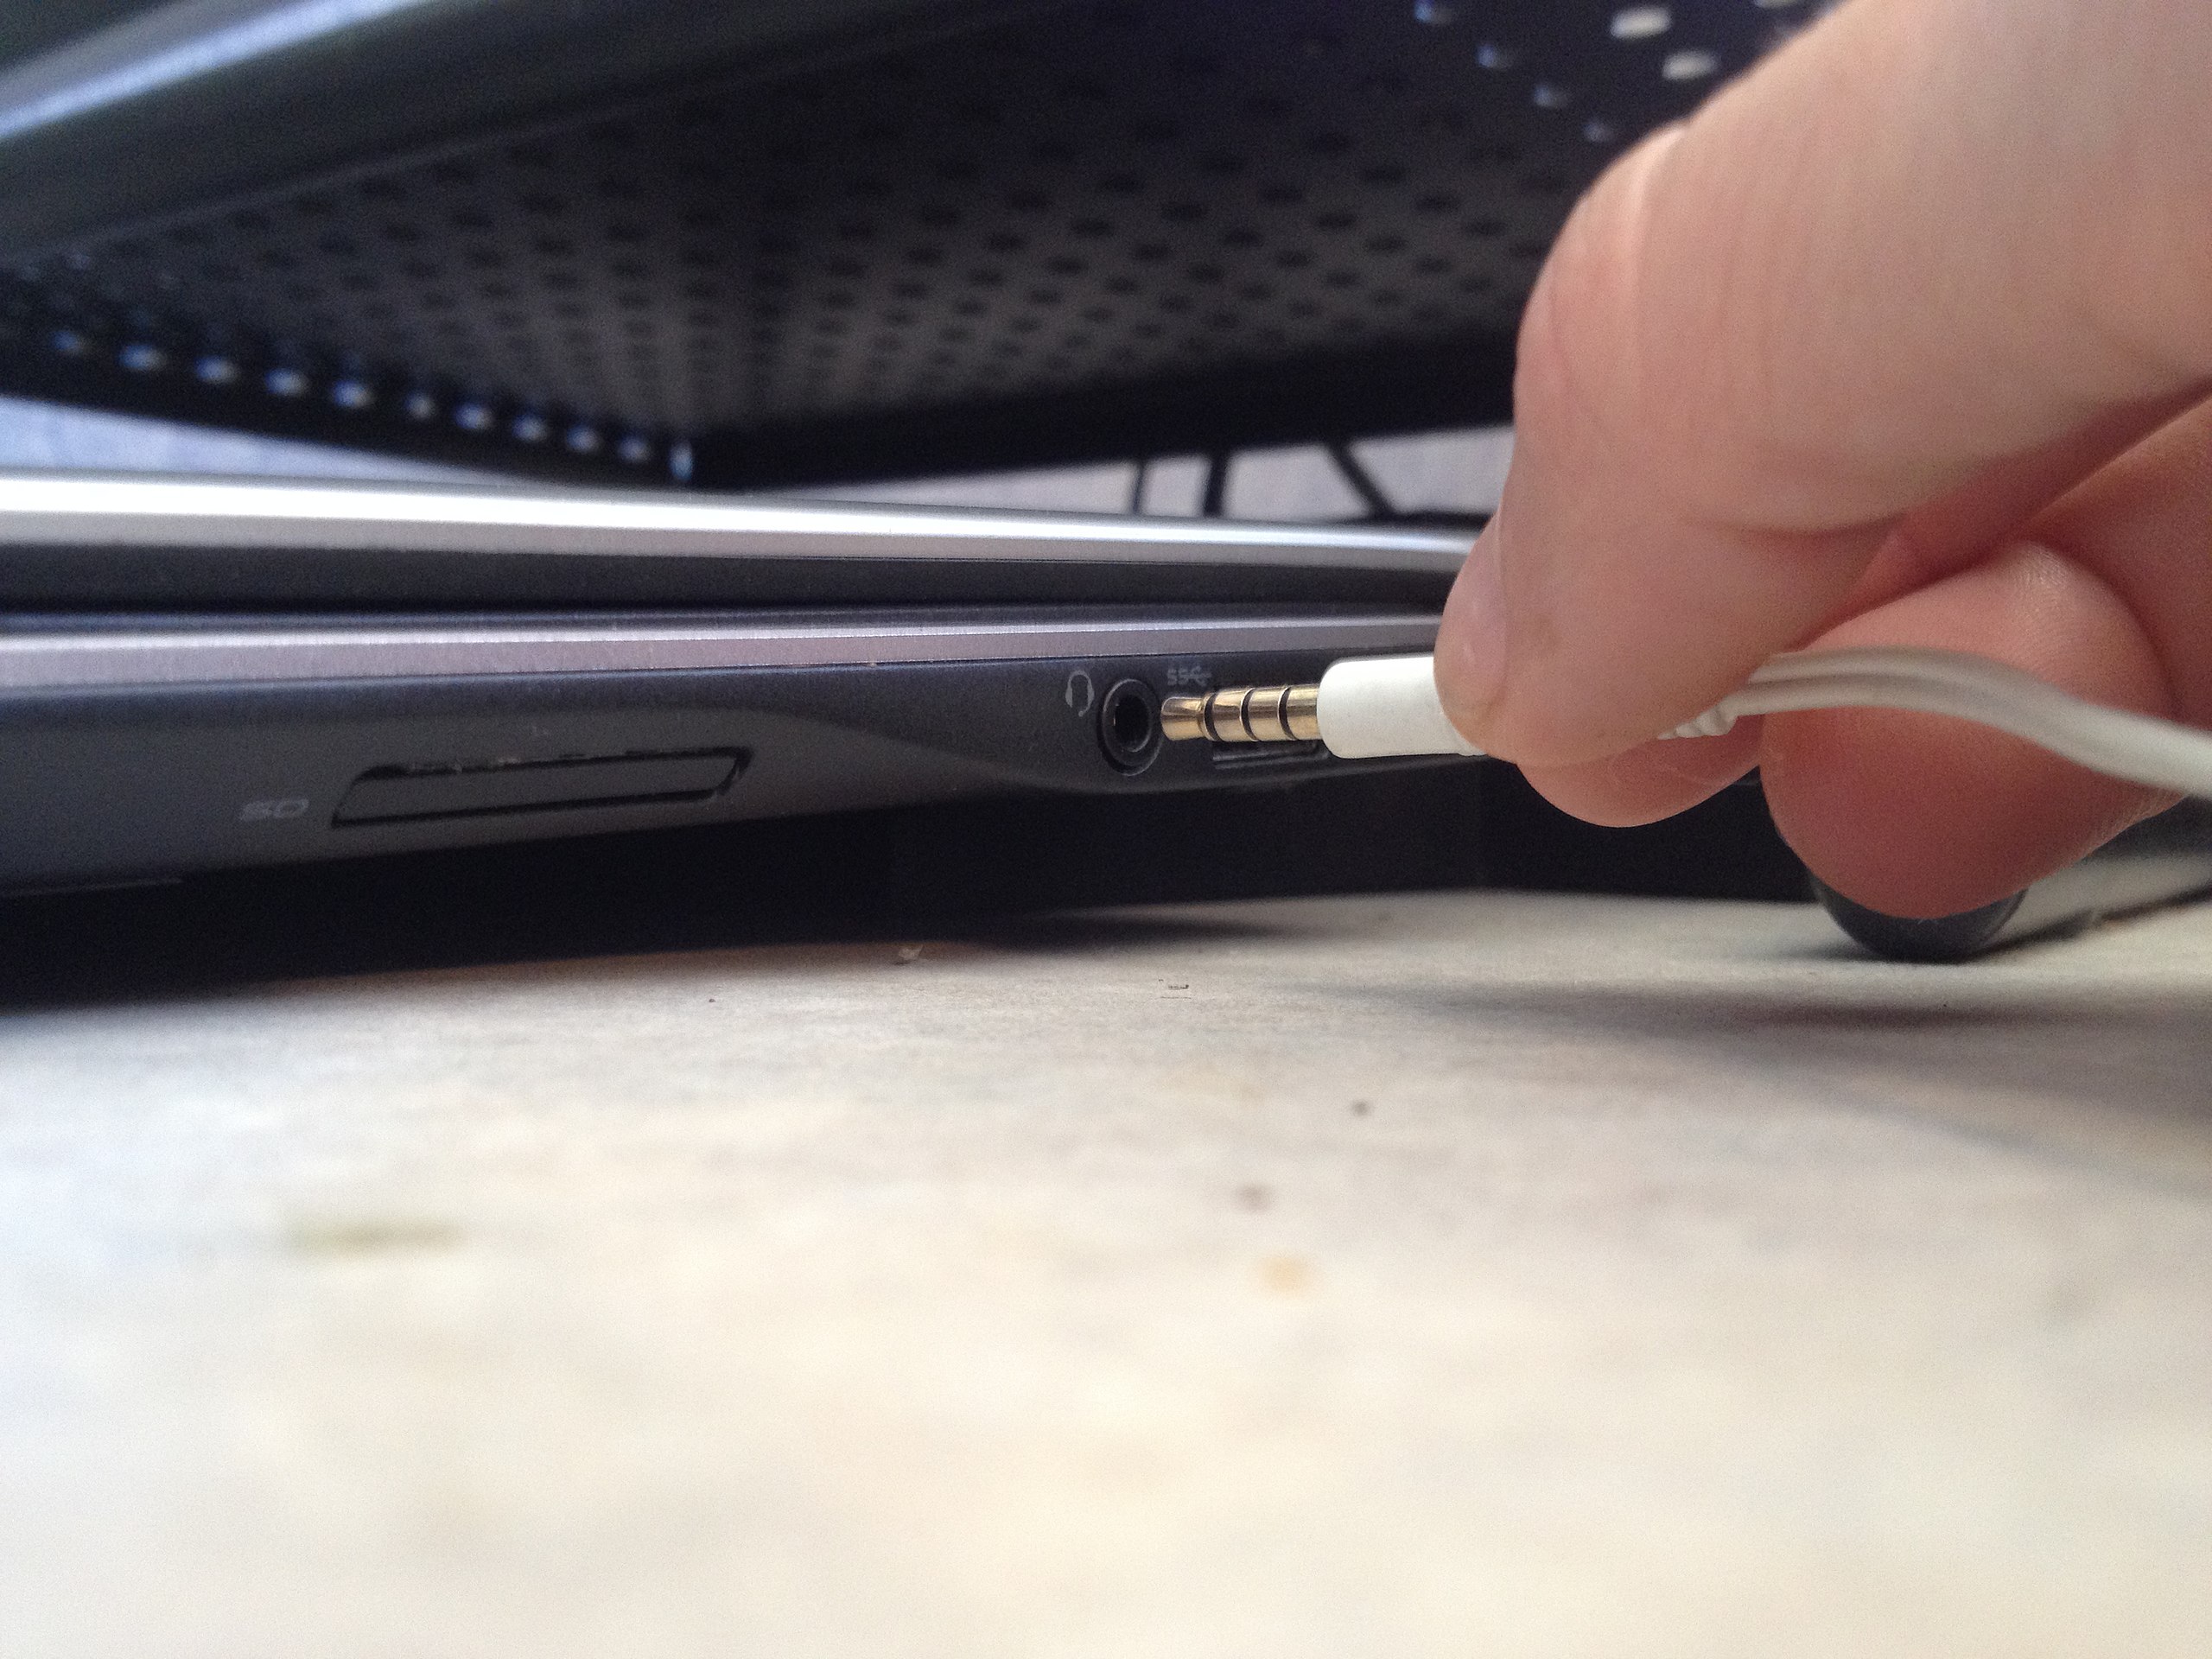
1. Connect the microphone to your computer: First, plug the microphone into the appropriate port on your computer. This may be a USB port or a microphone jack, depending on the type of microphone you are using.
2. Check the microphone settings: Right-click on the speaker icon in the taskbar and select “Open Sound settings.” Under the “Input” section, make sure the microphone you just connected is selected as the default device.
3. Adjust microphone properties: Click on “Device properties” below the input device to adjust settings such as volume and microphone boost. You can also test the microphone to ensure it is working properly.
4. Install device drivers: If your microphone requires specific drivers to function properly, you may need to install them. You can do this by right-clicking on the Start button, selecting “Device Manager,” and locating the microphone under the “Audio inputs and outputs” section. Right-click on the microphone and select “Update driver.”
5. Check for Windows updates: It’s always a good idea to make sure your computer is up to date with the latest Windows updates. Go to Settings > Update & Security > Windows Update and click on “Check for updates.”
6. Test the microphone: Once you have connected the microphone, adjusted settings, and installed drivers (if necessary), test the microphone to ensure it is working properly. You can do this by opening an application that uses the microphone, such as a voice recording app or video conferencing software.
7. Adjust microphone levels: If the microphone is too loud or too quiet, you can adjust the levels by right-clicking on the speaker icon in the taskbar, selecting “Open Sound settings,” and clicking on “Device properties” below the input device. From there, you can adjust the microphone volume and microphone boost levels.
8. Troubleshoot any issues: If you encounter any problems with the microphone, such as it not being detected or not working properly, you can troubleshoot the issue by going to Settings > Update & Security > Troubleshoot and running the “Recording Audio” troubleshooter.
Testing an Installed Microphone
To test an installed microphone in Windows 10, follow these steps:
1. Open the Control Panel: Click on the Windows icon in the bottom left corner of your screen, then select “Control Panel” from the list of options.
2. Navigate to the Sound settings: In the Control Panel, click on “Hardware and Sound,” then select “Sound.”
3. Check the recording devices: In the Sound window, go to the “Recording” tab. Here, you will see a list of all the recording devices connected to your computer, including the installed microphone.
4. Test the microphone: Right-click on the microphone you want to test and select “Properties.” In the Properties window, go to the “Levels” tab. Adjust the microphone level to an appropriate volume by moving the slider up or down. Click on “OK” to save the changes.
5. Use the built-in sound recorder: Open the built-in sound recorder in Windows 10 by typing “Sound Recorder” in the search bar. Start recording a short audio clip to test the microphone. Play back the recording to check if the microphone is working properly.
6. Check for updates: Make sure your device drivers are up to date by checking for Windows Updates. Go to the Settings menu, then select “Update & Security” and click on “Windows Update.” Check for any available updates and install them if necessary.
7. Test the microphone with other applications: Open a communication app or a video conferencing tool that uses the microphone. Test the microphone by speaking into it and checking if the audio is being picked up correctly.
8. Troubleshoot any issues: If the microphone is not working properly, troubleshoot the issue by checking the connection, restarting the computer, or updating the device drivers. You can also seek help from the manufacturer’s support website or contact technical support for further assistance.
Adding a New Output Device
![]()
To add a new output device in Windows 10, follow these simple steps. First, right-click on the speaker icon in the system tray located at the bottom right corner of your screen. Select “Open Sound settings” from the menu that appears.
Next, scroll down to the “Advanced sound options” section and click on “App volume and device preferences.” Here, you can assign specific output devices to different apps running on your computer.
If you want to add a new output device that is not currently listed, click on the drop-down menu under “Output” and select “Add device.” Follow the on-screen instructions to install the necessary drivers for the new device.
After the new device is added, you can select it as the default output device by going back to the main Sound settings page and clicking on the drop-down menu under “Choose your output device.”
Choose the new device from the list of available options. You can also adjust the volume and sound settings for the new device by clicking on “Device properties” under the same drop-down menu.
Once you have completed these steps, the new output device should be ready to use with your Windows 10 computer. If you encounter any issues or need further assistance, you can always refer to the Microsoft Windows support website for additional help.
Instructions for Setup
- Connect your desired sound output device to your computer.
- Open the Start menu and go to Settings.
- Select System and then click on Sound.
- Under the “Output” section, choose your preferred audio device from the drop-down menu.
- Adjust the volume levels for the selected device.
- Test the sound output to ensure it is working properly.
Article Guidelines
To manage sound output devices in Windows 10, you can easily access the settings through the Control Panel or the Settings app.
1. Control Panel:
To manage sound output devices through the Control Panel, simply right-click on the speaker icon in the taskbar and select “Sounds.” From there, you can choose the playback device you want to use and set it as the default.
2. Settings app:
Alternatively, you can also manage sound output devices through the Settings app. Go to Settings > System > Sound, and under the “Output” section, you can select the device you want to use for sound output.
3. Troubleshooting:
If you are experiencing issues with your sound output devices, you can troubleshoot them by going to Settings > Update & Security > Troubleshoot. From there, you can run the troubleshooter for audio playback to identify and fix any problems.
4. Updating drivers:
To ensure that your sound output devices are working properly, it is important to keep your device drivers up to date. You can do this by going to Device Manager, right-clicking on the audio device, and selecting “Update driver.”
5. Customizing sound settings:
In addition to managing sound output devices, you can also customize your sound settings in Windows 10. This includes adjusting the volume, changing the sound scheme, and configuring sound enhancements.
Configuration Properties
| Property | Description |
|---|---|
| Default Output Device | Determines which device sound will play through by default. |
| Volume | Controls the overall volume level of the output device. |
| Balance | Adjusts the balance of sound between left and right speakers. |
| Enhancements | Allows for audio enhancements to be applied to the sound output. |
| Spatial Sound | Enables 3D spatial sound for compatible devices. |
FAQs
Why is audio output device not showing up in Windows 10?
The audio output device may not be showing up in Windows 10 due to corrupt, missing, or outdated drivers. Updating the sound drivers is the most effective solution to fix this error.
How do I enable audio output device on my computer?
To enable an audio output device on your computer, you can right click the sound icon in the system tray, open sound settings, and then manage your sound devices to enable the desired device.
What is the output sound device?
The output sound device is responsible for converting sound wave data generated by a computer into usable sound signals, which are then used to produce sound through changes in air pressure.
How do I install Windows 10 audio output device?
To install a Windows 10 audio output device, you can update the driver by right-clicking on the audio device, selecting “Update driver,” choosing the “Browse my computer for drivers” option, picking from a list of available drivers, selecting the appropriate driver, and clicking “Next” to install it.


