Are you experiencing issues with your Windows 10 updates due to a pending.XML error? Here’s a quick guide on how to fix it.
Recently, Fortect has become increasingly popular as a reliable and efficient way to address a wide range of PC issues. It's particularly favored for its user-friendly approach to diagnosing and fixing problems that can hinder a computer's performance, from system errors and malware to registry issues.
- Download and Install: Download Fortect from its official website by clicking here, and install it on your PC.
- Run a Scan and Review Results: Launch Fortect, conduct a system scan to identify issues, and review the scan results which detail the problems affecting your PC's performance.
- Repair and Optimize: Use Fortect's repair feature to fix the identified issues. For comprehensive repair options, consider subscribing to a premium plan. After repairing, the tool also aids in optimizing your PC for improved performance.
Troubleshooting Pending.xml Errors
To troubleshoot Pending.xml errors in Windows 10 updates, first locate the file in C:\Windows\WinSxS\pending.xml. Check the file information and look for any errors, such as missing lines or root element. Use the sfc /scannow command to check for system file corruption. If the issue persists, try using the System Update Readiness Tool or checksur tool to fix XML errors. You can also try deleting the pending.xml file and rebooting the system, which may trigger the creation of a new file and resolve the issue. If you receive a code 0x80073712 error, it may be related to a gpnp profile or musnotifyicon.exe. It’s important to note that fixing these errors may require a reboot or system repair pending.
Restoring Your PC to Fix Runtime Errors
Restoring your PC to fix runtime errors is a simple process that can help resolve the “Fixing Pending.XML Error in Windows 10 Updates” issue. Begin by pressing the Windows key + R, type “msconfig” in the dialog box and click “OK”. Next, select the “Boot” tab, check the box next to “Safe Boot”, and click “OK”. Restart your PC and let it boot into safe mode. Then, open File Explorer and navigate to “C:\Windows\WinSxS”. Locate the “pending.xml” file and delete it. After deleting the file, restart your PC, press the Windows key + R, type “msconfig” in the dialog box and uncheck the box next to “Safe Boot”. Restart your PC again and the issue should be resolved. If the issue persists, try running the “sfc /scannow” command in the Command Prompt or using the System Update Readiness Tool or the checksur tool.
Uninstalling and Reinstalling Microsoft Office to Fix Errors
To fix the Pending.XML error in Windows 10 Updates, uninstalling and reinstalling Microsoft Office may be necessary. First, uninstall Microsoft Office by going to the Control Panel, selecting Programs and Features, and choosing Microsoft Office. Then, reinstall Microsoft Office by downloading the installation file from the Microsoft website or using the installation disc. After reinstalling, restart your computer and check if the error has been resolved. If the error persists, try running a system repair pending scan by opening Command Prompt as an administrator and typing in “sfc /scannow”. This should detect and repair any system file errors. If this does not work, other troubleshooting methods may be necessary.
Performing Windows Updates to Resolve Issues
- Check for Windows Updates
- Open the Start Menu
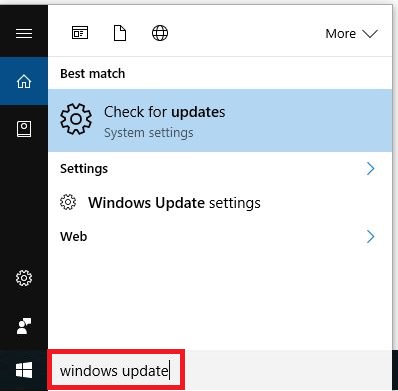
- Type “Windows Update” and click “Check for Updates“
- If updates are available, click “Install Updates“
- Run the Windows Update Troubleshooter
- Open the Start Menu
- Type “Troubleshoot” and click “Troubleshoot Settings“

- Click “Additional Troubleshooters“
- Click “Windows Update” and then click “Run the Troubleshooter“
- Follow the prompts to complete the troubleshooter
- Manually Download and Install Updates
- Go to the Microsoft Update Catalog website
- Type the KB number of the update you want to download and click “Search“
- Select the correct update for your system and click “Download“
- Double-click the downloaded file and follow the prompts to install the update
- Reset the Windows Update Components
- Open the Command Prompt as an administrator
- Type the following commands and press Enter after each one:
net stop wuauserv
net stop cryptSvc
net stop bits
net stop msiserver
ren C:\Windows\SoftwareDistribution SoftwareDistribution.old
ren C:\Windows\System32\catroot2 catroot2.old
net start wuauserv
net start cryptSvc
net start bits
net start msiserver


