If you own an HP Officejet 4620 printer and are experiencing issues with black ink printing, don’t worry – you’re not alone. Many users have reported similar problems, but fortunately, there are solutions available. In this article, we’ll explore some of the common causes of this issue and provide steps to help you fix it.
Recently, Fortect has become increasingly popular as a reliable and efficient way to address a wide range of PC issues. It's particularly favored for its user-friendly approach to diagnosing and fixing problems that can hinder a computer's performance, from system errors and malware to registry issues.
- Download and Install: Download Fortect from its official website by clicking here, and install it on your PC.
- Run a Scan and Review Results: Launch Fortect, conduct a system scan to identify issues, and review the scan results which detail the problems affecting your PC's performance.
- Repair and Optimize: Use Fortect's repair feature to fix the identified issues. For comprehensive repair options, consider subscribing to a premium plan. After repairing, the tool also aids in optimizing your PC for improved performance.
Troubleshooting the HP Officejet 4620 black ink printing issue
If you are experiencing black ink printing issues with your HP Officejet 4620, try the following steps:
1. Check the ink cartridge levels and replace if necessary.
2. Clean the print head using the printer’s maintenance function. Refer to the user manual for instructions.
3. Check for any paper jams or obstructions in the printer.
4. Make sure the ink cartridge is inserted correctly into the ink cartridge socket.
5. Reset the printer by turning it off and unplugging it for a few minutes.
If these steps do not resolve the issue, it may be necessary to replace the black ink cartridge or contact HP for further assistance. Remember to always use genuine HP ink cartridges to ensure proper function and avoid damage to the printer.
Checking and replacing the black ink cartridge
- Open the printer cover and remove the black ink cartridge.
- Make sure the printer is turned on and wait until it becomes idle.
- Press the power button to turn off the printer.
- Open the printer cover and wait for the carriage to move to the center.
- Press the tab on the black ink cartridge to release it, and then remove it from the printer.
- Check the ink level of the black ink cartridge.
- Inspect the ink level on the black ink cartridge.
- If the ink level is low or empty, replace the cartridge with a new one.
- If the ink level is sufficient, proceed to the next step.
- Clean the contacts and nozzles of the black ink cartridge.
- Use a lint-free cloth to wipe the copper-colored contacts on the cartridge.
- Gently wipe the nozzles on the cartridge with the cloth in one direction.
- Reinstall the black ink cartridge in the printer.
- Print a test page.
- Close the printer cover and wait for the printer to initialize.
- Press the “OK” button on the printer control panel.

- Select “Tools” on the printer display, and then select “Print Quality Report.”
- Inspect the test page for any black ink printing issues.
Cleaning the printhead and aligning the printer
| Cleaning the Printhead and Aligning the Printer | |
|---|---|
| Step | Description |
| Step 1 | Turn on the printer and lift the scanner lid to access the printhead. |
| Step 2 | Remove the ink cartridges from the printhead. |
| Step 3 | Take a lint-free cloth and dampen it with distilled water. |
| Step 4 | Gently wipe the printhead nozzles and electrical contacts with the damp cloth. |
| Step 5 | Reinstall the ink cartridges into the printhead. |
| Step 6 | Close the scanner lid and press the “OK” button on the printer control panel. |
| Step 7 | Select “Tools” from the printer control panel and then choose “Align Printer.” |
| Step 8 | Follow the instructions on the printer control panel to align the printer. |
| Step 9 | Print a test page to ensure that the black ink printing problem is resolved. |
1. Check if the printer is turned on and connected to the computer.

2. Check the ink level of the black ink cartridge.

3. If the ink level is low, prompt the user to replace the cartridge.

4. If the ink level is sufficient, run a printhead cleaning cycle.

5. Check if the printer is still not printing black.

6. If the issue persists, prompt the user to contact customer support for further assistance.
Note: This is just a basic outline and would require further development and testing to create a functional tool.
Updating the printer driver and using diagnostic tools
To fix the black ink printing problem in HP Officejet 4620, two things can be done: updating the printer driver and using diagnostic tools.
Updating the Printer Driver: Go to the HP website and download the latest driver that corresponds to your printer model. Install it and restart your computer.
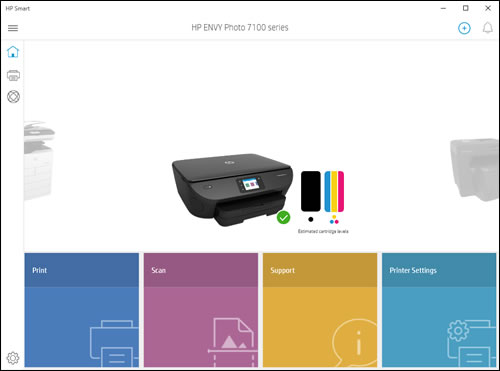
Using Diagnostic Tools: Use the HP Print and Scan Doctor tool to diagnose and fix printing problems. Download and install it from the HP website. Launch the tool and follow the on-screen instructions to diagnose the problem.
If the problem persists, try cleaning the print head or replacing the ink cartridge. Refer to your printer manual or the HP website for instructions. Keep in mind that HP printer ink can be expensive, so it’s a good idea to choose a cost-effective option.


