Having no sound on your computer can be frustrating. In this article, I will provide solutions to fix the issue and get your sound working again.
Recently, Fortect has become increasingly popular as a reliable and efficient way to address a wide range of PC issues. It's particularly favored for its user-friendly approach to diagnosing and fixing problems that can hinder a computer's performance, from system errors and malware to registry issues.
- Download and Install: Download Fortect from its official website by clicking here, and install it on your PC.
- Run a Scan and Review Results: Launch Fortect, conduct a system scan to identify issues, and review the scan results which detail the problems affecting your PC's performance.
- Repair and Optimize: Use Fortect's repair feature to fix the identified issues. For comprehensive repair options, consider subscribing to a premium plan. After repairing, the tool also aids in optimizing your PC for improved performance.
Check your volume settings
If you are experiencing no sound on your computer, one of the first things you should check is your volume settings. This may seem obvious, but sometimes the volume can accidentally be turned down or muted.
To check your volume settings on Windows 10, follow these steps:
1. Look for the speaker icon on your taskbar, usually located on the bottom right corner of the screen. If you don’t see it, click on the upward arrow to expand the hidden icons.
2. Once you locate the speaker icon, right-click on it to open the context menu.
3. In the context menu, click on “Open Volume Mixer.” This will open the Volume Mixer window, where you can adjust the volume for individual applications.
4. In the Volume Mixer window, make sure that the volume sliders for the different applications are turned up. Sometimes, specific applications may have their volume set to zero or muted.
5. If the volume sliders are already up and you still have no sound, click on the speaker icon again and select “Sounds.”
6. In the Sounds window, go to the “Playback” tab and make sure that your output device is set as the default device. If not, select the correct device and click on “Set Default.”
7. If you are using headphones or a headset, make sure they are properly connected to your computer. Sometimes, the sound may be directed to the wrong output device if headphones or a headset are connected.
8. After checking these settings, try playing a sound or video to see if you have sound now. If not, there may be an issue with your sound card or device drivers.
Remember, these steps are specific to Windows 10, but the general concept of checking volume settings applies to other versions of Windows as well. If you are using a different operating system, you can usually find similar settings in the control panel or system preferences.
If you have checked your volume settings and still have no sound, you may need to troubleshoot further or seek professional help.
Restart or change your audio device
1. Open the Start menu and navigate to the Control Panel (Windows).
2. Click on the “Sound” icon or search for “Sound” in the Control Panel search bar.
3. In the Sound settings window, go to the “Playback” tab.
4. Look for your audio device in the list of playback devices. It may be labeled with the name of your sound card or headset.
5. Right-click on your audio device and select “Properties” from the drop-down menu.
6. In the Properties window, go to the “General” tab.
7. Click on the “Disable” button to temporarily disable your audio device.
8. Wait for a few seconds, then right-click on your audio device again and select “Enable” from the drop-down menu.
9. Check if the sound issue is resolved. If not, proceed to the next step.
10. Open the Start menu and search for “Device Manager.”
11. Click on the Device Manager icon to open the Device Manager window.
12. In the Device Manager, expand the “Sound, video and game controllers” category.
13. Locate your audio device in the list and right-click on it.
14. Select “Uninstall device” from the drop-down menu.
15. Confirm the uninstallation if prompted.
16. Restart your computer.
17. After the restart, Windows will automatically detect and reinstall the audio driver for your device.
18. Check if the sound is working now.
If you’re still experiencing no sound on your computer, there may be other underlying issues. It’s recommended to update Windows and run troubleshooting tools to identify and fix any software-related problems. Additionally, you can try connecting external speakers or headphones to see if the issue lies with your computer’s hardware. If all else fails, it might be worth seeking professional assistance or contacting the manufacturer of your computer or audio device for further support.
Install or update audio or speaker drivers
1. Open the Control Panel on your Windows computer. You can do this by clicking on the Start menu and typing “Control Panel” in the search bar. Then, select the Control Panel from the search results.
2. In the Control Panel, locate and click on the “Device Manager” option. This will open a new window displaying a list of all the devices connected to your computer.
3. Look for the “Sound, video, and game controllers” category in the Device Manager window. Click on the arrow next to it to expand the category and reveal the audio devices installed on your computer.
4. Right-click on the audio device that is not working or needs an update. From the context menu that appears, select “Update driver” to start the driver update process.
5. A new window will appear asking how you want to search for drivers. Choose the option to “Search automatically for updated driver software.” Windows will then search for the latest drivers for your audio device and install them if any updates are found.
6. If Windows is unable to find updated drivers automatically, you may need to visit the manufacturer’s website for your audio device and manually download the latest drivers. Look for a support or downloads section on the manufacturer’s website and search for the model of your audio device. Download the appropriate driver and follow the installation instructions provided.
7. Once the driver update is complete, restart your computer to apply the changes. After the restart, check if the sound is working properly.
Remember to regularly check for driver updates using Windows Update or by visiting the manufacturer’s website. Keeping your audio drivers up to date can help resolve sound-related issues and ensure optimal performance.
If you’re still experiencing issues with the sound on your computer after updating the drivers, you may need to troubleshoot further or seek additional assistance from a professional.
python

import subprocess
def check_audio_devices():
try:
subprocess.run(["ls", "/dev/snd/"], check=True)
print("Audio devices found.")
except subprocess.CalledProcessError:
print("No audio devices found.")
def check_audio_drivers():
try:
subprocess.run(["lsmod | grep snd"], shell=True, check=True)
print("Audio drivers are loaded.")
except subprocess.CalledProcessError:
print("No audio drivers found.")
def check_volume_levels():
try:
subprocess.run(["amixer sget Master"], shell=True, check=True)
print("Volume levels are normal.")
except subprocess.CalledProcessError:
print("Volume levels could not be determined.")
def main():
print("Sound Diagnostic Tool")
print("---------------------")
check_audio_devices()
check_audio_drivers()
check_volume_levels()
if __name__ == "__main__":
main()
Please note that this code is a basic example and may not cover all possible sound-related issues. It demonstrates how you can use subprocess module in Python to execute commands and retrieve information about audio devices, drivers, and volume levels. The tool checks if audio devices are present, if audio drivers are loaded, and if volume levels can be determined.
Disable audio enhancements
1. First, right-click on the speaker icon located in the taskbar at the bottom right corner of your screen.
2. From the context menu that appears, select “Playback devices.”
3. In the Playback tab of the Sound window, you will see a list of available audio devices. Locate the device you are currently using, it may be labeled as “Speakers” or “Headphones.”
4. Once you’ve identified the correct device, click on it to select it, and then click on the “Properties” button below.
5. In the Properties window, go to the “Enhancements” tab.
6. Here, you will see a list of audio enhancements that are currently enabled. To disable them, check the box that says “Disable all enhancements.”
7. Click “Apply” to save the changes, and then click “OK” to close the window.
8. Test the sound on your computer to see if the issue has been resolved.
By disabling audio enhancements, you are essentially eliminating any additional processing or adjustments that may be applied to the sound output. This can help in cases where certain enhancements are causing conflicts or compatibility issues with your computer’s hardware or operating system.
It’s worth noting that the steps provided here are specific to Windows operating systems. If you are using a different operating system or device, the process may vary. In such cases, it’s recommended to consult the documentation or support resources specific to your device or operating system.
If disabling audio enhancements doesn’t resolve the no sound issue on your computer, you may need to explore other troubleshooting options or seek further assistance. This could involve checking for Windows updates, ensuring that the correct audio device is selected as the default playback device, or updating the device drivers.
Update the BIOS
Before proceeding with the BIOS update, it’s important to ensure that you have downloaded the latest BIOS version from the manufacturer’s website. Make sure to choose the correct BIOS version for your specific computer model.
To update the BIOS, follow these steps:
1. Connect your computer to a stable power source and ensure that the battery is fully charged. A sudden power loss during the BIOS update process can cause serious damage to your computer.
2. Locate the downloaded BIOS file on your computer. It is usually in the form of a .exe or .bin file.
3. Right-click on the BIOS file and select “Run as administrator” to begin the update process.
4. Follow the on-screen instructions provided by the BIOS update utility. These instructions may vary depending on your computer’s manufacturer. Make sure to read and understand each step before proceeding.
5. During the update process, your computer may restart multiple times. Do not interrupt the process or turn off your computer until the update is complete.
6. Once the BIOS update is finished, your computer will automatically restart. Check if the no sound issue has been resolved.
Updating the BIOS can sometimes resolve hardware-related issues, including the no sound problem. However, if the issue persists, there may be other factors causing the problem, such as outdated or faulty device drivers. In such cases, it is recommended to update the device drivers for your sound card or audio chipset.
To update device drivers in Windows:
1. Press the Windows key + X on your keyboard and select “Device Manager” from the menu that appears.
2. In the Device Manager window, expand the “Sound, video and game controllers” category.
3. Right-click on your sound card or audio chipset and select “Update driver” from the context menu.
4. Choose the option to search for updated drivers automatically. Windows will then search for the latest drivers and install them if available.
5. After the driver update is complete, restart your computer and check if the sound issue has been resolved.
Updating both the BIOS and device drivers can often fix the no sound problem on a computer. If these steps do not resolve the issue, it may be necessary to seek further assistance from a professional or contact the manufacturer’s support team.
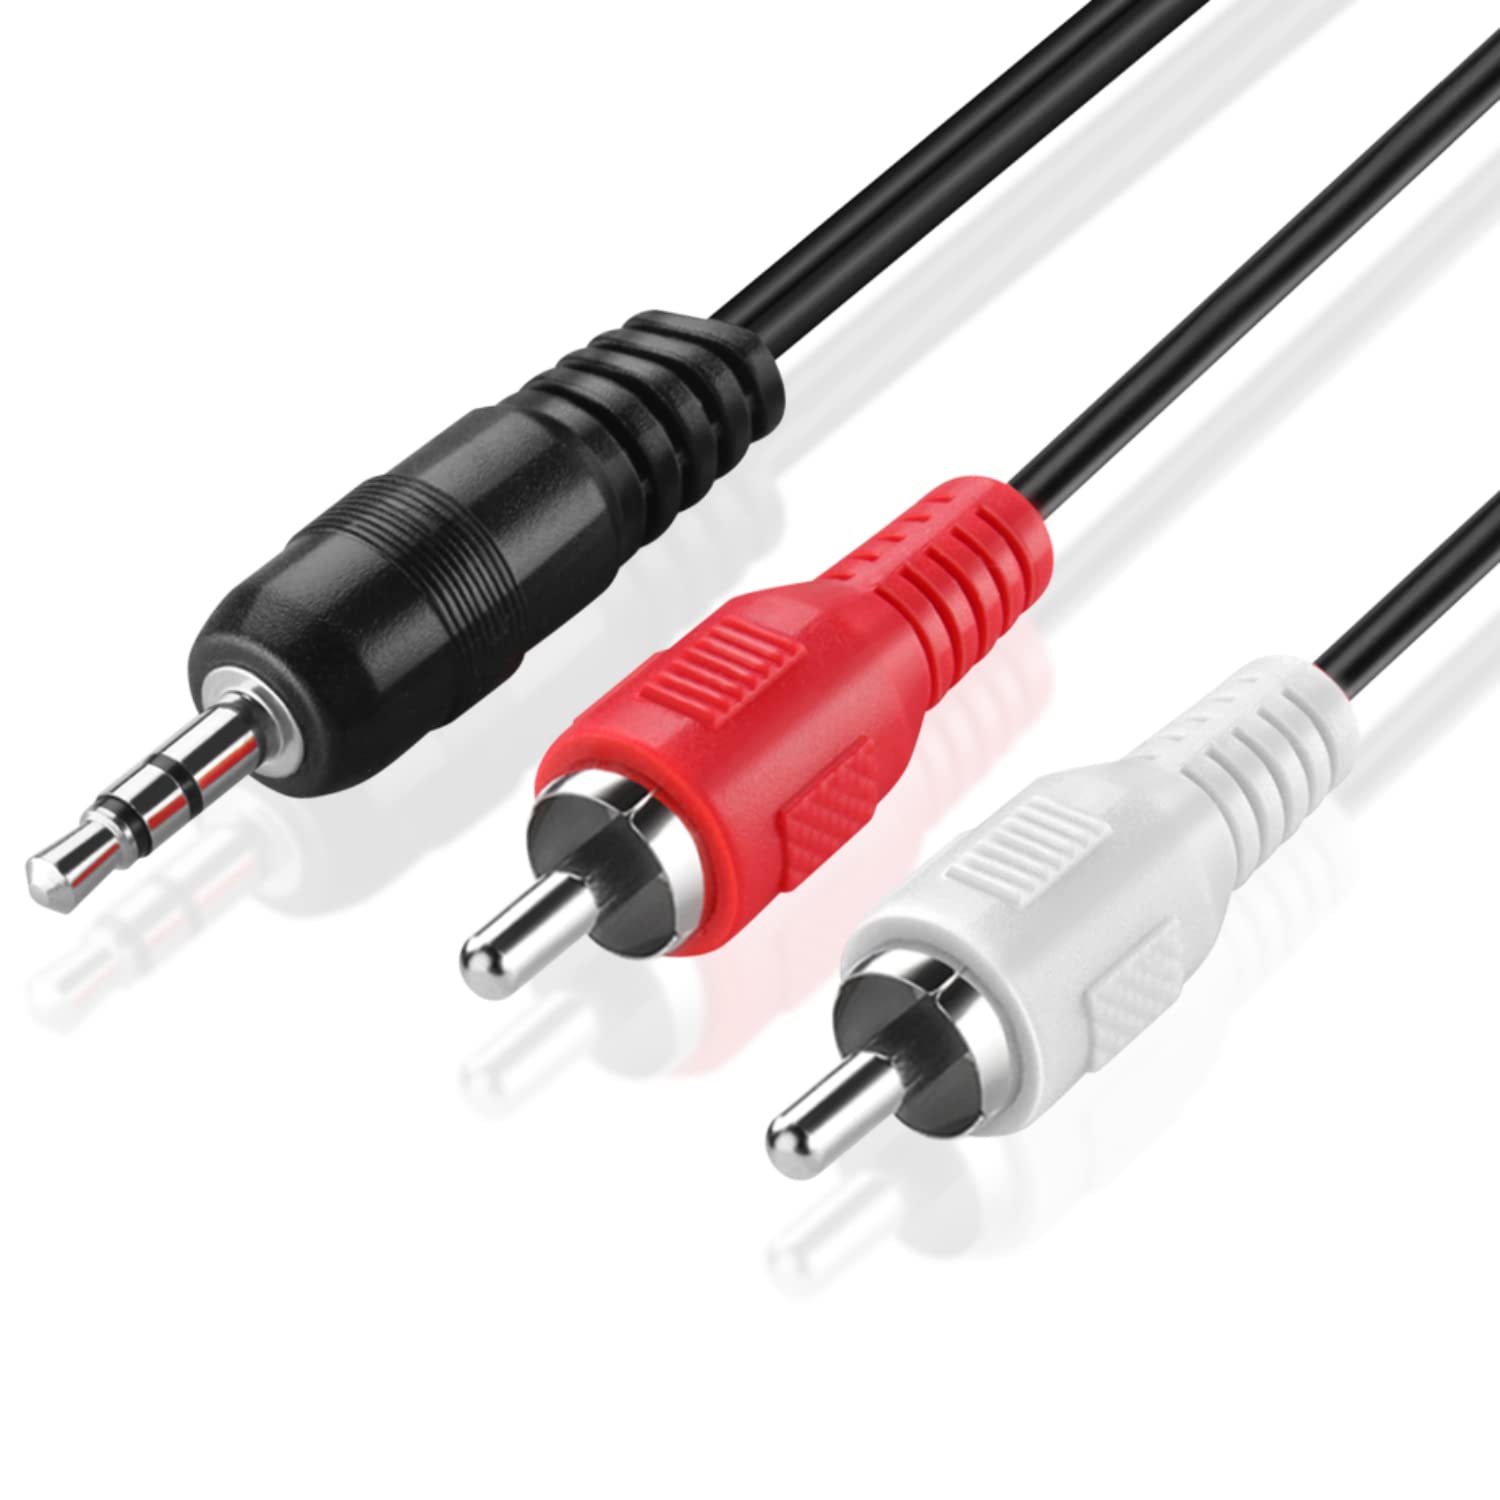
Check your hardware and cable connections
- Ensure that your speakers or headphones are properly connected to the computer.
- Check if the volume is turned up and not muted on both your computer and the external audio device.
- Verify that the audio cable is securely plugged into the correct audio jack.
- Try using a different audio cable to rule out any potential cable issues.
- Inspect the audio ports on your computer for any dirt or debris that may be obstructing the connection.
- Test your speakers or headphones on another device to determine if the problem lies with your computer.
- Ensure that the correct audio output device is selected in your computer’s sound settings.
- Update the audio drivers on your computer to the latest version available.
- Restart your computer to refresh the audio settings and resolve any temporary glitches.
Check the audio settings on your computer
1. Click on the Start menu in the bottom left corner of your screen.
2. Type “Control Panel” in the search bar and click on the Control Panel icon that appears.
3. In the Control Panel window, locate and click on the “Sound” option.
4. A new window will open, displaying the sound settings for your computer. Check if the volume slider is set to an appropriate level. If it’s too low, drag the slider up to increase the volume.
5. Make sure the correct playback device is selected. If you’re using external speakers or headphones, ensure they are plugged in and selected as the default playback device. To do this, right-click on the desired device and choose “Set as Default Device“.
6. If you are still not getting any sound, right-click on the default playback device and select “Properties“.
7. In the Properties window, go to the “Enhancements” tab and check if any enhancements are enabled. Disable any enhancements by unchecking the corresponding box.
8. Next, go to the “Advanced” tab and make sure the default format is set to the highest quality option available. If not, select the highest quality option from the drop-down menu.
9. If you are using a headset or headphones, make sure they are properly connected to the appropriate audio jacks on your computer.
10. Restart your computer and check if the sound is now working.
If you have followed these steps and are still experiencing issues with the sound on your computer, there may be a problem with the audio drivers. Consider updating your drivers by following these additional steps:
1. Open the “Device Manager” by right-clicking on the Start menu and selecting “Device Manager” from the menu that appears.
2. In the Device Manager window, expand the “Sound, video, and game controllers” category.
3. Right-click on your audio device and select “Update driver“.
4. Choose the option to search automatically for updated driver software.
5. Windows will search for the latest driver and install it if available. Follow any on-screen instructions that may appear.
6. After the driver is installed, restart your computer and check if the sound is now working.
What if my sound still isn’t working?
If your sound is still not working after trying the previous solutions, there are a few more steps you can take to troubleshoot the issue.
1. Check the volume settings: Make sure that the volume on your computer is not muted or set too low. To do this, right-click on the speaker icon in the taskbar and select “Open Volume Mixer.” Make sure that the volume slider for the application or device you are trying to use is turned up.
2. Restart your computer: Sometimes, a simple restart can resolve sound issues. Close all applications and restart your computer to see if the sound starts working again.
3. Update your audio drivers: Outdated or incompatible audio drivers can cause sound problems. To update your drivers, follow these steps:
a. Press the Windows key + X and select “Device Manager.”
b. Expand the “Sound, video, and game controllers” category.
c. Right-click on your audio device and select “Update driver.”
d. Choose the option to automatically search for updated driver software.
4. Run the Windows Audio Troubleshooter: Windows has a built-in troubleshooter that can help identify and fix sound issues. To run the troubleshooter, follow these steps:
a. Press the Windows key + I to open the Settings app.
b. Go to “Update & Security” and select “Troubleshoot” from the left-hand menu.
c. Under “Find and fix other problems,” click on “Playing Audio.”
d. Click on “Run the troubleshooter” and follow the on-screen instructions.
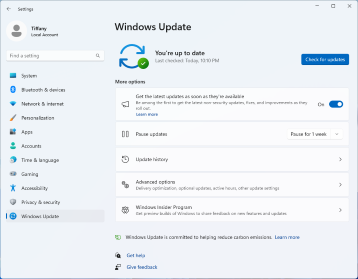
5. Check for Windows updates: It’s important to keep your operating system up to date, as updates often include bug fixes and improvements. To check for updates, follow these steps:
a. Press the Windows key + I to open the Settings app.
b. Go to “Update & Security” and select “Windows Update” from the left-hand menu.
c. Click on “Check for updates” and install any available updates.
6. Try a different audio device: If you have a headset or external speakers, try connecting them to your computer to see if you can hear sound through them. If the sound works with a different device, the issue may be with your computer’s speakers or audio jack.
7. Reset your audio settings: Sometimes, incorrect audio settings can cause sound problems. To reset your audio settings, follow these steps:
a. Press the Windows key + X and select “Control Panel.”
b. Click on “Hardware and Sound” and then “Sound.”
c. In the “Playback” tab, right-click on the device you want to use and select “Set as Default Device.”
d. Click on “Apply” and then “OK” to save the changes.
What if my sound and audio problems persist?
If you are still experiencing sound and audio problems on your computer, there are a few additional steps you can take to try and resolve the issue. Here are some troubleshooting tips to consider:
1. Check the volume settings: Ensure that the volume on your computer is not muted or set to a very low level. Click on the speaker icon in the taskbar and adjust the volume slider to an appropriate level.
2. Update the audio drivers: Outdated or incompatible audio drivers can cause sound issues. Open the Device Manager by right-clicking on the Start button and selecting it from the menu. Locate the audio device under the “Sound, video and game controllers” section, right-click on it, and select “Update driver.” Follow the on-screen instructions to update the driver.
3. Check the physical connections: Ensure that all cables and connections between your computer and speakers or headphones are secure. If you are using external speakers, make sure they are powered on and properly connected to the audio output port.
4. Run the audio troubleshooter: Windows has a built-in audio troubleshooter that can help diagnose and fix common sound issues. Open the Control Panel and search for “Troubleshoot audio playback.” Follow the prompts to run the troubleshooter and see if it can identify and fix the problem.
5. Test with different audio devices: If you are using headphones or speakers, try using a different set to see if the issue persists. This will help determine if the problem lies with the audio device itself.
6. Check for software conflicts: Some applications or programs may interfere with the audio settings on your computer. Try closing any running programs that might be using the audio system, such as media players or communication apps, and see if that resolves the issue.
7. Restart the Windows Audio service: The Windows Audio service is responsible for managing audio on your computer. If it is not running properly, you may experience sound problems. Open the Services menu by pressing Windows key + R, typing “services.msc,” and hitting Enter. Locate the “Windows Audio” service, right-click on it, and select “Restart.”
8. Consider a system restore: If the sound issues started recently after making changes to your computer, such as installing new software or updates, a system restore may help. This will revert your computer’s settings back to a previous state when the sound was working correctly.
Update your drivers automatically
1. Open the Control Panel on your Windows computer. You can do this by clicking on the Start menu and typing “Control Panel” in the search bar. Then, click on the Control Panel icon.
2. In the Control Panel window, locate and click on the “Device Manager” option. This will open the Device Manager window, which displays a list of all the hardware devices installed on your computer.
3. Look for the “Sound, video and game controllers” category in the Device Manager window. Expand this category by clicking on the arrow next to it.
4. Right-click on the audio device listed under the “Sound, video and game controllers” category. It could be named differently depending on your computer’s configuration, but it is usually something like “Realtek High Definition Audio” or “Conexant SmartAudio HD”.
5. From the context menu that appears, select the “Update driver” option. This will open a new window with two options: “Search automatically for updated driver software” and “Browse my computer for driver software”.
6. Choose the first option, “Search automatically for updated driver software”. Windows will now search for the latest driver updates for your audio device and install them automatically. This process may take a few minutes.
7. Once the driver update is complete, restart your computer. After the restart, check if the sound is working properly.
If the automatic driver update did not fix the issue, you can also try manually downloading and installing the latest audio driver from the manufacturer’s website. To do this:
1. Go to the website of your computer’s manufacturer or the manufacturer of your audio device.
2. Look for the “Support” or “Downloads” section on the website.
3. Search for the latest audio driver for your specific computer model or audio device.
4. Download the driver file and double-click on it to run the installer.
5. Follow the on-screen instructions to install the driver.
6. After the installation is complete, restart your computer and check if the sound is working.