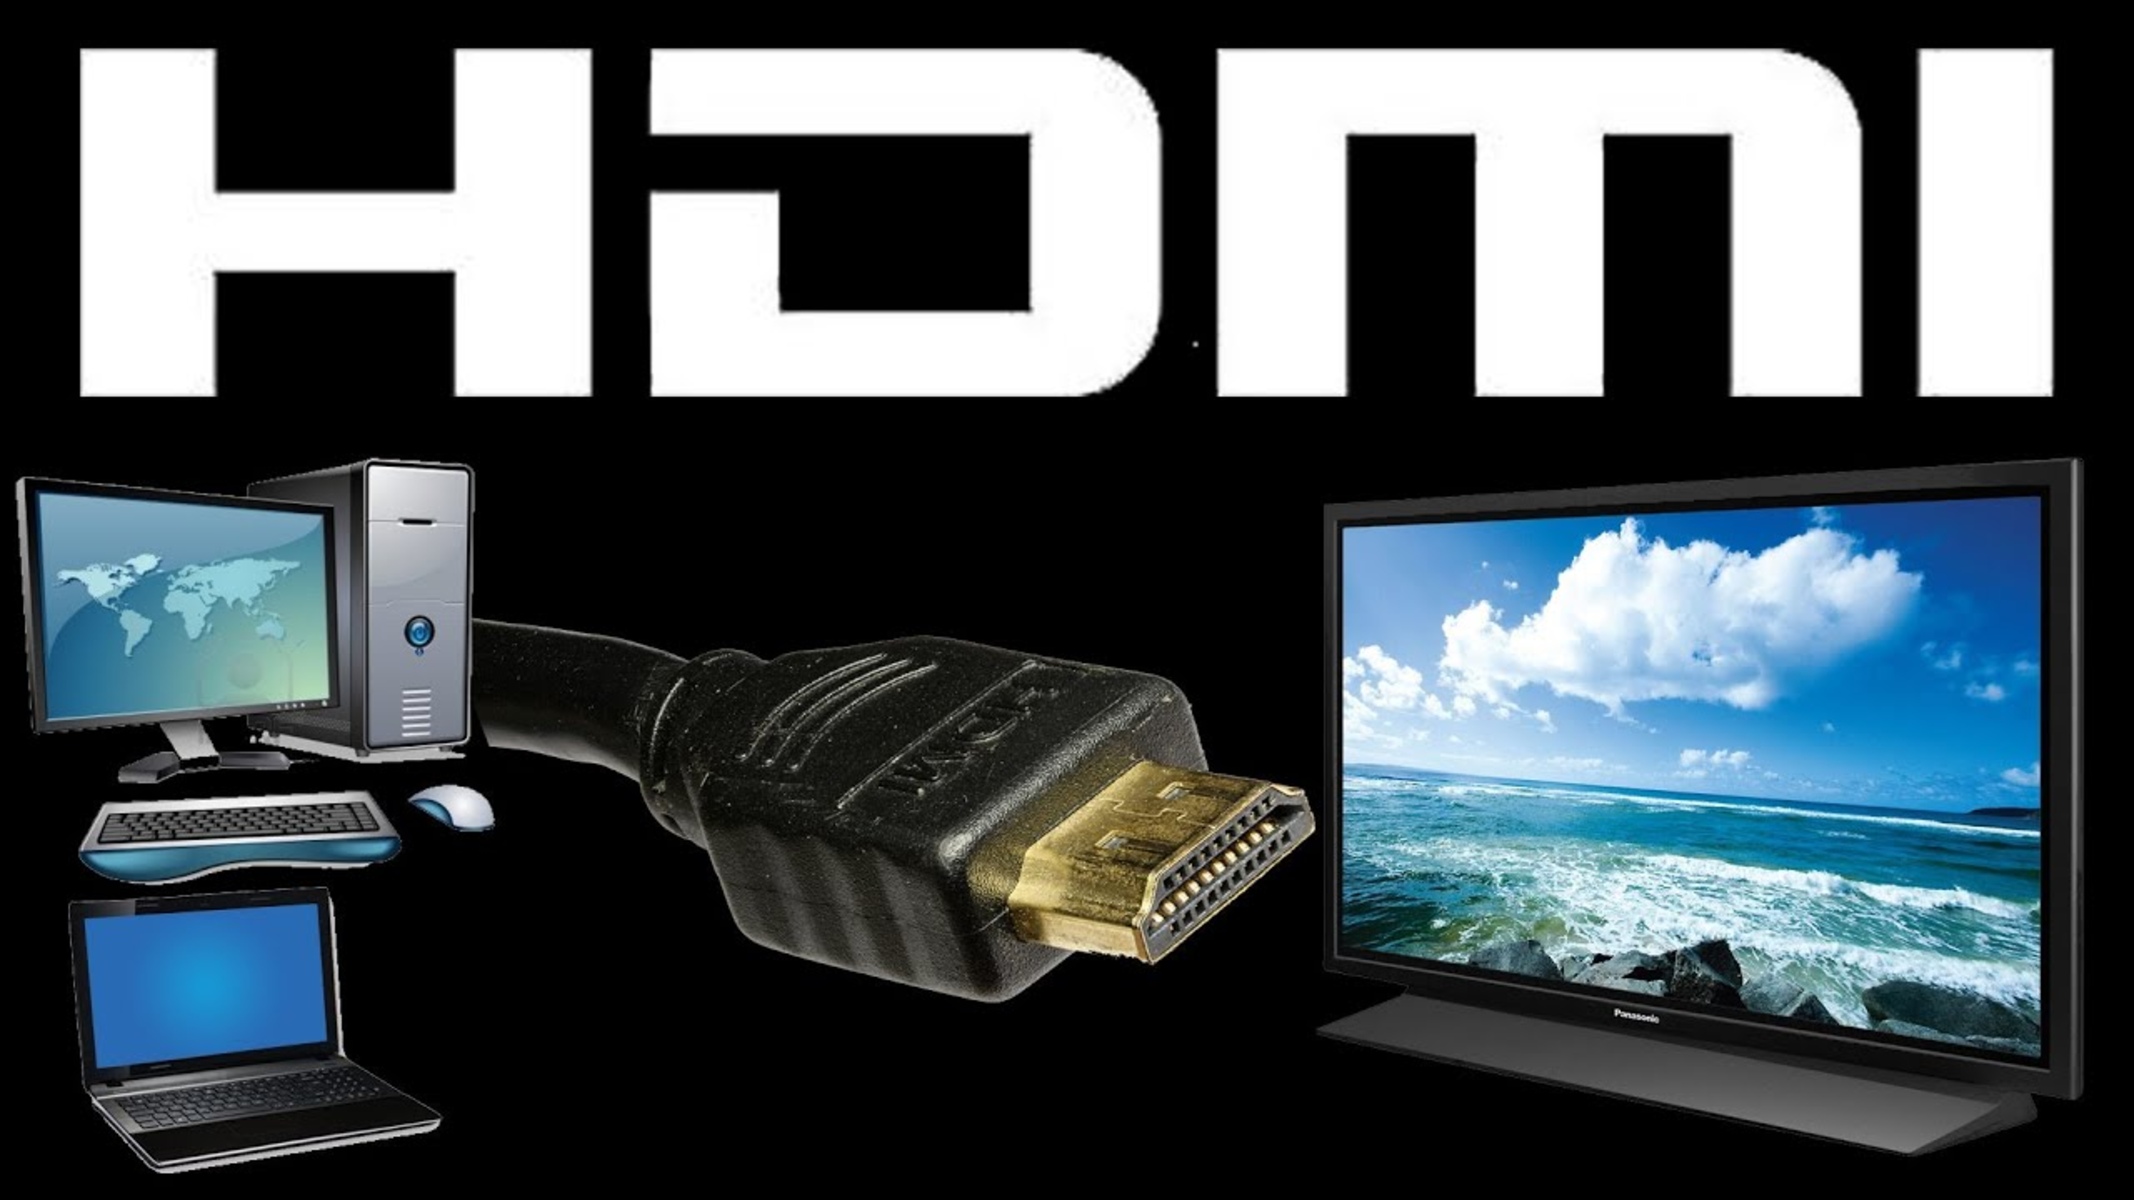
In today’s digital age, the ability to connect our laptops to TVs opens up a world of entertainment and productivity possibilities. However, encountering HDMI cable connection issues can be frustrating and hinder our seamless viewing experience. In this article, we delve into troubleshooting techniques to help you overcome these obstacles and get back to enjoying your favorite content on the big screen.
Recently, Fortect has become increasingly popular as a reliable and efficient way to address a wide range of PC issues. It's particularly favored for its user-friendly approach to diagnosing and fixing problems that can hinder a computer's performance, from system errors and malware to registry issues.
- Download and Install: Download Fortect from its official website by clicking here, and install it on your PC.
- Run a Scan and Review Results: Launch Fortect, conduct a system scan to identify issues, and review the scan results which detail the problems affecting your PC's performance.
- Repair and Optimize: Use Fortect's repair feature to fix the identified issues. For comprehensive repair options, consider subscribing to a premium plan. After repairing, the tool also aids in optimizing your PC for improved performance.
Troubleshooting HDMI Connection Issues
If you’re experiencing HDMI connection issues between your laptop and TV, try these troubleshooting steps:
1. Check the cable: Ensure that the HDMI cable is securely plugged into both your laptop and TV. If the cable is damaged, try using a different one.
2. Check the input source: On your TV remote, select the correct input source (HDMI) that matches the port your laptop is connected to.
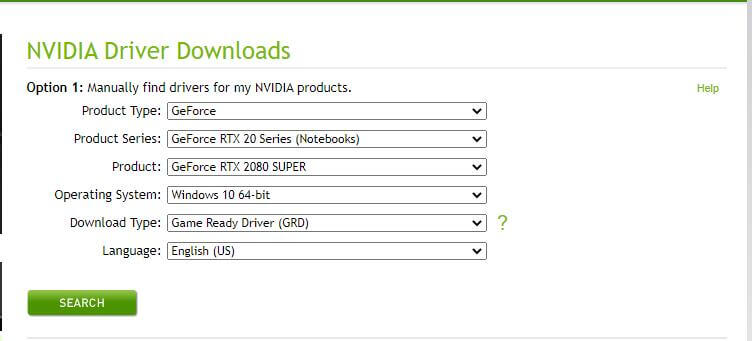
3. Update graphics drivers: Visit the manufacturer’s website (e.g., Intel, Acer) and download the latest graphics drivers for your laptop. Install them and restart your computer.
4. Adjust display settings: Right-click on your desktop and select “Display settings.” Ensure that your TV is recognized as a second display and set as the primary or extend your desktop to it.
5. Restart your devices: Power off both your laptop and TV, unplug them from the power source, wait for a few minutes, and then plug them back in.
6. Perform a factory reset: If all else fails, you can try performing a factory reset on your TV. Refer to the user manual or visit the manufacturer’s website for instructions.
Updating Display and Graphics Drivers
To update your display and graphics drivers, follow these steps:
1. Open the Start menu and search for “Device Manager.”
2. In Device Manager, expand the “Display adapters” category.
3. Right-click on your graphics card (e.g., Intel HD Graphics) and select “Update driver.”
4. Choose the option to search automatically for updated driver software.
5. If a newer driver is found, follow the on-screen instructions to install it.
6. Restart your PC to apply the changes.
If you’re still experiencing issues with your laptop to TV HDMI cable connection, try using a different HDMI cable or connecting to a different HDMI port on your TV/monitor. You can also try updating the HDMI-connector firmware or adjusting the connection settings on your TV/monitor.
Remember, if you’re using Windows 10 or Windows 11, the operating system itself may sometimes have compatibility issues with certain HDMI sources. In such cases, contacting the manufacturer for further assistance can be helpful.
Note: This content assumes that the reader is already familiar with troubleshooting steps for the laptop to TV HDMI cable connection issue.
Switching Input Source and Enabling HDMI Connection
To switch the input source and enable HDMI connection on your laptop to TV, follow these steps:
1. Check the HDMI cable connection. Ensure it is securely plugged into both your laptop and TV/monitor’s HDMI ports.
2. On your TV remote, locate the “Input” or “Source” button. Press it to display the available input sources.
3. Use the arrow keys on your TV remote to select the HDMI input corresponding to your laptop connection.
4. On your laptop, press the Windows key + P simultaneously to open the “Project” menu.
5. Select the “Duplicate” or “Extend” option to enable the HDMI output to your TV/monitor.
6. If you encounter signal issues, try switching HDMI cables or testing a different HDMI port on your TV/monitor.
Power Cycling TV or Monitor
If you’re experiencing a HDMI cable connection issue between your laptop and TV or monitor, power cycling can often resolve the problem. Here’s how:
1. Start by turning off your TV or monitor and unplugging it from the power source.
2. Disconnect the HDMI cable from both your laptop and the TV/monitor.
3. Now, shut down your laptop completely and disconnect it from its power source as well.
4. Wait for about 30 seconds before plugging everything back in.
5. Reconnect the HDMI cable to both your laptop and the TV/monitor, ensuring it’s securely plugged in.
6. Power on your laptop and then turn on your TV or monitor.
7. Select the correct input source on your TV/monitor to receive the HDMI signal.
By power cycling your devices and reconnecting the HDMI cable, you can often resolve issues like “No Signal” or strange display phenomena. If the problem persists, you may need to explore other troubleshooting solutions or consult technical support.
Reconnecting HDMI Sources
- Step 1: Check the HDMI cable connections
- Ensure that both ends of the HDMI cable are securely plugged into the HDMI ports of both the laptop and the TV.
- If the cable seems loose, unplug and then firmly reconnect it to ensure a proper connection.
- Inspect the cable for any visible signs of damage or wear. Replace the cable if necessary.
- Step 2: Verify the correct input source on the TV
- Using the TV remote control, press the “Input” or “Source” button.
- Scroll through the available input sources until you find the one corresponding to the HDMI port that your laptop is connected to.
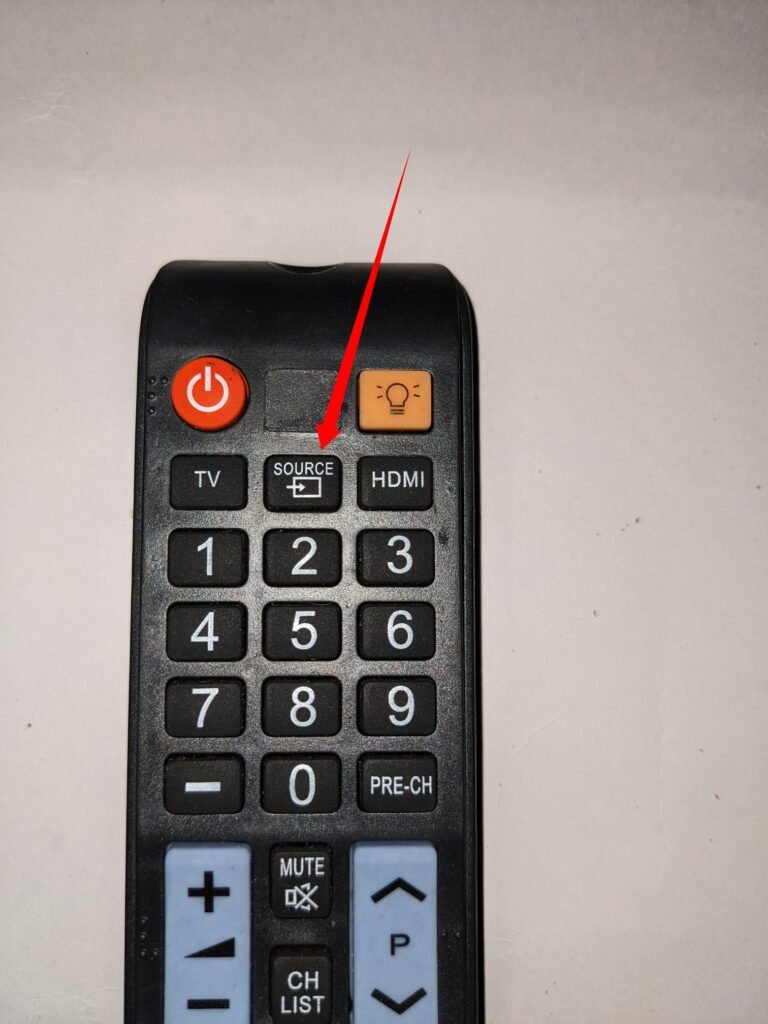
- Select the correct input source to display the laptop’s screen on the TV.
- Step 3: Check the display settings on the laptop
- Right-click on the desktop and select “Display Settings” from the context menu.
- Ensure that the TV is recognized as a secondary display in the display settings.
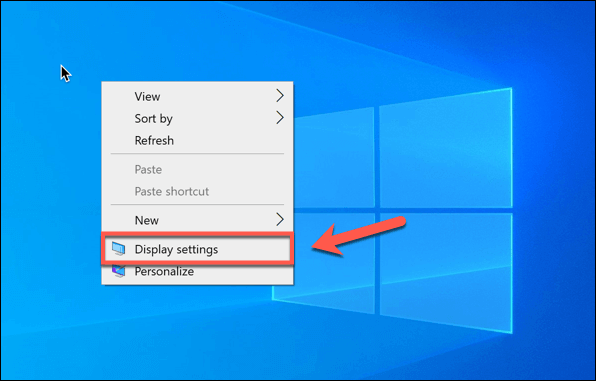
- If the TV is not detected, click on the “Detect” button to allow the laptop to search for connected displays.
- Adjust the screen resolution and other display settings if necessary.
- Step 4: Restart the laptop and TV
- Shut down both the laptop and the TV.
- Unplug the power cables from both devices.

- Wait for a few minutes and then plug the power cables back in.
- Turn on the TV first, and then boot up the laptop.
- Step 5: Update graphics drivers
- Visit the manufacturer’s website of the laptop’s graphics card (e.g., NVIDIA, AMD, Intel) and navigate to the drivers/downloads section.
- Download and install the latest graphics drivers for your specific graphics card model and operating system.
- Restart the laptop after the driver installation is complete.
Adjusting Computer Display Settings
If you’re experiencing issues with your laptop to TV HDMI cable connection, there are a few steps you can take to troubleshoot the problem.
Firstly, ensure that both your laptop and TV/monitor are powered on and connected properly.
Next, navigate to the display settings on your PC. In Windows 10, simply right-click on your desktop and select “Display settings.”
Check the display settings and make sure that the correct display device is selected and that the resolution is set appropriately.
If you’re still not getting a signal, try disconnecting and reconnecting the HDMI cable, ensuring it is securely connected at both ends.
Update your graphics driver by visiting the manufacturer’s website or using software like Driver Easy.
In some instances, the HDMI-connector on your laptop may not be functioning properly. Try using a different HDMI cable or connecting to a different HDMI port on your TV.
If you’re still experiencing issues, it may be a hardware fault or an OS issue. Contact your laptop manufacturer for further assistance.


