Is your Windows 10 running slower than usual? Struggling with 100% disk usage? Fear not! In this article, we bring you 14 hassle-free techniques to fix this issue and optimize your system’s performance. Get ready to bid farewell to sluggishness and embrace a seamless computing experience!
Recently, Fortect has become increasingly popular as a reliable and efficient way to address a wide range of PC issues. It's particularly favored for its user-friendly approach to diagnosing and fixing problems that can hinder a computer's performance, from system errors and malware to registry issues.
- Download and Install: Download Fortect from its official website by clicking here, and install it on your PC.
- Run a Scan and Review Results: Launch Fortect, conduct a system scan to identify issues, and review the scan results which detail the problems affecting your PC's performance.
- Repair and Optimize: Use Fortect's repair feature to fix the identified issues. For comprehensive repair options, consider subscribing to a premium plan. After repairing, the tool also aids in optimizing your PC for improved performance.
Identify the cause of high disk usage in Windows 10
14 Easy Ways to Fix 100% Disk Usage in Windows 10
If you’re experiencing high disk usage on Windows 10, here are some simple and effective methods to address the issue:
1. Check Task Manager: Press Ctrl + Shift + Esc to open Task Manager and identify which processes are using the most disk resources.
2. Disable Windows Search: Right-click the taskbar, select Task Manager, go to the Services tab, find Windows Search, right-click and select Stop.
3. Optimize Windows Update: Open Windows Settings, go to Update & Security, click on Windows Update, and select “Check for updates” to ensure your system is up to date.
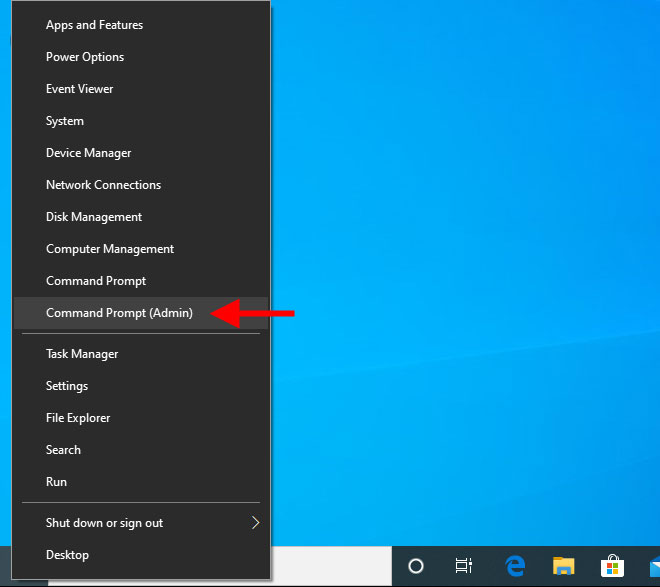
4. Disable Superfetch: Open Command Prompt as an administrator and type “net.exe stop superfetch“, then press Enter.
5. Adjust Virtual Memory: Open Control Panel, go to System and Security, click on System, select “Advanced system settings,” go to the Performance section, click on Settings, and go to the Advanced tab. Under Virtual Memory, click on “Change” and uncheck “Automatically manage paging file size for all drives.” Set a custom size for the paging file.
6. Disable Windows Tips and Tricks: Open Settings, go to System, click on Notifications & actions, and turn off “Get tips, tricks, and suggestions as you use Windows.”
7. Disable Background Apps: Open Settings, go to Privacy, click on Background apps, and turn off apps that you don’t need running in the background.
8. Uninstall Unnecessary Programs: Open Control Panel, go to Programs, and uninstall any programs that you no longer use or need.
9. Scan for Malware: Run a full system scan using your preferred antivirus software to check for any malware or viruses that could be causing high disk usage.
10. Disable Windows Defender: Open Windows Security, go to Virus & threat protection, click on Manage settings, and turn off “Real-time protection.”
11. Adjust Power Settings: Open Control Panel, go to Hardware and Sound, click on Power Options, select “High performance,” and click on “Change plan settings.” Set “Turn off hard disk after” to a higher value or select “Never.”
12. Disable Windows Tips and Tricks: Open Settings, go to System, click on Notifications & actions, and turn off “Get tips, tricks, and suggestions as you use Windows.”
13. Use a Disk Cleanup Utility: Open Disk Cleanup by searching for it in the taskbar, select the drive you want to clean up, and follow the prompts to remove unnecessary files.
14. Upgrade Your Hardware: If none of the above methods resolve the issue, it may be time to consider upgrading your computer’s hardware, such as the hard drive or adding more RAM.
Methods to fix high disk usage in Windows 10
- Open Task Manager by pressing Ctrl+Shift+Esc
- Click on the Services tab
- Locate and right-click on Windows Search
- Select Properties
- In the Startup type dropdown, choose Disabled
- Click Apply and then OK

Method 2: Change Energy Options
- Press Windows key + X and select Power Options
- Click on Change plan settings for your current power plan
- Click on Change advanced power settings
- Expand Hard disk and then Turn off hard disk after
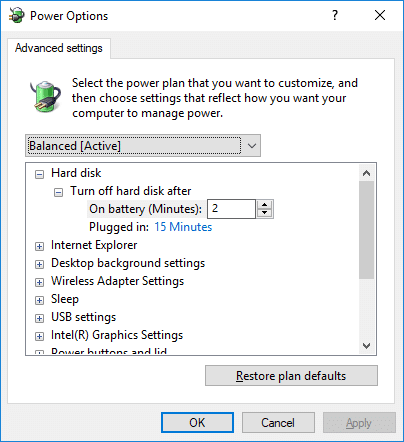
- Set the value to 0
- Click Apply and then OK
Method 3: Disable Superfetch
- Open Command Prompt as an administrator
- Type net.exe stop superfetch and press Enter
- Check if the disk usage has decreased
Method 4: Disable Windows Tips and Tricks
- Open Settings by pressing Windows key + I
- Click on System

- Select Notifications & actions
- Toggle off Show me tips about Windows
Method 5: Check for Malware
- Run a full system scan using a reliable antivirus program
- If any malware is detected, follow the recommended actions to remove it

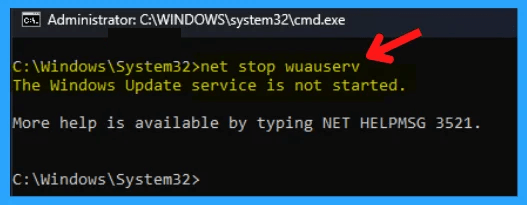
Method 6: Disable Windows Update Service
- Open Command Prompt as an administrator
- Type net.exe stop wuauserv and press Enter
- Check if the disk usage has decreased
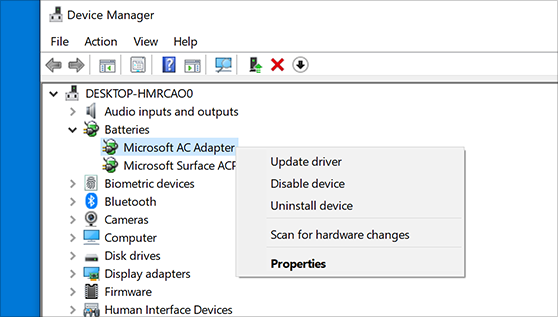
Method 7: Update Device Drivers
- Press Windows key + X and select Device Manager
- Expand the categories and locate the device drivers
- Right-click on each driver and select Update driver
- Follow the on-screen instructions to update the drivers
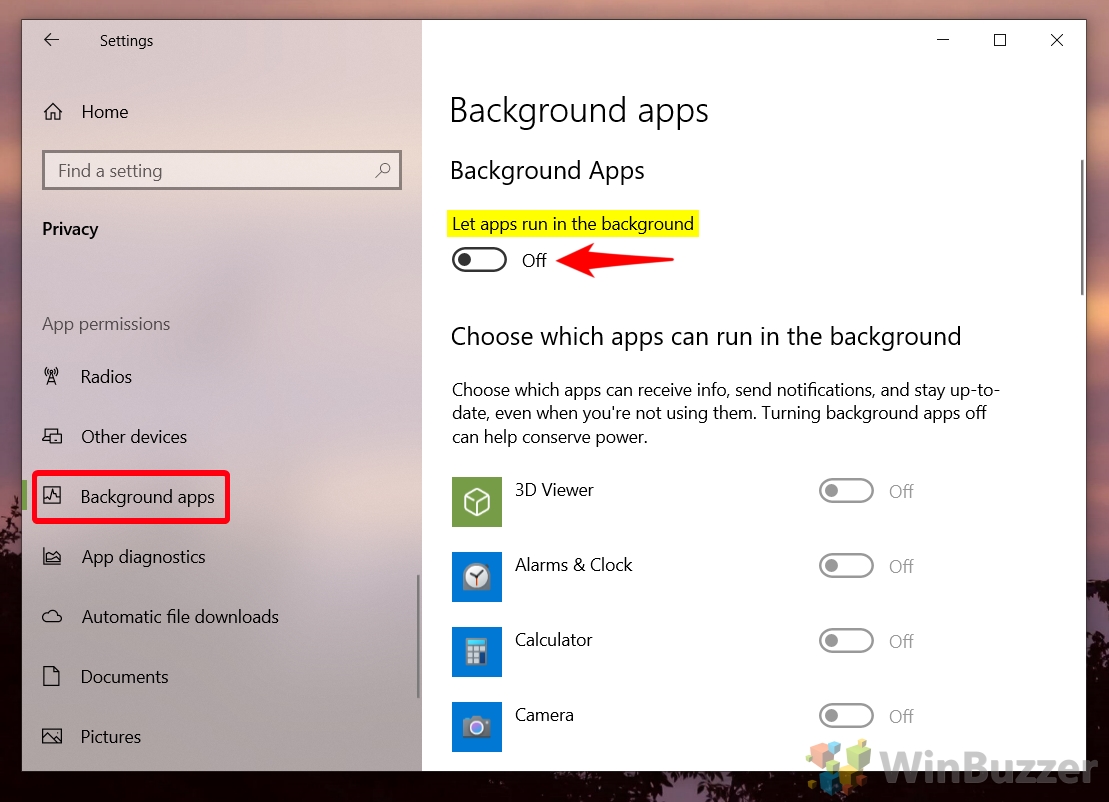
Method 8: Disable Background Apps
- Open Settings by pressing Windows key + I
- Click on Privacy
- Select Background apps
- Toggle off the apps you don’t want running in the background
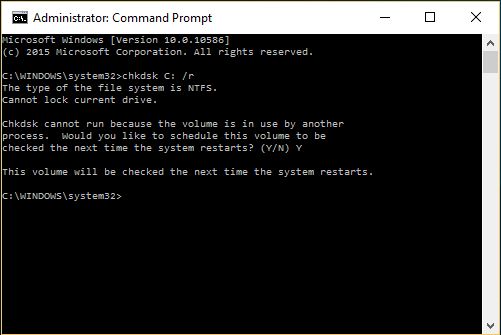
Method 9: Run Disk Check
- Open Command Prompt as an administrator
- Type chkdsk /f /r and press Enter
- Press Y to schedule the disk check on the next system restart
- Restart your computer to begin the disk check
Method 10: Adjust Virtual Memory
- Press Windows key + X and select System
- Click on Advanced system settings
- Under the Advanced tab, click on Settings in the Performance section
- Go to the Advanced tab in the new window
- Click on Change in the Virtual memory section
- Uncheck Automatically manage paging file size for all drives
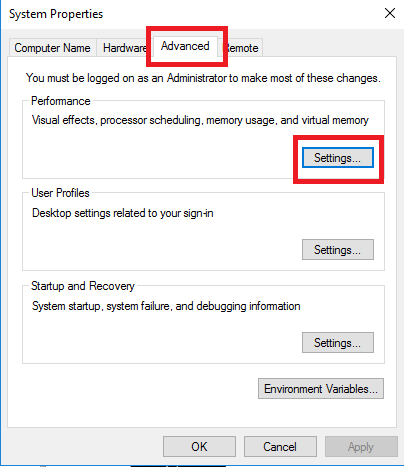
- Select your system drive, click on Custom size, and set the initial and maximum size
- Click Set and then OK
Method 11: Disable Windows Tips
- Open Settings by pressing Windows key + I
- Click on System
- Select Notifications & actions
- Toggle off Show me tips about Windows
Method 12: Disable Windows Store
- Open Group Policy Editor by pressing Windows key + R
- Type gpedit.msc and press Enter
- Navigate to Computer Configuration > Administrative Templates > Windows Components > Store
- Double-click on Turn off the Store application
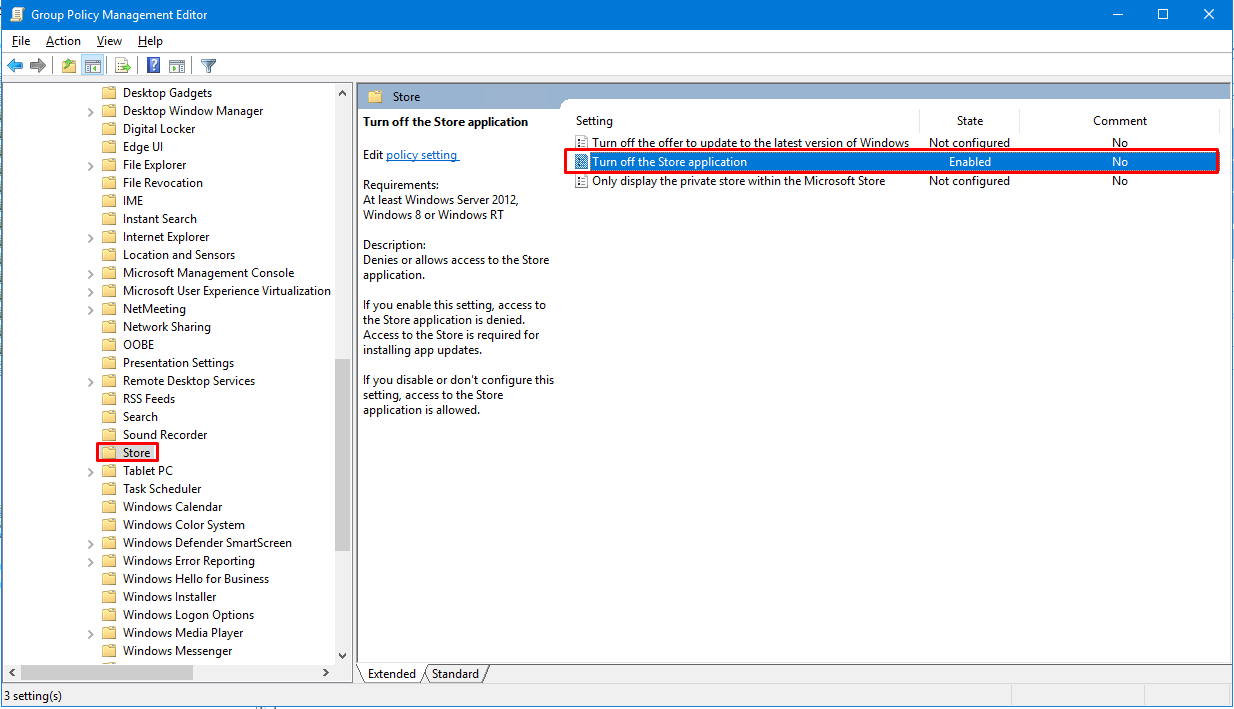
- Select Enabled
- Click Apply and then OK
Method 13: Reset Virtual Memory
- Press Windows key + X and select System
- Click on Advanced system settings
- Under the Advanced tab, click on Settings in the Performance section
- Go to the Advanced tab in the new window
- Click on Change in the Virtual memory section
- Check Automatically manage paging file size for all drives
- Click Set and then OK
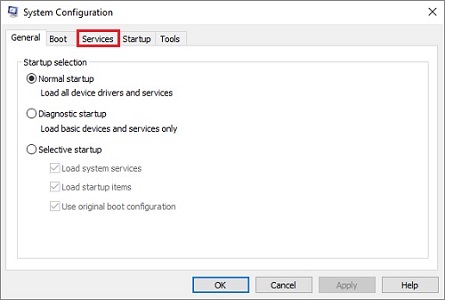
Method 14: Perform a Clean Boot
- Press Windows key + R and type msconfig
- In the General tab, select Selective startup
- Uncheck Load startup items
- Go to the Services tab
- Check the box for Hide all Microsoft services
- Click on Disable all
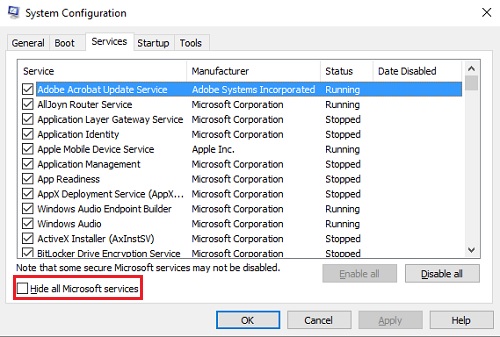
- Click Apply and then OK
- Restart your computer
Update Windows 10
14 Easy Ways to Fix 100% Disk Usage in Windows 10
If you’re experiencing high disk utilization on your Windows 10 computer, here are some easy steps to help resolve the issue:
1. Close any unnecessary programs or processes running in the background.
2. Use the Windows Task Manager to identify any specific processes consuming high disk usage.
3. Disable any unnecessary startup programs to reduce the load on your disk.
4. Clear your browser cookies and cache, as they can sometimes cause high disk usage.
5. Update your device drivers to ensure compatibility and optimize performance.
6. Run a disk check to identify and fix any potential errors on your hard drive.
7. Disable any third-party antivirus software temporarily to see if it’s causing the problem.
8. Reduce the number of files and folders on your desktop, as they can contribute to high disk usage.
9. Disable Windows Search indexing if you don’t require it for quick file searches.
10. Adjust your power options to optimize disk usage during idle periods.
11. Limit the number of simultaneous downloads or file transfers to reduce disk stress.
12. Disable unnecessary Windows services that may be contributing to high disk usage.
13. Use the Windows Command Prompt to run disk cleanup and free up disk space.
14. Consider upgrading your hard drive to a solid-state drive (SSD) for faster and more efficient performance.
Disable Superfetch
To disable Superfetch and fix the 100% disk usage problem in Windows 10, follow these steps:
1. Open the Windows Task Manager by pressing Ctrl + Shift + Esc.
2. Click on the “Performance” tab.
3. In the left column, click on “Disk” to view the disk performance metrics.
4. Look for the process with the highest disk utilization.
5. Right-click on the process and select “Open File Location” to identify the associated program.
6. Close the Windows Task Manager.
7. Press Win + R to open the Run dialog box.
8. Type “services.msc” and press Enter to open the Services utility.
9. Scroll down and double-click on “Superfetch” to open its properties.
10. In the “General” tab, click on the “Stop” button to shut down Superfetch.
11. Set the “Startup type” to “Disabled”.
12. Click on “Apply” and then “OK” to save the changes.
13. Restart your computer for the changes to take effect.
By disabling Superfetch, you can reduce disk usage and improve the overall performance of your Windows 10 machine.
Remove viruses and malware
To remove viruses and malware causing 100% disk usage in Windows 10:
1. Run a full scan with a trusted antivirus software to detect and remove any malicious programs on your machine.
2. Use the Windows Task Manager to identify and close any unnecessary or suspicious running processes that may be consuming excessive disk resources.
3. Disable any unnecessary startup programs to reduce the load on your disk during boot-up.
4. Clear your browser cache and cookies to optimize performance and remove any potential malware.
5. Update your operating system and drivers to ensure they are equipped with the latest security patches and bug fixes.
6. Check your disk for errors and perform a disk cleanup to free up space and improve disk efficiency.
7. Consider upgrading your hardware, such as adding more RAM or switching to a solid-state drive (SSD), to improve overall system performance.
8. If the issue persists, use Windows Command Prompt to run a disk check and repair any disk errors.
9. Monitor your disk usage using the Task Manager or third-party tools to identify the specific processes or applications causing high disk utilization.
10. Disable any unnecessary background services or scheduled tasks that may be contributing to the problem.
11. Optimize your power settings to ensure your computer is not running unnecessary processes while idle.
12. Avoid running multiple resource-intensive applications simultaneously to prevent excessive disk usage.
13. Regularly update your antivirus software and perform scans to prevent future infections.
14. If all else fails, seek professional assistance or consult online forums and communities, like Reddit, for further troubleshooting tips.
Close background applications
To close background applications and fix the 100% disk usage problem in Windows 10, follow these steps:
1. Press Ctrl + Shift + Esc to open Task Manager.
2. In the Processes or Details tab, identify any applications with high disk usage.
3. Right-click on the application and select End Task to close it.
4. Repeat this process for other resource-intensive applications.
5. Check if the disk usage has decreased.
By closing unnecessary background applications, you can free up system resources and improve overall performance.
Reset or reinstall synchronization tools
Resetting or reinstalling synchronization tools can be an effective way to fix 100% disk usage issues in Windows 10. To do this, follow these steps:
1. Press the Windows key + R to open the Run dialog box.
2. Type “services.msc” and press Enter to open the Services window.
3. Scroll down and locate the synchronization tool you want to reset or reinstall.
4. Right-click on the tool and select “Properties.”
5. In the Properties window, go to the “General” tab and click on “Stop” to stop the tool.
6. Once stopped, click on “Start” to restart the tool.
7. If the issue persists, right-click on the tool again and select “Uninstall” to remove it completely.
8. Restart your computer.
9. If needed, reinstall the synchronization tool from a reliable source.
By resetting or reinstalling synchronization tools, you can often resolve the high disk usage problem and improve your system’s performance.
Repair hard disk issues
14 Easy Ways to Fix 100% Disk Usage in Windows 10
| Method | Description |
|---|---|
| 1 | Check for malware and scan your computer |
| 2 | Disable Windows Search |
| 3 | Change your power settings |
| 4 | Disable Superfetch service |
| 5 | Update your device drivers |
| 6 | Disable Windows notifications |
| 7 | Reset virtual memory settings |
| 8 | Check for disk errors |
| 9 | Disable unnecessary startup programs |
| 10 | Adjust your Windows settings |
| 11 | Perform a disk cleanup |
| 12 | Upgrade your hard disk drive |
| 13 | Disable Windows tips and tricks |
| 14 | Reset your Windows 10 installation |
Optimize performance with Google Chrome and Skype settings
To optimize performance with Google Chrome and Skype settings, follow these simple steps:
1. In Google Chrome, click on the three-dot menu in the top right corner and select “Settings.”
2. Scroll down and click on “Advanced” to expand the advanced settings options.
3. Under the “System” section, toggle off the option for “Continue running background apps when Google Chrome is closed.”
4. Clear your browsing history, cache, and cookies regularly to free up disk space and enhance performance.
5. In Skype, click on the three-dot menu in the top left corner and select “Settings.”
6. Go to the “Calling” tab and disable the option for “Call Quality Feedback.”
7. Under the “Advanced” tab, uncheck the box for “Show overlay when using my camera.”
8. Ensure that both Google Chrome and Skype are up to date by checking for updates regularly.