I will share my experience and guide you on how to resolve the DirectX elevation error efficiently.
Recently, Fortect has become increasingly popular as a reliable and efficient way to address a wide range of PC issues. It's particularly favored for its user-friendly approach to diagnosing and fixing problems that can hinder a computer's performance, from system errors and malware to registry issues.
- Download and Install: Download Fortect from its official website by clicking here, and install it on your PC.
- Run a Scan and Review Results: Launch Fortect, conduct a system scan to identify issues, and review the scan results which detail the problems affecting your PC's performance.
- Repair and Optimize: Use Fortect's repair feature to fix the identified issues. For comprehensive repair options, consider subscribing to a premium plan. After repairing, the tool also aids in optimizing your PC for improved performance.
Understanding the “Requested Operation Requires Elevation” Error

When encountering the “Requested Operation Requires Elevation” error, it means that the action you are trying to perform requires administrative privileges. To fix this error, you can follow these steps:
1. Right-click on the application or file you are trying to access and select “Run as administrator” from the context menu. This will grant the necessary permissions.
2. If the error persists, you can try running the System File Checker tool. Press the Windows key + X on your keyboard and select “Command Prompt (Admin)” from the menu. Then, enter the command “sfc /scannow” and press Enter. This will scan and repair any corrupt system files that may be causing the error.
3. Additionally, make sure that your antivirus software is not interfering with the operation. Temporarily disable your antivirus and try running the application again. If the error no longer occurs, consider adding the application to the antivirus exception list.
4. It is also recommended to scan your computer for malware that may be causing the elevation error. Use a trusted antivirus or antimalware software to perform a full system scan.
Resolving the Elevation Error in Windows 10

If you are experiencing the Elevation Error in Windows 10 when trying to run DirectX, there are several steps you can take to resolve this issue.
First, ensure that you are logged in as an administrator on your computer. This error often occurs when trying to run certain applications without the necessary permissions.
Next, try running the application as an administrator. Right-click on the application icon or shortcut and select “Run as administrator” from the context menu.
If that doesn’t work, you can try repairing your system files using the System File Checker tool. Open a Command Prompt with administrative privileges and type “sfc /scannow“. This will scan your system for any corrupt or missing files and attempt to repair them.
You should also check for any malware or viruses that may be causing the issue. Run a full scan with your antivirus software to ensure your system is clean.
If the issue persists, you can try resetting the Windows Registry. Open the Registry Editor by typing “regedit” in the Start menu search bar and pressing Enter. Navigate to the following key: “HKEY_LOCAL_MACHINE\SOFTWARE\Microsoft\Windows\CurrentVersion\Policies\System“. Look for a value called “EnableLUA” and set it to “1” if it is not already.
Lastly, make sure that you have the latest version of DirectX installed on your computer. You can download it from the Microsoft website or use Windows Update to check for any available updates.
Taking Ownership of the Hard Drive
To take ownership of the hard drive and fix the DirectX elevation error, follow these steps:
1. Open File Explorer by clicking on the folder icon on the taskbar or pressing the Windows key + E on your computer keyboard.
2. Navigate to the directory where your DirectX files are located. This is usually in the “C:\Windows\System32” folder.
3. Locate the file “dxgi.dll” and right-click on it.
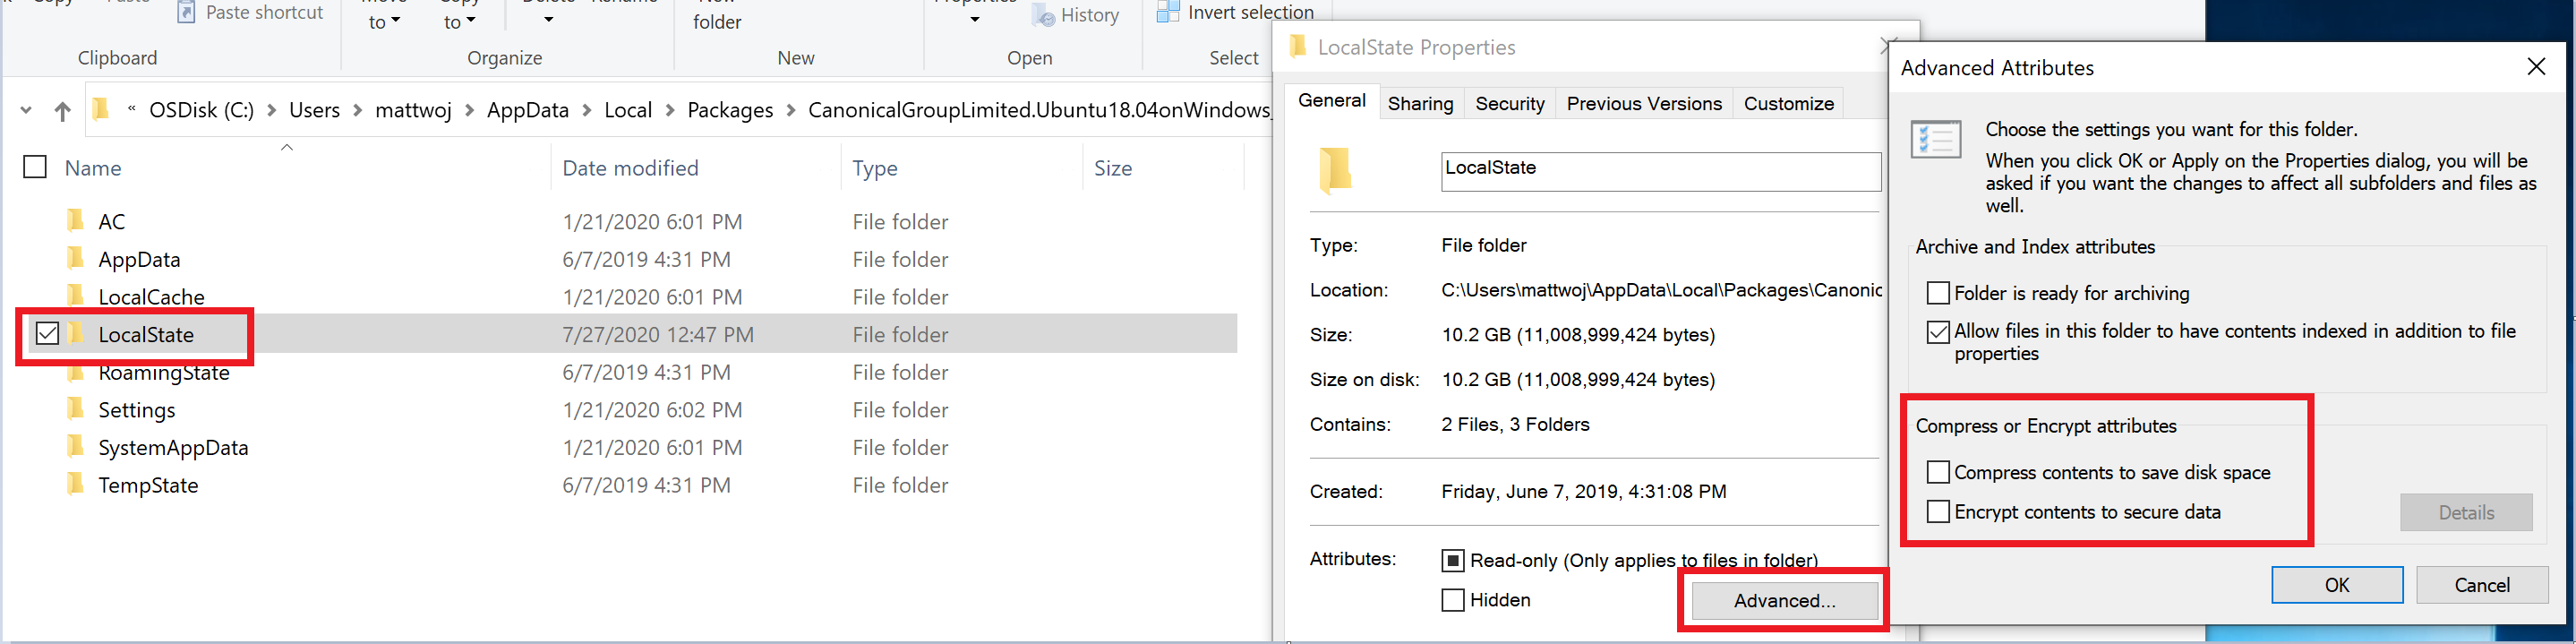
4. From the context menu, select “Properties.”
5. In the Properties window, go to the “Security” tab.
6. Click on the “Advanced” button at the bottom.
7. In the Advanced Security Settings window, click on the “Change” link next to the owner’s name.
8. In the “Select User or Group” window, type your username in the text field or click on the “Advanced” button to search for your username.
9. Click “OK” to close the “Select User or Group” window.
10. Back in the Advanced Security Settings window, check the box that says “Replace owner on subcontainers and objects.”
11. Click “Apply” and then “OK” to save the changes.
12. Close all open windows and restart your computer.
After following these steps, you should have taken ownership of the hard drive and resolved the DirectX elevation error. If you continue to experience issues, please reach out to our technical support team for further assistance.
python

import ctypes
def elevate_directx():
try:
# Check if running with administrative privileges
if not ctypes.windll.shell32.IsUserAnAdmin():
# If not elevated, attempt to elevate
ctypes.windll.shell32.ShellExecuteW(None, "runas", sys.executable, __file__, None, 1)
else:
# Code for DirectX elevation
# ...
print("DirectX elevation code executed successfully.")
except Exception as e:
print("Error occurred during DirectX elevation:", str(e))
# Main entry point
if __name__ == "__main__":
elevate_directx()
Running the App as an Administrator
To run the app as an administrator, follow these steps:
1. Open File Explorer and navigate to the location where the app is installed.
2. Right-click on the app’s executable file.
3. From the context menu, select “Run as administrator”.
4. If prompted for confirmation, click “Yes” or enter your administrator credentials.
5. The app will now run with elevated privileges, allowing it to perform tasks that require administrative access.
Running an app as an administrator can be useful when troubleshooting or installing certain software that requires elevated privileges. It gives the app the necessary permissions to access system files and settings.
Keep in mind that running an app as an administrator should be done with caution, as it grants the app additional privileges that could potentially be exploited by malicious software. Only run apps as an administrator when necessary and from trusted sources.
If you encounter any issues or errors while trying to run the app as an administrator, please reach out to our technical support team for assistance.
Disabling UAC
To fix the DirectX elevation error, you may need to disable User Account Control (UAC) on your computer. Here’s how you can do it:
1. Open the Start menu and type “UAC” in the search bar.
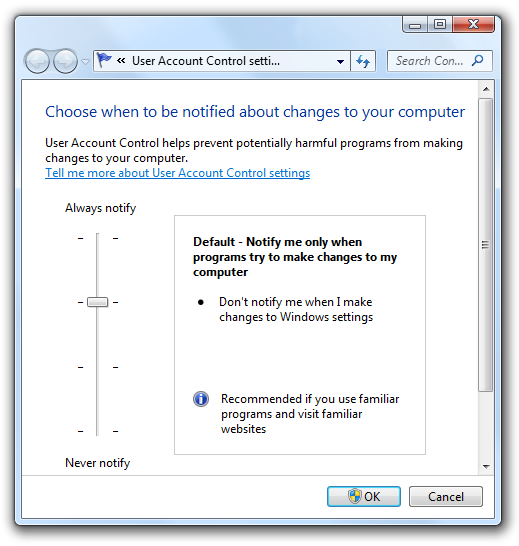
2. Click on the “Change User Account Control settings” option in the search results.
3. In the User Account Control settings window, move the slider to the bottom to disable UAC.
4. Click “OK” to save the changes.
5. You may need to restart your computer for the changes to take effect.
Disabling UAC can help resolve the DirectX elevation error by giving the necessary permissions to the application or game that requires elevated privileges. However, keep in mind that disabling UAC can potentially expose your computer to security risks, so it’s recommended to only disable it temporarily if needed.
If you encounter any issues or need further assistance, you can visit the Microsoft website or reach out to their support team for more information.
Temporarily Disabling Antivirus Software
If you are experiencing a DirectX Elevation Error on your Microsoft Windows computer, temporarily disabling your antivirus software may help resolve the issue. When antivirus software interferes with certain system processes, it can cause errors with DirectX. Here’s how you can disable your antivirus software temporarily:
1. Locate the antivirus software icon in the system tray on your computer. It may appear as an icon resembling a shield or a small “X” mark.
2. Right-click on the antivirus software icon to access the context menu.
3. In the context menu, look for an option that says “Disable” or “Pause Protection.” Click on this option to temporarily disable the antivirus software.
4. Some antivirus software may require you to specify the duration for which you want to disable the protection. Choose an appropriate time frame or select “Disable until next restart” if available.
5. Once the antivirus software is disabled, try running the application or performing the task that was causing the DirectX Elevation Error.
Remember, it is important to re-enable your antivirus software after troubleshooting the issue. Leaving your computer unprotected can expose it to potential threats. To re-enable your antivirus software, simply follow the same steps but choose the option to enable or resume protection.
If disabling the antivirus software does not resolve the issue, you may want to consider seeking further assistance from a technical support professional or visiting the Microsoft Support website for additional troubleshooting steps.
Running the Windows Troubleshooter
To fix the DirectX elevation error on your Windows operating system, you can use the Windows Troubleshooter. This built-in tool can help diagnose and resolve common issues related to DirectX.
To run the Windows Troubleshooter, follow these steps:
1. Press the Windows key on your computer keyboard or click on the Windows icon in the bottom left corner of your screen to open the Start Menu.
2. Type “Troubleshoot” in the search bar and click on the “Troubleshoot settings” option that appears.
3. In the Troubleshoot settings window, scroll down and click on the “Additional troubleshooters” link.
4. Look for the “Windows Store Apps” troubleshooter and click on it.
5. Click on the “Run the troubleshooter” button to start the troubleshooting process.
The Troubleshooter will automatically scan your system for any issues related to DirectX and attempt to fix them. Follow the on-screen instructions and prompts to complete the troubleshooting process.
If the Troubleshooter is unable to resolve the DirectX elevation error, you may need to try other troubleshooting methods or seek further assistance from Microsoft support or the Superuser community.
Updating Drivers

To update your drivers, follow these steps:
1. Press the Windows key + R to open the Run dialog box.
2. Type “devmgmt.msc” and press Enter to open the Device Manager.
3. In the Device Manager, expand the category of the device you want to update.
4. Right-click on the device and select “Update driver.”
5. Choose the option to automatically search for updated driver software.
6. Windows will search online for the latest driver and install it for you.
7. If Windows doesn’t find a new driver, you can try downloading the driver from the manufacturer’s website and manually updating it.
8. Once the driver is updated, restart your computer to apply the changes.
Remember to always keep your drivers up to date to ensure optimal performance and compatibility with your hardware and software.
If you encounter any issues during the update process, you can visit the Microsoft Support website or seek assistance from the Superuser community for troubleshooting help.
Repairing System Files
If you’re experiencing a DirectX elevation error on your Windows computer, it may be due to corrupted system files. Fortunately, you can repair these files to resolve the issue. Here’s how:
1. Press the Windows key and type “Command Prompt” in the search bar. Right-click on “Command Prompt” and select “Run as administrator.”
2. In the Command Prompt window, type sfc /scannow and press Enter. This command will scan your system files for errors and automatically repair them if possible.
3. Wait for the scan to complete. It may take some time, so be patient.
4. Once the scan is finished, restart your computer and check if the DirectX elevation error persists.
If the error persists after following these steps, you may need to consider other troubleshooting methods or seek further assistance from Microsoft support.
Resetting Folder Permissions
To reset folder permissions and fix the DirectX elevation error, follow these steps:
1. Open the Command Prompt as an administrator. To do this, right-click on the Start button and select “Command Prompt (Admin)” from the menu.
2. In the Command Prompt window, navigate to the directory where the folder with the permission issue is located. Use the “cd” command followed by the directory path. For example, if the folder is located in the “C:\Users\Username\Documents” directory, you would enter: cd C:\Users\Username\Documents.
3. Once you are in the correct directory, use the following command to reset the folder permissions: icacls foldername /reset /T /C /Q. Replace “foldername” with the name of the folder you want to reset the permissions for.
4. Press Enter to execute the command. The folder permissions will be reset to their default settings.
5. After the command finishes running, close the Command Prompt window.
Now you should be able to access the folder without encountering the DirectX elevation error. If you continue to experience issues, it may be helpful to restart your computer and try again.
Turning off UAC on Your PC
To turn off User Account Control (UAC) on your PC, follow these steps:
1. Press the Windows key + R to open the Run dialog box.
2. Type “regedit” and press Enter to open the Windows Registry Editor.
3. In the Registry Editor, navigate to the following path: HKEY_LOCAL_MACHINE\SOFTWARE\Microsoft\Windows\CurrentVersion\Policies\System.
4. Look for a DWORD value named “EnableLUA”.
5. Double-click on “EnableLUA” and change its value to 0.
6. Click OK and close the Registry Editor.
7. Restart your computer for the changes to take effect.
Please note that turning off UAC can make your PC more vulnerable to security threats. Proceed with caution and only make this change if you understand the risks involved.
If you encounter any issues or have further questions, feel free to reach out to our support team for assistance.
Getting Tech Support for Elevation Errors
If you are experiencing elevation errors while using DirectX on your Microsoft Windows operating system, there are a few steps you can take to resolve the issue. Firstly, ensure that you have administrative privileges on your personal computer. This will allow you to make the necessary changes to fix the error.
Next, try running the application or game that is causing the elevation error as an administrator. To do this, right-click on the application or game icon and select “Run as administrator” from the menu.
If the elevation error persists, you can try reinstalling DirectX on your computer. To do this, navigate to the Microsoft website and download the latest version of DirectX. Once downloaded, run the installer and follow the on-screen instructions to complete the installation.


