Experiencing the frustrating error message “Unfortunately com.android.phone Has Stopped” on your android device? Find out effective fixes and solutions in this guide.
Recently, Fortect has become increasingly popular as a reliable and efficient way to address a wide range of PC issues. It's particularly favored for its user-friendly approach to diagnosing and fixing problems that can hinder a computer's performance, from system errors and malware to registry issues.
- Download and Install: Download Fortect from its official website by clicking here, and install it on your PC.
- Run a Scan and Review Results: Launch Fortect, conduct a system scan to identify issues, and review the scan results which detail the problems affecting your PC's performance.
- Repair and Optimize: Use Fortect's repair feature to fix the identified issues. For comprehensive repair options, consider subscribing to a premium plan. After repairing, the tool also aids in optimizing your PC for improved performance.
Introduction to the “Unfortunately the Process com.android.phone Has Stopped” Error
If you are experiencing the “Unfortunately the Process com.android.phone Has Stopped” error on your Android device, there are a few steps you can take to resolve the issue.
First, try clearing the cache for the phone app. To do this, go to the Settings menu, then Apps or Applications. Find the phone app in the list and tap on it. From there, you can clear the cache.
If clearing the cache doesn’t work, you can try clearing the data for the phone app. This will remove any saved preferences or settings for the app, so be aware that you may need to set them up again. To clear the data, follow the same steps as before but instead of clearing the cache, tap on the option to clear the data.
If neither of these options work, you can try resetting the app preferences. This will reset all app preferences, such as default apps, background data restrictions, and permissions. To do this, go to the Settings menu, then Apps or Applications. Tap on the three-dot menu icon in the top-right corner and select Reset app preferences.
If the issue persists, you may need to update the phone app or check for system updates. Sometimes, outdated apps or software can cause compatibility issues. Go to the Google Play Store and search for the phone app. If there is an update available, tap on the update button to install it. Additionally, you can check for system updates by going to the Settings menu, then System or About phone.
If none of these solutions work, you may need to perform a factory reset on your device. This will erase all data and settings on your device, so make sure to back up any important information beforehand. To perform a factory reset, go to the Settings menu, then System or Backup & reset. Select the option to Factory data reset.
Understanding the Reasons Behind the Error
If you’re encountering the error message “Unfortunately com.android.phone has stopped” on your Android device, there are a few possible reasons behind it.
First, it could be due to a software bug or glitch. To fix this, try clearing the cache of the phone app. You can do this by going to Settings > Apps > Phone > Storage > Clear cache.
Another possible reason is a conflict with a recently installed app. To troubleshoot this, boot your phone in safe mode. This will disable all third-party apps and allow you to determine if a specific app is causing the problem. To enter safe mode, press and hold the power button, then tap and hold the “Power off” option until the safe mode prompt appears.
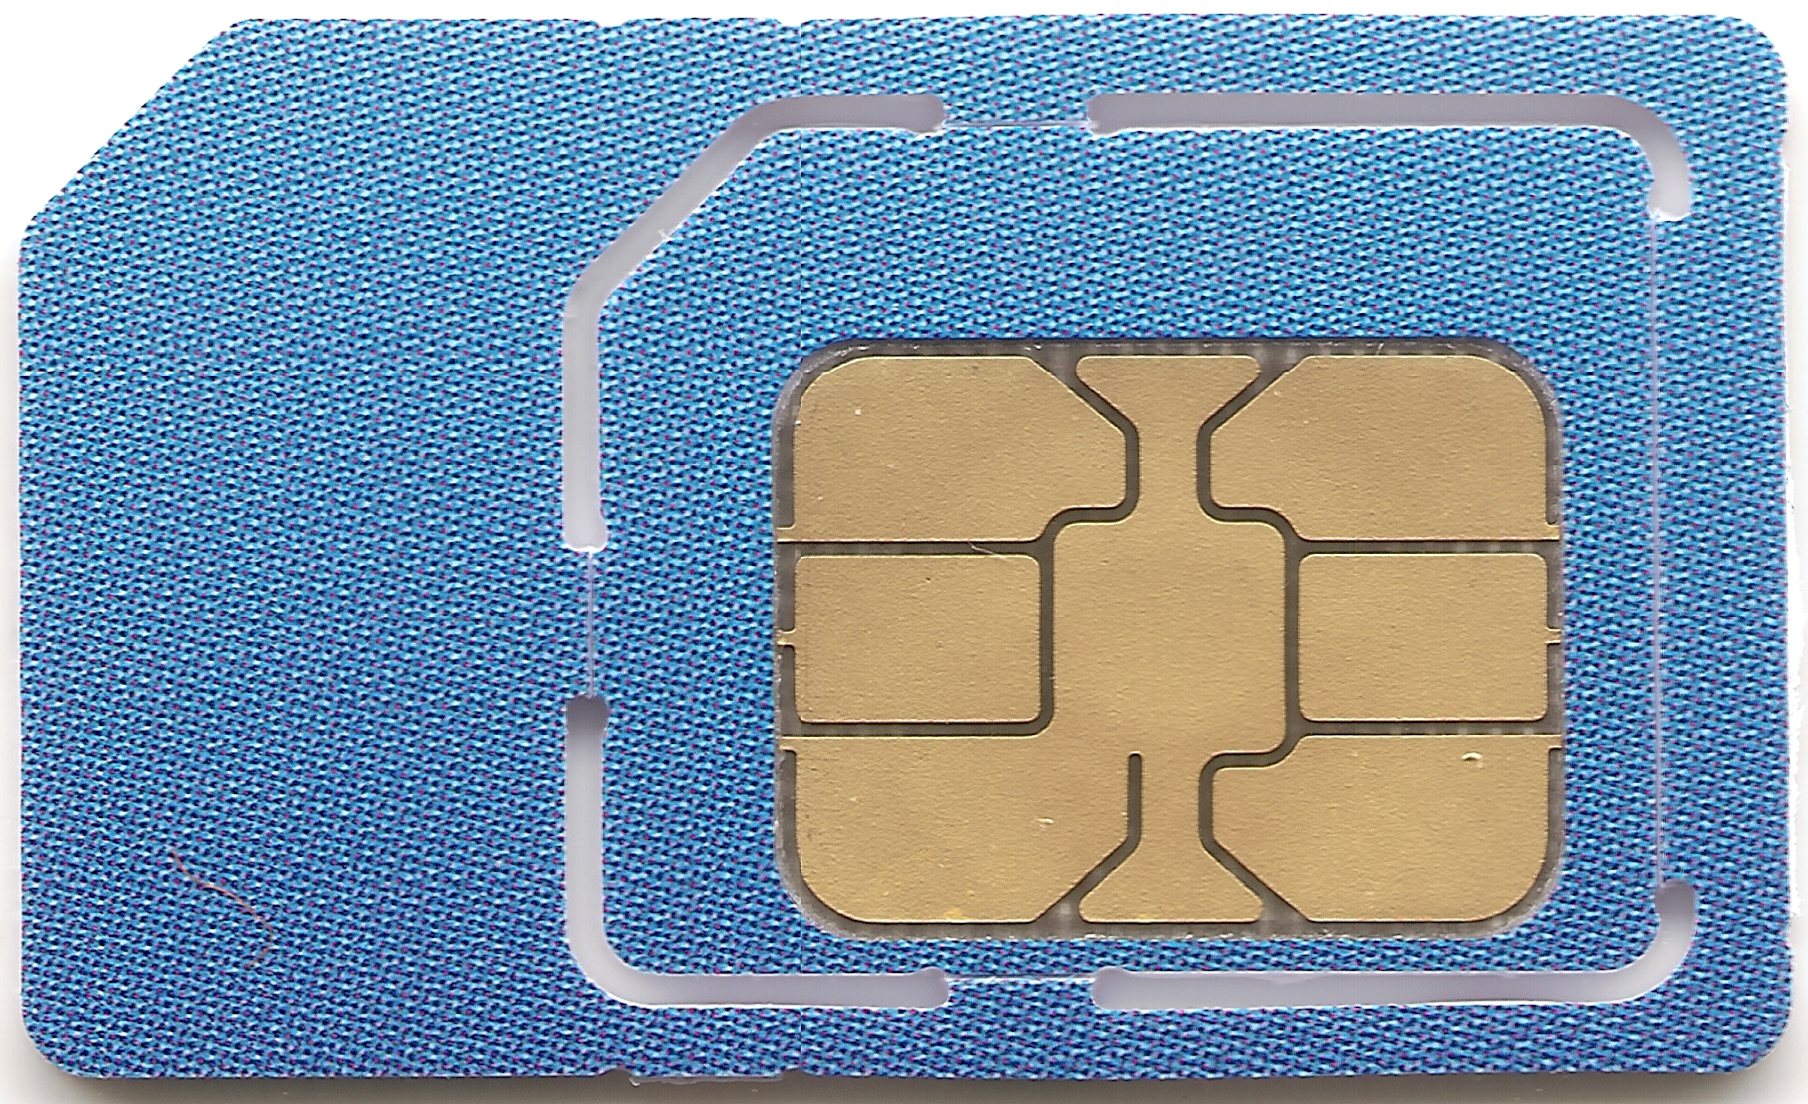
If the error still persists, it might be related to your SIM card or network settings. Try the following steps:
1. Power off your phone.
2. Remove the SIM card.
3. Reinsert the SIM card and power on your phone.
If none of these solutions work, you could also consider resetting your device to factory settings. Keep in mind that this will erase all data on your phone, so make sure to back up any important files beforehand.
If you’re still experiencing the error after trying these steps, it’s recommended to contact your device manufacturer or service provider for further assistance.
Reboot Your Phone
If you are experiencing the error message “Unfortunately com.android.phone has stopped” on your Android device, you can try rebooting your phone to resolve the issue.
To reboot your phone, follow these steps:
1. Press and hold the power button on your device until the power menu appears.
2. Tap on the “Restart” or “Reboot” option in the menu.
If your phone does not have a restart option in the power menu, you can try the following alternative method:
1. Press and hold the power button on your device until your phone turns off completely.
2. Once your phone is off, press and hold the power button again until your phone starts up.
Rebooting your phone can help to clear temporary files and resolve software bugs that may be causing the error message.
If the issue persists after rebooting, you may need to explore other troubleshooting options such as clearing the cache or performing a factory reset. You can find detailed instructions for these steps in our troubleshooting guide.
Please note that if you have recently rooted your device or installed any new applications, these could be potential causes of the error message. In such cases, you may need to uninstall or disable the problematic app or consider restoring your device to its original firmware.
If you continue to experience the error message after trying these steps, it may be helpful to contact your device manufacturer or visit a service center for further assistance.
Clear App Data and Cache
To fix the “Unfortunately com.android.phone has stopped” error on your Android device, you can try clearing the app data and cache for the Phone app. This can often resolve issues with the app and restore its functionality.
Here’s how to clear app data and cache for the Phone app:
1. Open the Settings app on your Android device.
2. Scroll down and tap on “Apps” or “Applications”, depending on your device.
3. Look for the Phone app in the list of installed apps and tap on it.
4. On the App info page, you’ll see options like “Storage” or “Storage & cache”. Tap on it.
5. You’ll see the “Clear storage” or “Clear data” option. Tap on it to clear the app data.
6. Next, tap on the “Clear cache” button to clear the app’s cache.
Note: Clearing app data will remove any saved preferences or settings for the Phone app. However, it won’t delete any of your contacts or call history.
After clearing the app data and cache, restart your device and check if the error is resolved. If not, you may need to consider other troubleshooting steps or seek further assistance.
Remember to regularly clear app data and cache for your apps to keep your device running smoothly and prevent any potential issues.
References:
– Microsoft Windows: https://www.microsoft.com/en-us/
– Android: https://www.android.com/
Clear Cache and Data of the SIM Toolkit
To fix the issue of “Unfortunately com.android.phone Has Stopped,” you can try clearing the cache and data of the SIM Toolkit on your Android device.
Here’s how you can do it:
1. Open the Settings app on your Android device. You can usually find it in the app drawer or by swiping down from the top of the screen and tapping the gear icon.
2. Scroll down and tap on “Apps” or “Applications”. This may be located under the “Device” or “Device Management” section, depending on your device.
3. Look for the SIM Toolkit app in the list of installed apps and tap on it. If you don’t see it, you may need to tap on the three-dot menu icon and select “Show system apps” or “Show all apps”.
4. Once you’re in the SIM Toolkit app settings, you’ll see options like “Storage” or “Storage & cache”. Tap on it.
5. On the next screen, you should see options to clear the cache and data of the SIM Toolkit. Tap on “Clear cache” and then “Clear data”. Confirm any prompts that appear.
6. After clearing the cache and data, restart your device. This can help refresh the system and resolve any issues.
By following these steps, you should be able to clear the cache and data of the SIM Toolkit on your Android device, which can help fix the “Unfortunately com.android.phone Has Stopped” error.
Disable Automatic Updates
![]()
To fix the issue of “Unfortunately com.android.phone Has Stopped,” you can disable automatic updates on your Android device. Here’s how:
1. Open the Settings app on your device.
2. Scroll down and tap on “System” or “About phone,” depending on your device.
3. Look for “Software Update” or “System updates” and tap on it.
4. Disable or uncheck the option for “Automatic updates” or “Download updates automatically.”
By disabling automatic updates, you can prevent your device from automatically downloading and installing software updates. This can be helpful if you’re experiencing issues with certain updates causing problems on your device.
It’s important to note that disabling automatic updates means you’ll need to manually check for and install updates in the future. To do this, you can go back to the “Software Update” or “System updates” section in your device’s settings and check for any available updates.
Remember, keeping your device up to date with the latest software updates is crucial for security and performance reasons. So, make sure to regularly check for updates and install them manually when needed.
If you continue to experience issues with the “com.android.phone Has Stopped” error, you may need to seek further assistance or consider other troubleshooting steps, such as clearing the cache or performing a factory reset on your device.
Using AROMA File Manager for Troubleshooting
If you are experiencing the error message “Unfortunately com.android.phone has stopped,” AROMA File Manager can help you troubleshoot and resolve the issue. Follow these steps to use AROMA File Manager:
1. Download AROMA File Manager onto your computer and transfer it to your smartphone via USB.
2. Boot your smartphone into recovery mode. This process may vary depending on your device, so refer to your device’s manual or search online for specific instructions.
3. In recovery mode, navigate to the “Install ZIP from SD card” or similar option using the volume keys and select it with the power button.
4. Browse and locate the AROMA File Manager ZIP file you transferred to your smartphone in step 1. Select it to start the installation.
5. Once installed, AROMA File Manager will launch. You can navigate through the graphical user interface using the volume and power buttons.
6. Locate and select the “System” folder to access the system files on your smartphone.
7. Look for the “com.android.phone” folder and select it.
8. Within the “com.android.phone” folder, locate and delete any cache files or temporary folders that may be causing the error.
9. After deleting the necessary files, exit AROMA File Manager and reboot your smartphone.
10. Your smartphone should now start up without the “Unfortunately com.android.phone has stopped” error message.
Remember to exercise caution when deleting files and only delete files that you are sure are safe to remove. AROMA File Manager is a powerful tool, so use it responsibly.
Wiping the Cache Partition
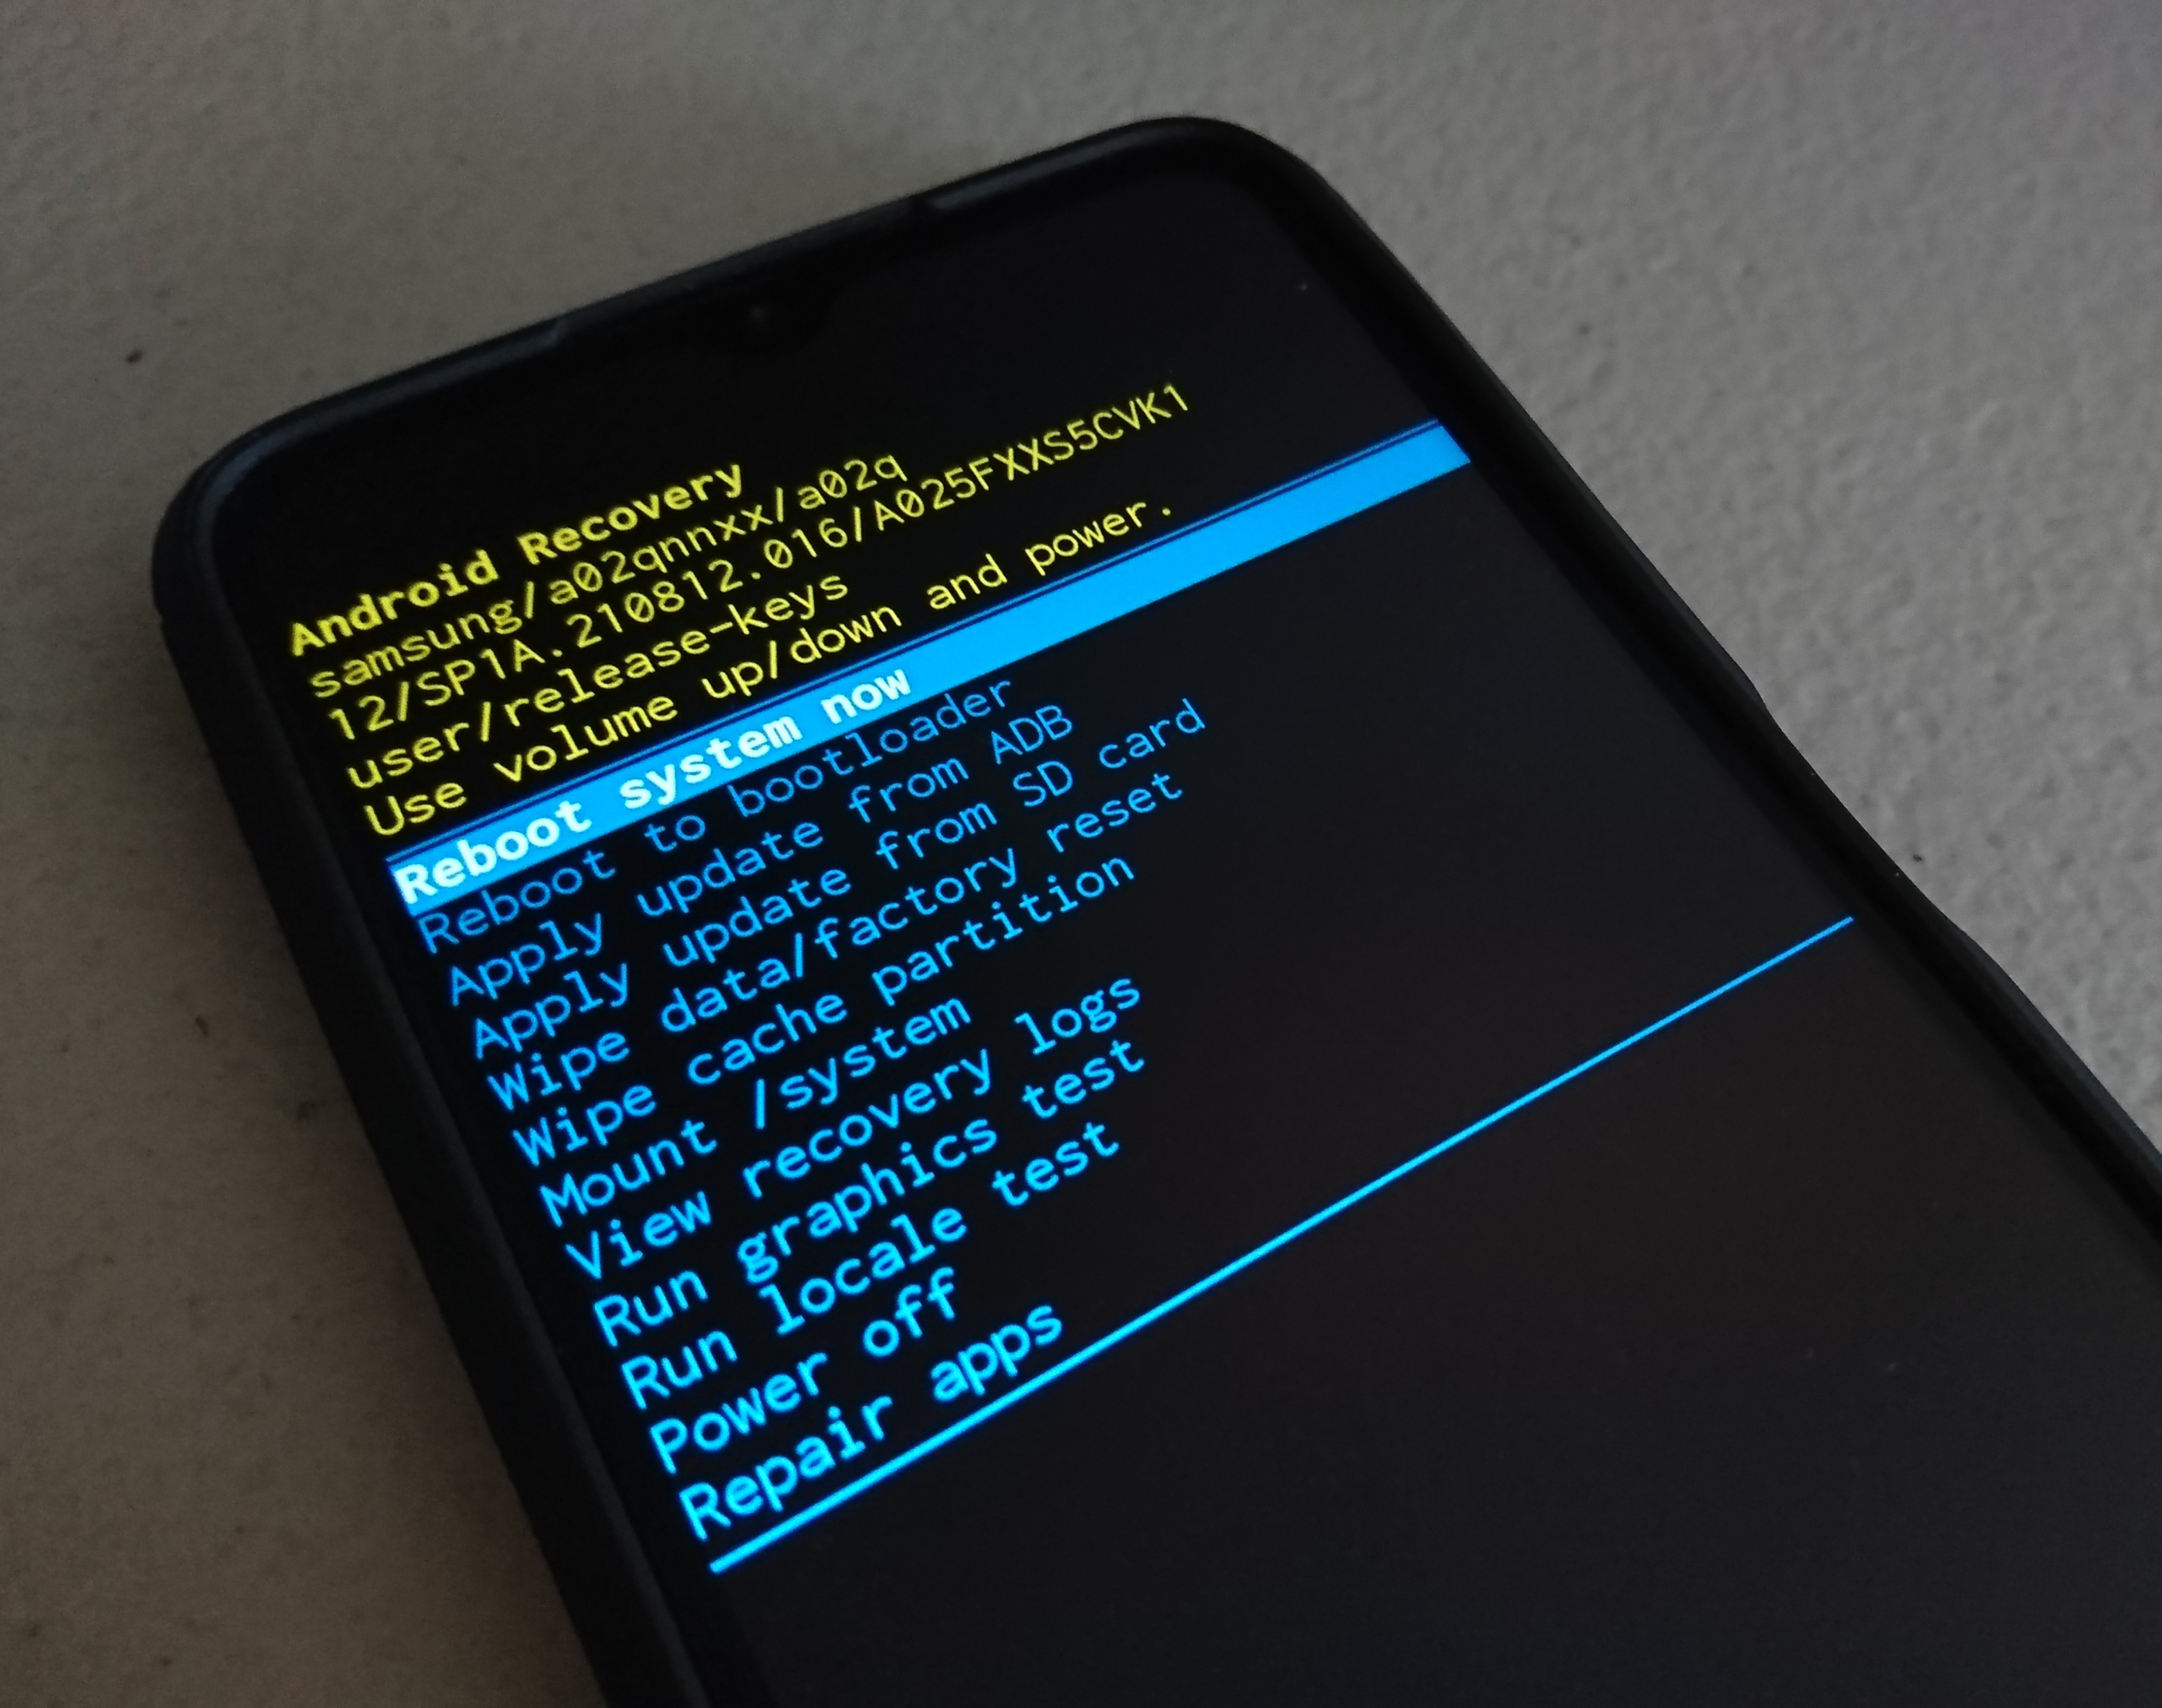
If you’re experiencing the error message “Unfortunately com.android.phone has stopped” on your Android device, clearing the cache partition can often help resolve the issue.
To wipe the cache partition, follow these steps:
1. Turn off your Android device.
2. Press and hold the Volume Up and Power buttons simultaneously until the device vibrates and the boot menu appears.
3. Use the volume buttons to navigate to the Recovery option, then press the Power button to select it.
4. When the Android logo appears, press and hold the Power button, then press and release the Volume Up button.
5. Use the volume buttons to highlight the Wipe cache partition option, then press the Power button to select it.
6. Wait for the cache partition to be wiped. This may take a few minutes.
7. Once the process is complete, the Reboot system now option will be highlighted. Press the Power button to select it and restart your device.
By wiping the cache partition, you’re essentially clearing temporary files and data that may be causing conflicts or errors on your device. This process does not delete any personal data or settings, so you don’t need to worry about losing anything important.
If clearing the cache partition doesn’t resolve the issue, you may want to consider other troubleshooting steps such as updating your software or performing a factory reset. Remember to always back up your important data before attempting any major changes to your device.
For more information and support, check out our website or contact our customer support team. We’re here to help you get the most out of your Android device.
Booting Your Phone in Safe Mode
To fix the issue of “Unfortunately com.android.phone has stopped,” you can try booting your phone in Safe Mode. Safe Mode allows your phone to start with only the essential system apps and services, which can help you determine if a third-party app is causing the problem.
Here’s how you can boot your phone in Safe Mode:
1. Press and hold the power button on your phone until the power menu appears.
2. Tap and hold the “Power off” option until the “Reboot to Safe Mode” prompt appears.
3. Tap “OK” to confirm and your phone will restart in Safe Mode.
In Safe Mode, you’ll notice that only the pre-installed system apps are available, and any third-party apps you’ve installed will not be accessible. This allows you to check if the issue persists without any interference from other apps.
If the problem doesn’t occur in Safe Mode, it’s likely that a third-party app is causing the issue. To identify the problematic app, you can uninstall recently installed apps one by one and test if the issue is resolved after each uninstallation.
To uninstall an app, follow these steps:
1. Go to the Settings menu on your phone.
2. Scroll down and tap on “Apps” or “Applications,” depending on your device.
3. Find the app you want to uninstall and tap on it.
4. Tap on “Uninstall” or “Remove” to remove the app from your phone.
Remember to restart your phone in normal mode after uninstalling each app to see if the problem has been resolved.
If the issue persists even in Safe Mode, it could be a system-related problem or a firmware issue. In such cases, you may need to contact your device manufacturer or seek professional technical assistance for further troubleshooting.
Performing a Factory Reset
If you’re experiencing the error message “Unfortunately com.android.phone has stopped” on your Android device, performing a factory reset can help resolve the issue. Please note that a factory reset will erase all data on your device, so it’s important to back up any important files or data before proceeding. Here’s how you can perform a factory reset on your Android device:
1. Power off your device completely.
2. Press and hold the Power button and the Volume Up button simultaneously until the device logo appears.
3. Use the volume buttons to navigate to the Recovery Mode option and press the Power button to select it.
4. Once in Recovery Mode, use the volume buttons to navigate to the Wipe data/factory reset option and press the Power button to select it.
5. Confirm the action by selecting Yes and wait for the process to complete.
6. Once the factory reset is finished, select the Reboot system now option to restart your device.
After the reboot, your device will be restored to its original factory settings, and the error message “Unfortunately com.android.phone has stopped” should no longer appear. Remember to set up your device again and restore any backed-up data.
If the issue persists even after performing a factory reset, it may indicate a more complex problem. In such cases, it’s recommended to seek assistance from an authorized service center or contact the manufacturer for further support.
The Ultimate Tool for Fixing the Error
Fixing the “Unfortunately com.android.phone Has Stopped” error is made easy with the ultimate tool. Follow these steps to resolve the issue quickly:
1. Clear the cache: Go to Settings > Apps > Phone > Storage > Clear Cache. This will remove any temporary files that could be causing the error.
2. Restart your phone: Hold the power button, then tap Restart. Sometimes a simple reboot can fix software bugs causing the error.
3. Update your phone’s software: Go to Settings > Software Update > Download and Install. Installing the latest updates can resolve compatibility issues that may be triggering the error.
4. Check for malware: Install a trusted mobile security app to scan for and remove any malware that could be causing the error.
5. Reset app preferences: Go to Settings > Apps > Menu > Reset App Preferences. This will restore default settings for all apps, potentially fixing any conflicts causing the error.
If the error persists after trying these steps, consider contacting your device manufacturer’s support team for further assistance.
Clearing the SIM Toolkit Cache and Data
To fix the error message “Unfortunately com.android.phone has stopped,” you can try clearing the SIM Toolkit cache and data on your Android device. Here’s how:
1. Open the “Settings” app on your phone.
2. Scroll down and tap on “Apps” or “Applications,” depending on your device.
3. Look for “SIM Toolkit” in the list of installed apps and tap on it.
4. On the SIM Toolkit app info page, tap on “Storage.”
5. You will see two options: “Clear cache” and “Clear data.” Tap on “Clear cache” first to remove any temporary files that may be causing the issue.
6. After clearing the cache, tap on “Clear data” to delete any stored information related to the SIM Toolkit.
7. Confirm your action when prompted.
By clearing the SIM Toolkit cache and data, you are essentially resetting the app to its default state. This can help resolve any conflicts or issues that may have been causing the error message.
Remember, clearing the SIM Toolkit cache and data will not delete any of your personal data or settings. It will only remove temporary files and reset the app.
If the error message persists, you may also try restarting your phone or contacting your mobile service provider for further assistance.
Note: The steps provided here are based on a general Android interface and may vary slightly depending on your device’s manufacturer and Android version.
Backup Android Data to Computer (Bonus Tip)
To backup your Android data to your computer, follow these steps:
1. Connect your Android device to your computer using a USB cable.
2. On your Android device, swipe down from the top of the screen to access the notification panel.
3. Tap the “USB” option and then select “File Transfer” or “MTP” mode.
4. On your computer, open File Explorer (Windows) or Finder (Mac).
5. Locate your Android device in the list of connected devices.
6. Double-click on your Android device to open it and navigate to the folders you want to backup.
7. Select the files or folders you want to backup by clicking on them while holding down the “Ctrl” key (Windows) or “Command” key (Mac).
8. Right-click on the selected files or folders and choose “Copy” from the context menu.
9. Navigate to the location on your computer where you want to store the backup.
10. Right-click in the destination folder and choose “Paste” from the context menu to copy the files or folders from your Android device to your computer.
Clearing Cache on Android Device
- What is cache? Understand the purpose and function of cache on your Android device.
- Reasons for clearing cache: Learn why it is important to clear cache and how it can resolve issues with the “com.android.phone has stopped” error.
- Step-by-step guide: Follow a detailed walkthrough on how to clear cache on your Android device to fix the error.
- Alternative methods: Explore other options to clear cache, such as using third-party apps or accessing the device’s recovery mode.
- Precautions: Discover important precautions to take before clearing the cache to ensure a smooth process without any data loss.
- Benefits of clearing cache: Understand the potential benefits of regularly clearing cache to optimize your Android device’s performance.
- Frequently Asked Questions (FAQs): Find answers to common queries related to clearing cache on Android devices.
- Additional troubleshooting: If clearing cache doesn’t resolve the “com.android.phone has stopped” error, explore other troubleshooting steps to fix the issue.
- Conclusion: Summarize the importance of clearing cache on Android devices and the effectiveness in resolving the “com.android.phone has stopped” error.
Stop Automatic Date and Time
![]()
To stop automatic date and time on your Android device, follow these steps:
1. Open the Settings app on your device. You can usually find it in your app drawer or by swiping down from the top of your screen and tapping the gear icon.
2. Scroll down and tap on “System” or “System & Device” depending on your device model.
3. Look for the “Date & time” option and tap on it.
4. Toggle off the “Automatic date & time” or “Use network-provided time” option. This will disable the automatic date and time setting.
5. If you want to set the date and time manually, tap on the “Set date” or “Set time” option and adjust the values accordingly. Alternatively, you can also select a different time zone if needed.
6. Once you’ve made your changes, exit the Settings app. Your device will now use the date and time you have manually set.
Please note that disabling automatic date and time may affect certain apps and services that rely on accurate time information. If you encounter any issues, consider enabling the automatic date and time feature again.
If you continue to experience the “com.android.phone has stopped” error, it may be caused by other factors such as a software bug or conflicting apps. In such cases, you may need to troubleshoot further or seek assistance from the manufacturer or a professional technician.
Reset App Preferences and Uninstalling Recently Downloaded 3rd Party Apps
To fix the “Unfortunately com.android.phone Has Stopped” error on your Android device, you can try resetting app preferences and uninstalling recently downloaded third-party apps. Here’s how you can do it:
1. Reset App Preferences:
– Go to the Settings app on your Android device.
– Scroll down and tap on “Apps” or “Applications” (the name may vary depending on your device).
– Look for the three-dot menu icon in the top-right corner of the screen and tap on it.
– Select “Reset app preferences” from the dropdown menu.
– A confirmation pop-up will appear. Tap on “Reset apps” to confirm.
– This will reset the preferences for all apps on your device, which can help resolve any conflicts causing the error.
2. Uninstall Recently Downloaded Third-Party Apps:
– Go back to the “Apps” or “Applications” section in the Settings app.
– Look for the recently downloaded third-party apps that you suspect may be causing the error.
– Tap on the app you want to uninstall.
– On the app info page, tap on the “Uninstall” button.
– Confirm the uninstallation when prompted.
– Repeat this process for any other recently downloaded third-party apps that you want to uninstall.
By resetting app preferences and uninstalling recently downloaded third-party apps, you can troubleshoot and resolve the “Unfortunately com.android.phone Has Stopped” error on your Android device. Remember to restart your device after making these changes to ensure the changes take effect.
If the problem persists, you may need to consider other troubleshooting steps or contact your device manufacturer or service provider for further assistance.