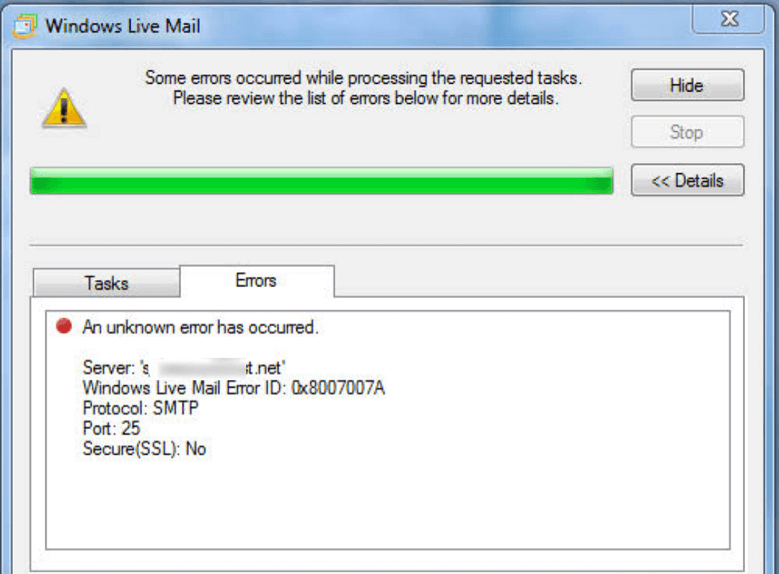
If you’re struggling with error 0x8007007A while trying to update Windows Live Mail, don’t worry – you’re not alone. In this article, we’ll explore a few simple fixes to help you get your email client up and running smoothly.
Recently, Fortect has become increasingly popular as a reliable and efficient way to address a wide range of PC issues. It's particularly favored for its user-friendly approach to diagnosing and fixing problems that can hinder a computer's performance, from system errors and malware to registry issues.
- Download and Install: Download Fortect from its official website by clicking here, and install it on your PC.
- Run a Scan and Review Results: Launch Fortect, conduct a system scan to identify issues, and review the scan results which detail the problems affecting your PC's performance.
- Repair and Optimize: Use Fortect's repair feature to fix the identified issues. For comprehensive repair options, consider subscribing to a premium plan. After repairing, the tool also aids in optimizing your PC for improved performance.
Fixing Windows Live Mail Error 0x8007007A
Fix Windows Live Mail Error 0x8007007A by following these methods:
1. Delete the email(s) causing the error message(s). Right-click the email and select Delete.
2. Check if the error code is related to the root folder size. Move some data to an alternative folder or delete some files and folders to free up space.
3. Update Windows Live Mail to the latest version or switch to an alternative email client like MS Outlook or Office 365.
4. Check if the offline address book has any issues. Open the terminal and use the command Outlook.exe /resetnavpane.
5. If the problem persists, try creating a new Windows user account and see if the error appears. If not, the issue might be with the original user account.
By following these methods, you can fix the Windows Live Mail Error 0x8007007A and continue to use the app without any further issues.
Removing Stuck Emails from Windows Live Mail Outbox
- Step 1: Open Windows Live Mail
- Step 2: Click on the “Outbox” folder in the left-hand pane
- Step 3: Identify the stuck email(s) in the Outbox folder
- Step 4: Close Windows Live Mail
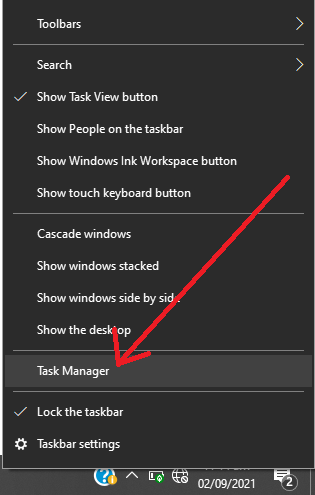
- Step 5: Open the Windows Task Manager
- Step 5.1: Press Ctrl+Shift+Esc to open the Task Manager
- Step 5.2: Click on the “Processes” tab
- Step 5.3: Find the “WindowsLiveMail.exe” process and select it
- Step 5.4: Click the “End Task” button to close the process
- Step 6: Navigate to the Windows Live Mail Outbox folder
- Step 6.1: Open File Explorer
- Step 6.2: Navigate to the following path: C:\Users\username\AppData\Local\Microsoft\Windows Live Mail\Outbox
- Step 6.3: Replace “username” with your own Windows username
- Step 7: Delete the stuck email(s)
- Step 7.1: Select the stuck email(s)
- Step 7.2: Press the “Delete” key on your keyboard or right-click and select “Delete”
- Step 8: Restart Windows Live Mail
Sending Media as Attachments in Windows Live Mail
Sending media attachments in Windows Live Mail is a straightforward process. Open a new e-mail message window and click on the “Attach File” option. Navigate to the file(s) you want to attach and select them. You can also send an entire album of photos or videos by selecting the “Photo Album” option. Once you’ve attached your files, you can add a message and send the e-mail as normal. If you encounter an error code, such as 0x8007007A, it could be due to a problem with the data area passed to a system call being too small. In this case, try updating Windows Live Mail or using an alternative e-mail application like MS Outlook or Windows 10 Mail.
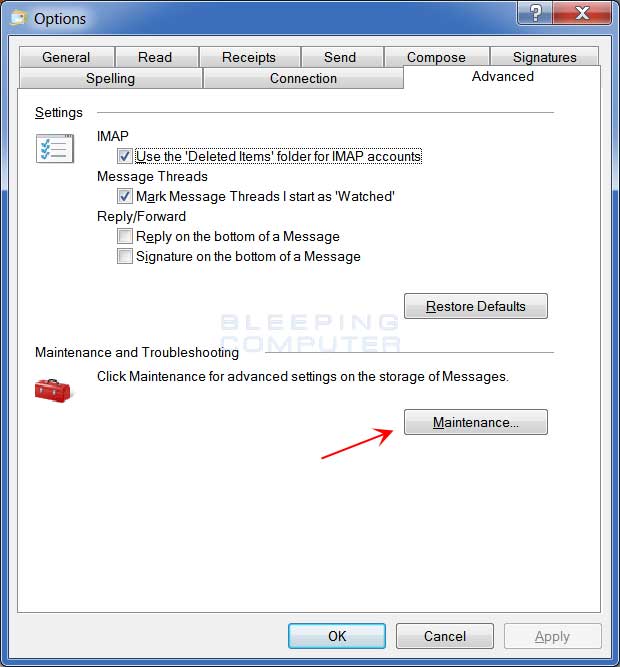
Repairing Windows Live Mail Program
| Repairing Windows Live Mail Program | |
|---|---|
| Article Title: | Fix Windows Live Mail & Update Error 0x8007007A |
| Step 1: | Close Windows Live Mail program if it is open |
| Step 2: | Open the Control Panel and click on “Programs and Features” |
| Step 3: | Find “Windows Essentials” and right-click on it |
| Step 4: | Select “Uninstall” and follow the prompts to remove Windows Essentials |
| Step 5: | Download and install the latest version of Windows Essentials from Microsoft’s website |
| Step 6: | Restart your computer and open Windows Live Mail to see if the issue has been resolved |
| Step 7: | If the issue persists, try running a virus scan on your computer and ensure all Windows updates are installed |
Deleting and Reconfiguring Windows Live Mail Account
To delete and reconfigure your Windows Live Mail account, follow these steps:
1. Open Windows Live Mail and click on the Accounts tab.
2. Select the account that you want to delete and click on the Remove button.
3. Confirm that you want to remove the account by clicking on Yes.
4. To add a new account, click on the Add button and select Email Account.
5. Enter your email address and password. Make sure that you select the option to manually configure server settings.
6. Enter the server information for your email provider and click on Next.
7. Confirm the settings and click on Finish.
Follow these steps to reconfigure your Windows Live Mail account.
If you encounter any errors while deleting or reconfiguring your account, try restarting the application or your computer. If the problem persists, consider using alternatives like Windows 10 Mail or Outlook 2010/2013.


