Having trouble with your Windows 10 PC refusing to stay asleep? Let’s explore some troubleshooting steps and solutions to address this frustrating issue.
Recently, Fortect has become increasingly popular as a reliable and efficient way to address a wide range of PC issues. It's particularly favored for its user-friendly approach to diagnosing and fixing problems that can hinder a computer's performance, from system errors and malware to registry issues.
- Download and Install: Download Fortect from its official website by clicking here, and install it on your PC.
- Run a Scan and Review Results: Launch Fortect, conduct a system scan to identify issues, and review the scan results which detail the problems affecting your PC's performance.
- Repair and Optimize: Use Fortect's repair feature to fix the identified issues. For comprehensive repair options, consider subscribing to a premium plan. After repairing, the tool also aids in optimizing your PC for improved performance.
Troubleshoot and Fix Computer Sleep Issues
Troubleshoot and Fix Windows 10 PC Won’t Stay Asleep
If your Windows 10 PC is having trouble staying asleep, there are a few troubleshooting steps you can take to resolve the issue.
First, check your power settings to ensure that your computer is not set to wake up automatically. Go to the Start menu and search for “Power Options.” Click on the Control Panel (Windows) option that appears. In the Power Options window, click on “Change plan settings” next to your current power plan. Then, click on “Change advanced power settings.” Expand the “Sleep” option and make sure that “Allow wake timers” is set to “Disable.” This will prevent any scheduled tasks or programs from waking up your computer.
If the issue persists, you can try using the Command-line interface to troubleshoot further. Open a Command Prompt window by typing “cmd.exe” in the search bar and selecting the Command Prompt app. In the Command Prompt window, type the following command and press Enter: powercfg -lastwake. This command will show you the last device or event that woke up your computer. Use this information to investigate and resolve the issue.
Another helpful tool is the Event Viewer. Press the Windows key + R to open the Run dialog box. Type “eventvwr.msc” and press Enter to open the Event Viewer. In the Event Viewer, expand “Windows Logs” and select “System.” Look for any events with the source “Power-Troubleshooter” or “Power-Kernel-Power” that occurred around the time your computer woke up unexpectedly. These events may provide more clues about the cause of the issue.
If none of these steps resolve the problem, it’s possible that a hardware issue is causing your computer to wake up. Check for any loose connections or malfunctioning hardware, such as a faulty mouse or keyboard. You can also try disconnecting any USB devices, as they can sometimes cause sleep issues.
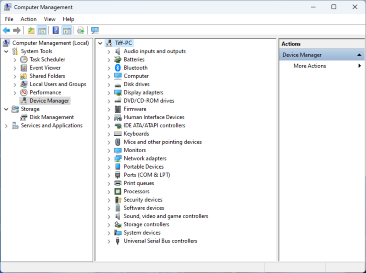
In some cases, a software conflict or outdated driver may be the culprit. Make sure that your Windows 10 is up to date with the latest Windows Update patches. You can also try updating your device drivers through the Device Manager. Right-click on the Start menu and select “Device Manager.” Expand the categories and look for any devices with a yellow exclamation mark. Right-click on the device and select “Update driver” to install the latest driver software.
If all else fails, you can try performing a system restore to a previous point when your computer was able to stay asleep. Open the Control Panel (Windows) and search for “Recovery.” Click on the “Recovery” option and select “Open System Restore.” Follow the on-screen instructions to restore your computer to an earlier state.
Adjust Windows Update and Scheduled Maintenance Settings
Adjusting Windows Update and Scheduled Maintenance Settings can help troubleshoot and fix a Windows 10 PC that won’t stay asleep. Here’s how you can do it:
1. Open the Control Panel by searching for it in the Start menu and selecting it from the search results.
2. Click on “System and Security” in the Control Panel.
3. Under “Windows Update,” click on “Turn automatic updating on or off.”
4. In the Windows Update settings, click on the drop-down list next to “Important updates” and select “Never check for updates (not recommended).” This will prevent Windows from automatically downloading and installing updates, which can sometimes interfere with sleep mode.
5. Click on “OK” to save the changes.
6. Next, go back to the Control Panel and click on “System and Security” again.
7. Under “Security and Maintenance,” click on “Change maintenance settings.”
8. In the Scheduled Maintenance settings, deselect the checkbox next to “Allow scheduled maintenance to wake up my computer at the scheduled time.” This will prevent maintenance tasks from waking up your PC when it’s supposed to be in sleep mode.
9. Click on “OK” to save the changes.
10. Restart your computer for the changes to take effect.
By adjusting these settings, you can ensure that Windows Update and scheduled maintenance tasks don’t interrupt your PC’s sleep mode. This should help resolve the issue of your Windows 10 PC not staying asleep.
If you’re using Windows 11, the steps may be slightly different. You can refer to the Microsoft website or search online for specific instructions tailored to Windows 11.
Utilize Local Group Policy Editor for Advanced Customization

If your Windows 10 PC won’t stay asleep, you can troubleshoot and fix the issue by utilizing the Local Group Policy Editor. This powerful tool allows you to customize various settings on your computer, including those related to sleep mode.
To access the Local Group Policy Editor, follow these steps:
1. Press the Windows key + R to open the Run dialog box.
2. Type “gpedit.msc” and press Enter to open the Local Group Policy Editor.
Once you have the Local Group Policy Editor open, you can navigate to the relevant settings to troubleshoot the sleep issue. Here are a few key settings to check:
1. Navigate to Computer Configuration > Administrative Templates > System > Power Management > Sleep Settings.
2. Double-click on the “Allow hybrid sleep” setting and select “Disabled” to prevent your computer from entering hybrid sleep mode.
3. Double-click on the “Allow wake timers” setting and select “Disabled” to prevent any wake timers from interrupting sleep mode.
4. Double-click on the “Require a password on wakeup” setting and select “Enabled” to ensure that a password is required when waking up from sleep mode.
Remember to apply the changes and restart your computer for the new settings to take effect.
By utilizing the Local Group Policy Editor, you can customize advanced settings related to sleep mode on your Windows 10 PC. This can help troubleshoot and fix the issue of your PC not staying asleep.
python

import psutil
def check_wake_timers_enabled():
# Check if wake timers are enabled
return psutil.WINDOWS and psutil.power_info().as_dict().get('wake_timers_supported', False)
# Usage
if check_wake_timers_enabled():
print("Wake timers are enabled.")
else:
print("Wake timers are disabled.")
Disable Specific Devices that Wake Up Your PC
1. Open the Control Panel by searching for it in the Windows search bar.
2. In the Control Panel, click on “Hardware and Sound.”
3. Under “Devices and Printers,” click on “Device Manager.”
4. In the Device Manager window, expand the categories to find the devices that might be causing your PC to wake up. Common culprits include the mouse, keyboard, and network adapters.
5. Once you’ve identified the device, right-click on it and select “Properties” from the context menu.
6. In the device’s Properties window, go to the “Power Management” tab.
7. Uncheck the box that says “Allow this device to wake the computer.”
8. Click “OK” to save the changes.
9. Repeat steps 5 to 8 for any other devices that may be causing the issue.
10. Close the Device Manager and Control Panel windows.
Optimize Power Options to Prevent Computer from Waking Up
- Adjust power settings: Access the Power Options menu in the Control Panel or search for “Power Options” in the Start menu. Choose the “Change plan settings” option for your selected power plan.
- Configure advanced power settings: Click on “Change advanced power settings” to access additional options. Look for the “Sleep” section and expand it to find settings like “Allow wake timers” and “Allow hybrid sleep.”
- Disable wake timers:
Under the “Sleep” section of the advanced power settings, disable the “Allow wake timers” option. This prevents certain apps or tasks from waking up your computer. - Adjust power buttons and lid settings:
Expand the “Power buttons and lid” section in the advanced power settings. Configure the options for “Lid close action” and “Power button action” to ensure they don’t wake up your PC. - Disable network adapters:
If your computer wakes up due to network activity, disable the network adapters from waking it. Access the Device Manager, expand the “Network adapters” category, and right-click on your network adapter. In the properties window, go to the “Power Management” tab and uncheck the option “Allow this device to wake the computer.” - Check scheduled tasks:
Some tasks or applications may have scheduled activities that wake up your PC. Open the Task Scheduler by searching for it in the Start menu. Go through the different folders and disable any tasks that have the option “Wake the computer to run this task” enabled. - Update device drivers:
Outdated or incompatible drivers can cause issues with power management. Visit the manufacturer’s website or use Windows Update to ensure your drivers are up to date. Look specifically for drivers related to chipset, network, and graphics cards. - Scan for malware:
Malware can interfere with power settings and prevent your computer from staying asleep. Run a thorough scan with Windows Defender or any reputable antivirus software to detect and remove any potential threats. - Perform a clean boot:
Start your PC with a minimal set of drivers and startup programs to determine if any third-party software is causing the wake-up issue. Open the System Configuration tool by searching for “msconfig” in the Start menu, go to the “Services” tab, check the box “Hide all Microsoft services,” then click “Disable all.” Restart your computer and observe if it stays asleep. - Restore default power plan settings:
If you have made extensive changes to your power plan settings, consider restoring the default settings. In the Power Options menu, click on “Change plan settings” for your selected power plan, then choose “Restore default settings for this plan.”
Resolve Sleep Issues by Updating Device Drivers
If your Windows 10 PC is having trouble staying asleep, updating your device drivers can often resolve the issue. Outdated or incompatible drivers can cause sleep problems, but fortunately, Microsoft Windows provides an easy way to update them.
To begin, open the Device Manager by pressing the Windows key + X and selecting Device Manager from the context menu. Alternatively, you can search for “Device Manager” in the search bar and select it from the results.
Once in the Device Manager, expand the categories to locate the drivers you want to update. Right-click on the driver and select “Update driver” from the menu.
Note: If you’re unsure which drivers to update, it’s recommended to start with the display and network drivers, as these are commonly associated with sleep issues.
In the driver update wizard, choose the option to search automatically for updated driver software. Windows will then scan your computer and the internet for the latest drivers. If an updated driver is found, follow the prompts to install it.
If Windows doesn’t find any updates or if the issue persists after updating the drivers, you can also try manually downloading the latest driver from the manufacturer’s website. Most hardware manufacturers provide a support section on their website where you can search for and download the latest drivers for your specific device.
Updating your device drivers can help ensure compatibility and stability, which are crucial for a smooth sleep experience on your Windows 10 PC. By following these steps, you can troubleshoot and fix sleep issues, allowing you to enjoy uninterrupted rest and peace of mind.
Remember to regularly check for driver updates, as new versions are often released to address bugs and improve performance. Keeping your drivers up to date is an essential part of maintaining a healthy and efficient computer system.
References:
– PCMag: www.pcmag.com
– Microsoft Windows: www.microsoft.com
Repair System Files and Reset PC to Factory Settings
| Step | Description |
|---|---|
| 1 | Open Command Prompt as an administrator. |
| 2 | Type the following command and press Enter: sfc /scannow |
| 3 | Wait for the System File Checker to scan and repair any corrupted files. |
| 4 | Restart your computer and check if the issue persists. |