
In this guide, I will show you how to repair your Windows Server 2012 R2 installation without losing any data.
Recently, Fortect has become increasingly popular as a reliable and efficient way to address a wide range of PC issues. It's particularly favored for its user-friendly approach to diagnosing and fixing problems that can hinder a computer's performance, from system errors and malware to registry issues.
- Download and Install: Download Fortect from its official website by clicking here, and install it on your PC.
- Run a Scan and Review Results: Launch Fortect, conduct a system scan to identify issues, and review the scan results which detail the problems affecting your PC's performance.
- Repair and Optimize: Use Fortect's repair feature to fix the identified issues. For comprehensive repair options, consider subscribing to a premium plan. After repairing, the tool also aids in optimizing your PC for improved performance.
Overview of System Restores and Repairs
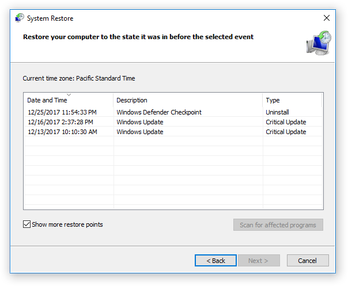
System Restore allows you to revert your Windows Server 2012 R2 installation back to a previous state, undoing any recent changes that may have caused issues. This can be a lifesaver when facing system errors or performance issues.
Repairing Windows Server 2012 R2 without losing data is possible by using tools such as System Restore or Windows Server Installation Media. These methods can help fix corrupted system files or restore the system to a working state without affecting your data.
If your server is experiencing issues, consider using System Restore to roll back to a known good state. This can be done by accessing the System Restore feature in the Control Panel and following the on-screen instructions to select a restore point.
In cases where System Restore is not an option, using the Windows Server Installation Media to repair the installation is an alternative. Boot from the installation media, select the repair option, and follow the prompts to repair the system without losing data.
Utilizing SFC /Scannow and Alternatives for Fixes
Utilizing SFC /Scannow is a built-in Windows tool that can help repair corrupted system files on Windows Server 2012 R2 without losing data. To run SFC /Scannow, open Command Prompt as an administrator and type “sfc /scannow” and hit Enter. This will scan and repair any corrupted system files.
If SFC /Scannow does not fix the issue, you can try using the Deployment Image Servicing and Management (DISM) tool. To do this, open Command Prompt as an administrator and type “DISM /Online /Cleanup-Image /RestoreHealth” and hit Enter. This will repair the Windows image and hopefully resolve any issues.
Another alternative for fixing Windows Server 2012 R2 without losing data is to perform a repair installation. This involves using the Windows installation media to reinstall Windows while keeping your files and settings intact. Simply boot from the installation media, choose the “Repair your computer” option, and then select “Upgrade” to perform the repair installation.
If none of these methods work, you may need to consider a system restore to a previous point in time when the system was working correctly. This can be done by accessing the System Restore tool in the Control Panel and following the on-screen instructions.
By utilizing these methods, you can repair your Windows Server 2012 R2 installation without losing any data.
Reinstalling Without Data Loss: Traditional and Advanced Methods
Traditional Method: The traditional method for reinstalling Windows Server 2012 R2 without losing data involves using the installation media to perform a repair installation. This process allows you to repair any corrupted system files while keeping your data intact. To do this, insert the Windows Server 2012 R2 installation disk and boot from it. Follow the on-screen instructions until you reach the option to “Upgrade” or “Custom Install.” Choose the “Upgrade” option to repair the existing installation without losing data.
Advanced Method: An advanced method for reinstalling Windows Server 2012 R2 without data loss involves using the Deployment Image Servicing and Management (DISM) tool. This tool allows you to repair the Windows image offline without booting into the operating system. To do this, open a command prompt with administrative privileges and run the following command: DISM /Online /Cleanup-Image /RestoreHealth. This will scan for and repair any corrupted system files.
Restoring Files, Folders, and Server to Default Settings
To restore files, folders, and server to default settings in Windows Server 2012 R2 without losing data, follow these steps:
1. Back up all important data on the server before proceeding with any changes.
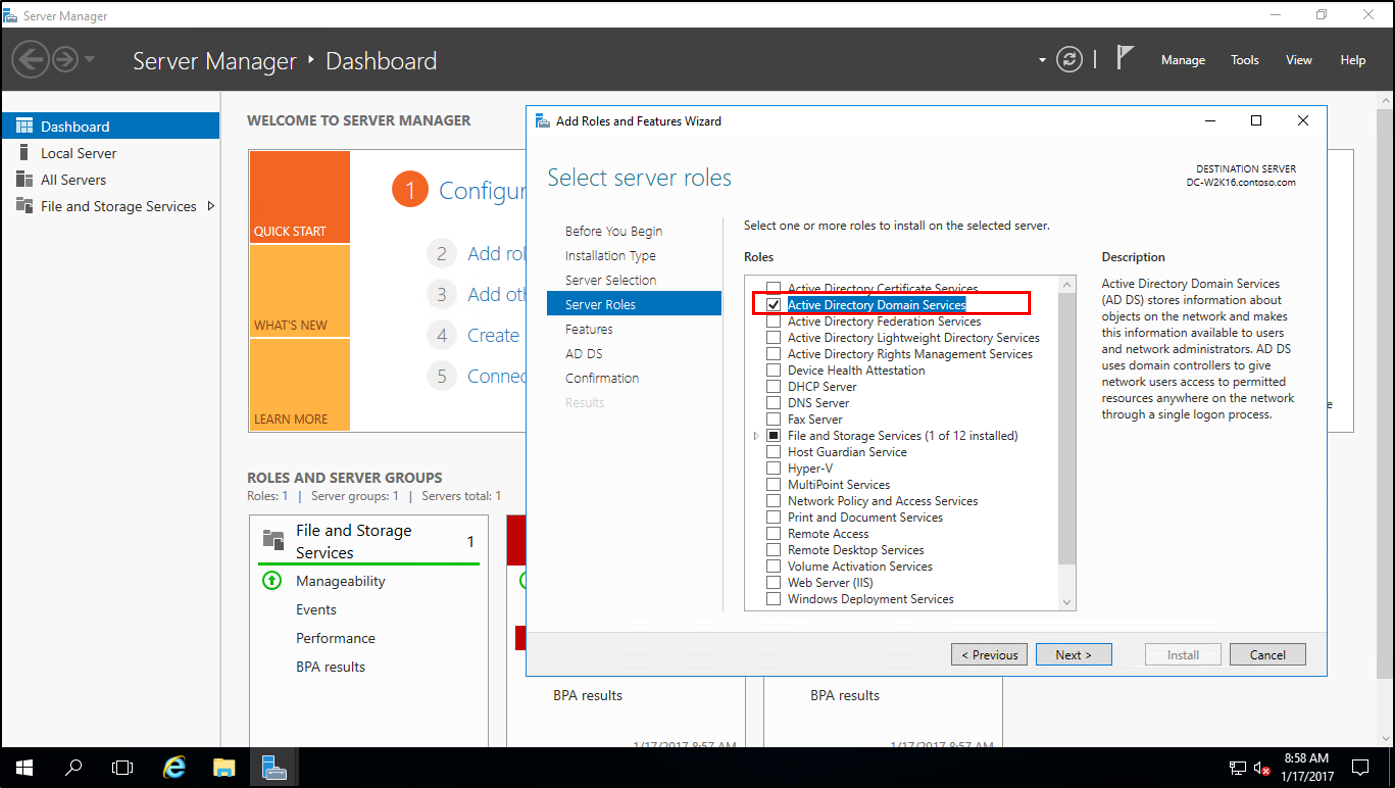
2. Access the Server Manager on your Windows Server 2012 R2 machine.
3. Navigate to the Tools menu and select “Computer Management.”
4. In the Computer Management window, expand the “Storage” section, then click on “Disk Management.”
5. Right-click on the disk partition you want to restore to default settings and select “Format.”
6. Follow the on-screen prompts to format the disk partition. This will erase all data on the selected partition, so make sure you have backed up any important files before proceeding.
7. Once the formatting process is complete, your files, folders, and server settings will be restored to default settings.
FAQs
How to repair a 2012 server?
To repair a 2012 server, you can utilize the System File Checker tool (SFC) in command prompt with administrator rights.
How to restore or repair Windows Server 2012 R2?
To restore or repair Windows Server 2012 R2, you can connect the external drive with the system image backup and the system repair disc to your computer. Reboot your computer from the repair disk, click on “Repair your computer,” select the operating system you wish to recover, locate the backup image you wish to restore, and click Next.
How to install Server 2012 step by step?
To install Server 2012 step by step, you can start by downloading Windows Server 2012 from the official Microsoft website. Next, follow the step-by-step instructions to configure BIOS settings before installing Windows Server 2012 and Hyper-V. Then, press ENTER to boot from the DVD and proceed to take the defaults on the Language screen by clicking Next.


