Unveiling the Solution: Conquering the McUICnt.exe Bad Image Error
Recently, Fortect has become increasingly popular as a reliable and efficient way to address a wide range of PC issues. It's particularly favored for its user-friendly approach to diagnosing and fixing problems that can hinder a computer's performance, from system errors and malware to registry issues.
- Download and Install: Download Fortect from its official website by clicking here, and install it on your PC.
- Run a Scan and Review Results: Launch Fortect, conduct a system scan to identify issues, and review the scan results which detail the problems affecting your PC's performance.
- Repair and Optimize: Use Fortect's repair feature to fix the identified issues. For comprehensive repair options, consider subscribing to a premium plan. After repairing, the tool also aids in optimizing your PC for improved performance.
Resolving McUICnt.exe Runtime Errors
To resolve McUICnt.exe runtime errors and fix the “Bad Image” error, follow these steps:
1. Run a full system scan with your anti-virus software, such as McAfee Total Protection, to check for any malware or viruses. Make sure to update your anti-virus software to the latest version before scanning.
2. Use a reliable system maintenance tool to scan and fix any corruption issues in your Windows registry. This can help resolve any underlying issues that may be causing the error.
3. Check the Windows registry for any entries related to McUICnt.exe. Open the Registry Editor by pressing the Windows key + R, then type “regedit” and hit Enter. Navigate to the following path: HKEY_LOCAL_MACHINE\SOFTWARE\WOW6432NODE\MapsGalaxy_39. If you find any entries related to McUICnt.exe, delete them.
4. Check the HKU\S-1-5-21-3529422162-276151246-1532304501\SOFTWARE\MICROSOFT\WINDOWS\CURRENTVERSION\ELEVATIONPOLICY\SEARCHSCOPES\EXT\SETTINGS registry key. If you find any entries related to McUICnt.exe, remove them.
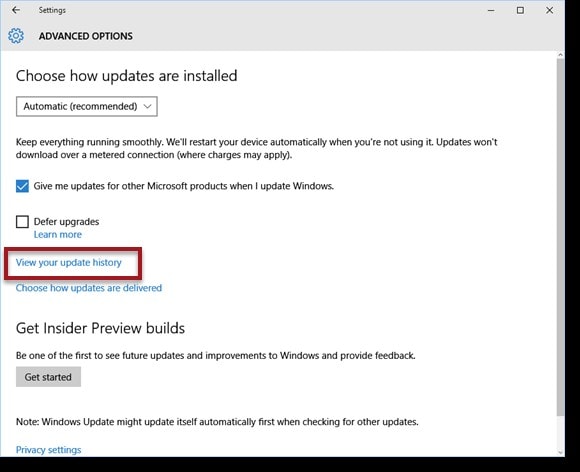
5. Update your Windows operating system to the latest version. This can help resolve compatibility issues that may be causing the error.
6. If the error persists, try reinstalling the application associated with McUICnt.exe. Uninstall the application, restart your computer, then reinstall it from a reliable source.
7. Contact Microsoft support or visit their website for further assistance if the issue persists.
Fixing Bad Image Errors in Windows
If you are experiencing a “McUICnt.exe Bad Image Error” on Windows, here are some steps you can take to fix the issue:
1. Run a Threat Scan with McAfee Total Protection: Open the McAfee app, go to the “Scan” tab, select “Threat Scan”, and click “Start Scan”. This will help identify and remove any potential threats causing the error.
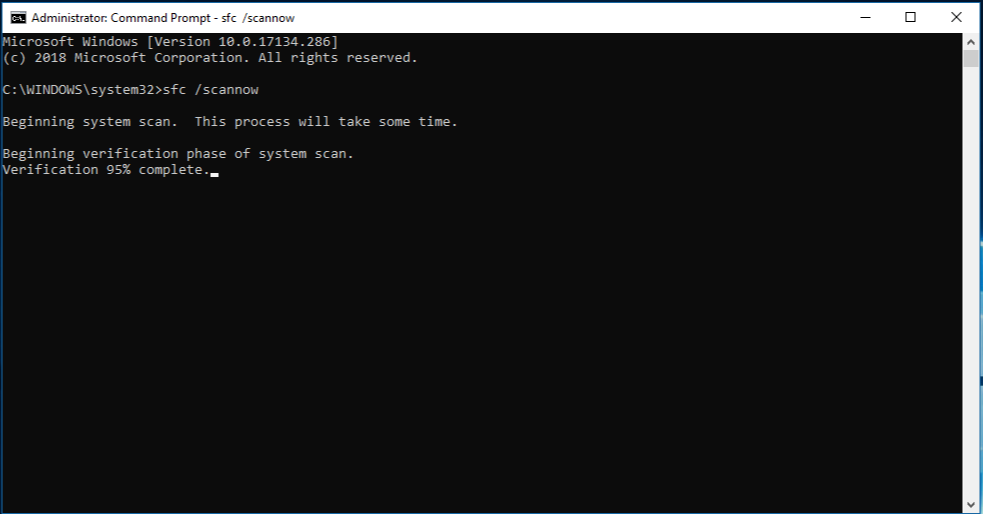
2. Check for corrupt system files: Press Win + R, type “cmd”, and press Enter to open Command Prompt. In the Command Prompt window, type “sfc /scannow” and press Enter. This will scan and repair any corrupted files.
3. Reset the Windows registry: Press Win + R, type “regedit”, and press Enter to open Registry Editor. Navigate to “HKEY_LOCAL_MACHINE\SOFTWARE\WOW6432NODE\MapsGalaxy_39” and “HKEY_USERS\S-1-5-21-3529422162-276151246-1532304501“. Delete any suspicious entries related to the error.
4. Reinstall the problematic application: If the error is specific to an app like Microsoft Teams or Microsoft Edge, uninstall and reinstall the app to ensure a fresh installation.
Removing McAfee Total Protection and Reinstalling
To remove McAfee Total Protection and reinstall it, follow these steps:
1. First, uninstall McAfee Total Protection from your computer. Open the Control Panel, go to “Programs” or “Programs and Features,” locate McAfee Total Protection, and click on “Uninstall.”
2. After uninstalling, download the latest version of McAfee Total Protection from the official McAfee website.
3. Once the download is complete, locate the downloaded file and double-click on it to start the installation process.
4. Follow the on-screen instructions to complete the installation. Make sure to carefully review any prompts or options during the installation.
5. Once the installation is finished, restart your computer to ensure that all changes take effect.
sfc /scannow
This command will scan for and attempt to repair any corrupted system files.
3. Malware Scan: Run a thorough scan of your system using reliable antivirus software to check for any potential malware infections. Malware can sometimes cause “bad image” errors.
Remember, it’s crucial to have a backup of your important files before making any changes to your system or attempting to fix errors.
If you need further assistance with a specific error or have additional details, feel free to provide more context, and I’ll try my best to assist you.
Troubleshooting Windows Update for Bad Image Errors
If you’re experiencing a Bad Image error related to McUICnt.exe during a Windows Update, follow these steps to resolve the issue:
1. Run a full system scan using a trusted antivirus or antimalware tool to check for any potential malware or PUP.Optional.MindSpark infections.
2. Check the Windows registry for any corruption by navigating to HKEY_USERS\SOFTWARE\MICROSOFT\WINDOWS\CURRENTVERSION and ensuring all entries are correct.
3. Use the System File Checker tool to scan and repair any corrupted or missing system files. Open Command Prompt as an Administrator, then enter the command “sfc /scannow” and wait for it to complete.
4. Update or reinstall any software that may be causing the error, such as Jana or PUP.Optional.ASK, ensuring you download them from trusted sources.
5. Ensure your antivirus or antimalware software is up to date and perform a full scan to check for any remaining malware.
If the issue persists, consider seeking further assistance from Microsoft support or a professional technician.
Methods to Fix Bad Image Errors in Windows
-
Perform a System File Check:
- Open the Command Prompt as an administrator by pressing Windows key + X and selecting Command Prompt (Admin).
- In the Command Prompt window, type sfc /scannow and press Enter.
- Wait for the scan to complete and let the System File Checker fix any corrupted files.
- Restart your computer and check if the Bad Image error is resolved.
-
Run a Virus/Malware Scan:
- Install a reliable antivirus or antimalware software if you don’t have one already.
- Update the antivirus/antimalware software to the latest version.
- Perform a full system scan to detect and remove any viruses or malware.
- Follow the software’s instructions to quarantine or delete any threats found.
- Restart your computer and check if the Bad Image error is resolved.
-
Reinstall or Update Problematic Software:
- Identify the software that is causing the Bad Image error.
- Uninstall the problematic software by going to Control Panel > Programs > Uninstall a program.
- Restart your computer after uninstalling the software.
- If the software is essential, download the latest version from the official website.

- Install the updated version and follow the installation instructions.
- Restart your computer and check if the Bad Image error is resolved.
-
Perform a Clean Boot:
- Press Windows key + R to open the Run dialog box.
- Type msconfig and press Enter to open the System Configuration window.
- In the System Configuration window, go to the Services tab.
- Check the box that says Hide all Microsoft services.

- Click on Disable all to disable all non-Microsoft services.
- Go to the Startup tab and click on Open Task Manager.
- In Task Manager, disable all the startup programs.
- Close Task Manager and go back to the System Configuration window.
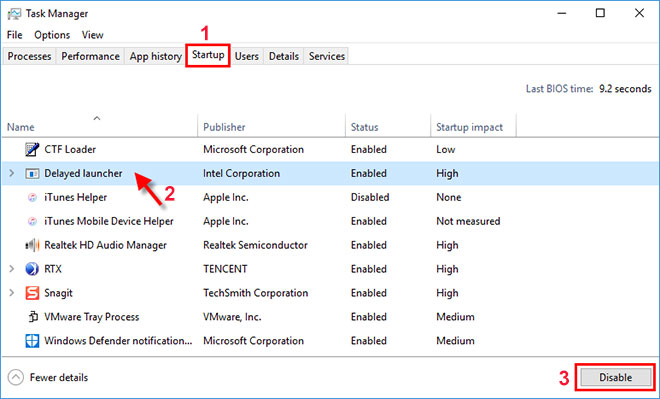
- Click on OK and restart your computer.
- Check if the Bad Image error is resolved. If it is, gradually enable services and startup programs to identify the culprit.

-
Repair Windows System Files:
- Open the Command Prompt as an administrator by pressing Windows key + X and selecting Command Prompt (Admin).
- In the Command Prompt window, type dism /online /cleanup-image /restorehealth and press Enter.
- Wait for the repair process to complete.
- Restart your computer and check if the Bad Image error is resolved.


