Unleash your voice on Discord: A comprehensive guide to resolving microphone volume issues.
Recently, Fortect has become increasingly popular as a reliable and efficient way to address a wide range of PC issues. It's particularly favored for its user-friendly approach to diagnosing and fixing problems that can hinder a computer's performance, from system errors and malware to registry issues.
- Download and Install: Download Fortect from its official website by clicking here, and install it on your PC.
- Run a Scan and Review Results: Launch Fortect, conduct a system scan to identify issues, and review the scan results which detail the problems affecting your PC's performance.
- Repair and Optimize: Use Fortect's repair feature to fix the identified issues. For comprehensive repair options, consider subscribing to a premium plan. After repairing, the tool also aids in optimizing your PC for improved performance.
Fixing Discord Voice Settings
To fix quiet mic issues on Discord, follow these steps:
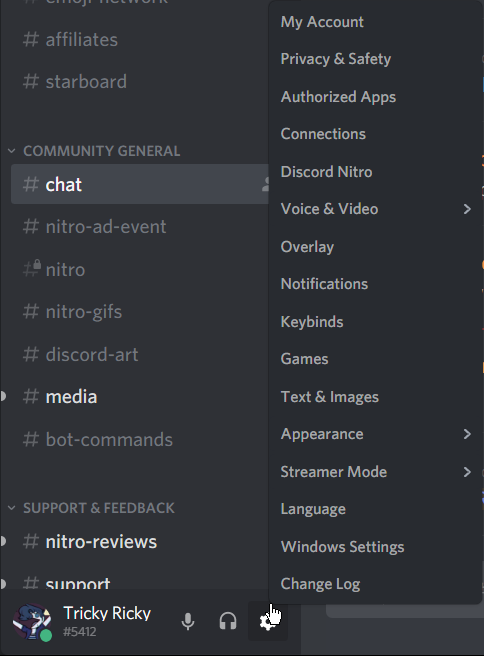
1. Open Discord and go to User Settings by clicking on the gear icon at the bottom left of the screen.
2. In the User Settings menu, select the Voice & Video tab.
3. Under the Input Device dropdown, select your microphone. Ensure that the correct microphone is selected.
4. Adjust the Input Volume slider to increase the volume of your microphone. You can also test your microphone to check the audio levels.
5. If you’re using headphones, make sure they are properly connected and set as the Output Device in the Voice & Video settings.
6. Check the System Volume on your device and make sure it’s not too low.
7. Restart Discord to apply the changes.
These steps should help you fix any quiet mic issues on Discord. If the problem persists, make sure your microphone is functioning properly and check your network connection as a poor Wi-Fi connection can also affect audio quality.
Checking System Volume
To check the system volume and fix a quiet mic on Discord, follow these steps:
1. Restart Discord: Sometimes, simply restarting the application can resolve audio issues. Close Discord completely and relaunch it.
2. Check Voice Settings: Click on the gear icon at the bottom left of the Discord window to access User Settings. Under the “Voice & Video” tab, ensure that the Input and Output devices are set correctly. Adjust the input sensitivity if needed.
3. Adjust System Volume: Right-click on the speaker icon in the system tray and select “Open Volume Mixer.” Ensure that both the Discord application and your output device volume are set appropriately.
4. Check Microphone Settings: If the issue persists, right-click on the speaker icon again and select “Sounds.” Go to the “Recording” tab, select your microphone, and click on “Properties.” Adjust the microphone volume and check the “Levels” tab for any muted or low settings.
Restarting Discord Application
To fix a quiet mic on Discord, one simple solution is to restart the application. By doing this, you can troubleshoot any temporary issues that might be affecting your microphone’s audio quality.
To restart Discord, follow these steps:
1. Close the Discord application completely.
2. Press the Windows key + R to open the Run dialog box.
3. Type “taskmgr” and press Enter to open the Task Manager.
4. In the Task Manager, locate the Discord process under the “Processes” or “Details” tab.
5. Right-click on the Discord process and select “End Task” or “End Process”.
6. Confirm the action if prompted.
7. After closing Discord, wait a few seconds and then relaunch the application.
By restarting Discord, you can refresh its settings and potentially resolve any mic-related issues.
python

from pydub import AudioSegment
def adjust_audio_volume(file_path, output_path, volume_change):
audio = AudioSegment.from_file(file_path)
modified_audio = audio + volume_change # Adjust the volume by adding/subtracting a value (in dB)
modified_audio.export(output_path, format="mp3") # Export the modified audio to a new file
# Example usage:
input_file = "input_audio.mp3" # Input audio file path
output_file = "output_audio.mp3" # Output audio file path
volume_change_dB = -10 # Decrease the volume by 10dB
adjust_audio_volume(input_file, output_file, volume_change_dB)
Please note that this code is independent of Discord and operates on audio files outside of the platform. It uses the PyDub library to adjust the volume of an audio file by adding/subtracting a specified value. The resulting modified audio is then exported to a new file.
Starting Discord as Administrator
To fix a quiet mic on Discord, it can be helpful to start the application as an administrator. This ensures that Discord has the necessary permissions to access and adjust your microphone settings.
To do this, follow these steps:
1. Close Discord completely if it’s already open.
2. Right-click on the Discord shortcut on your desktop or in the Start menu.
3. Select “Run as administrator” from the context menu.
4. If prompted, confirm your selection by clicking “Yes” or entering your administrator password.
Starting Discord as an administrator may resolve mic issues caused by restricted access to your device’s microphone settings. After launching Discord this way, check if the mic volume is still too low during voice chats or calls.
If starting as an administrator doesn’t solve the problem, there may be other factors contributing to the low mic volume. Consider checking your Wi-Fi connection, video settings, output device volume, and Discord Voice Settings as potential culprits. Additionally, ensure that your headset or headphones are properly connected and functioning correctly.
Reasons for Quiet Discord Mic
Reasons for a Quiet Discord Mic
If you’re experiencing a quiet mic on Discord, there could be a few reasons behind it. First, ensure that your headset’s volume is turned up and not muted. Additionally, check if your microphone is properly connected to your device.
Another reason could be Discord’s output volume settings. To adjust this, go to User Settings > Voice & Video > Output Volume and increase it if needed.
If you’re using Discord on Windows 10, make sure that the app has access to your microphone. Go to Settings > Privacy > Microphone and enable the option for Discord.
Sometimes, the issue might lie with the voice chat option on Discord servers. Ensure that you’re connected to the right voice channel and that your microphone is not muted within the channel.
Lastly, if you’re using Discord’s screen sharing or streaming feature, check if the issue persists when not using these features.
Hopefully, these solutions will help you fix the quiet mic issue and allow you to enjoy seamless communication with your friends and fellow gamers on Discord.
Windows Volume Being Too Low
If you’re experiencing low volume on your Windows device while using Discord, there are a few solutions you can try. First, check your Discord settings by clicking on the gear icon next to your username. Under “Voice & Video,” make sure the input and output devices are set correctly.
If that doesn’t solve the issue, you can adjust the Windows volume settings. Right-click on the speaker icon in your taskbar and select “Open Volume Mixer.” Check the levels for both Discord and your system sound.
If the volume is still low, try boosting it further by following these steps: Open the Control Panel and navigate to “Sound.” Select the “Recording” tab and find your microphone. Right-click on it and go to “Properties.” Under the “Levels” tab, increase the volume to your desired level.
Headwear and Connection Issues
If you’re experiencing quiet mic issues on Discord, it could be due to a connectivity problem with your headset. To fix this, try the following steps:
1. Check your headset connection: Ensure that your headset is properly connected to your device. Sometimes, loose or faulty connections can cause mic issues. Also, make sure your headset is fully charged or has fresh batteries.
2. Adjust Discord settings: Open Discord and go to User Settings. Under the “Voice & Video” tab, check if the input and output devices are correctly selected. Increase the input volume if it’s too low. You can also try enabling “Automatic Gain Control” for better microphone sensitivity.
3. Test your mic on other apps: Verify if the mic issue is specific to Discord or if it persists on other voice chat applications. If the problem occurs only on Discord, it’s likely a Discord-specific issue.
4. Update audio drivers: Outdated or incompatible audio drivers can cause mic problems. Visit your headset manufacturer’s website or your computer’s manufacturer’s support page to download and install the latest audio drivers.
5. Restart Discord and your device: Sometimes, a simple restart can resolve various software-related issues.
Wrong Audio Settings
If you’re having trouble with a quiet mic on Discord, there are a few audio settings you can check and adjust. First, make sure your headset is properly connected and the volume is turned up. Next, open Discord and go to the User Settings by clicking on the gear icon in the bottom left corner. Under the “Voice & Video” tab, check that your input device is set to the correct microphone.
Adjust the input sensitivity slider until your mic picks up your voice properly. You can also try toggling the “Automatically determine input sensitivity” option off and manually adjusting the sensitivity. If you’re still experiencing issues, try restarting Discord or your computer. Additionally, make sure you have the latest version of Discord installed, as updates often include fixes for audio problems.
Simple Fixes for Discord Mic
- Open Discord and click on the gear icon located at the bottom left corner of the window.
- Select “Voice & Video” from the left-hand menu.
- Under the “Input Sensitivity” section, drag the slider to the right to increase the sensitivity of your microphone.
- Make sure the “Automatically determine input sensitivity” option is disabled.
- Test your microphone by speaking into it and observing the input level bar. Adjust the sensitivity until the input level is adequate.
- Click “Okay” to save the changes.
2. Check Hardware Connections
- Ensure that your microphone is securely plugged into the correct audio input port on your computer.
- If you are using an external microphone, check the connection between the microphone and any adapters or extension cables being used.
- If applicable, try using a different audio input port on your computer to rule out any issues with the current port.
3. Update Audio Drivers
- Open the “Device Manager” by right-clicking on the “Start” button and selecting “Device Manager” from the context menu.
- Expand the “Audio inputs and outputs” or “Sound, video and game controllers” category.
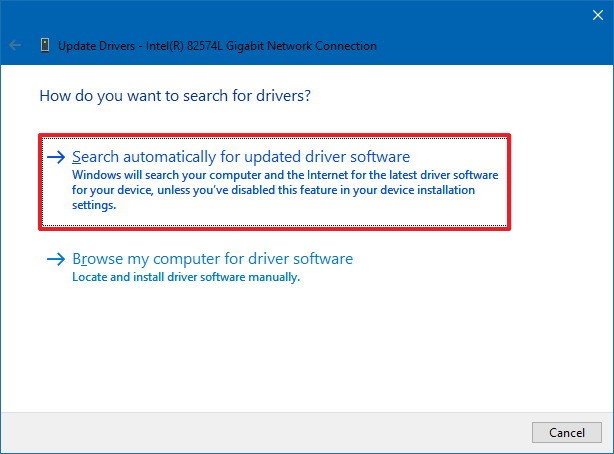
- Right-click on your microphone device and select “Update driver” from the drop-down menu.
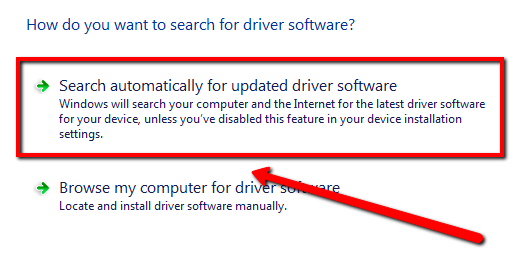
- Choose the option to search automatically for updated driver software.
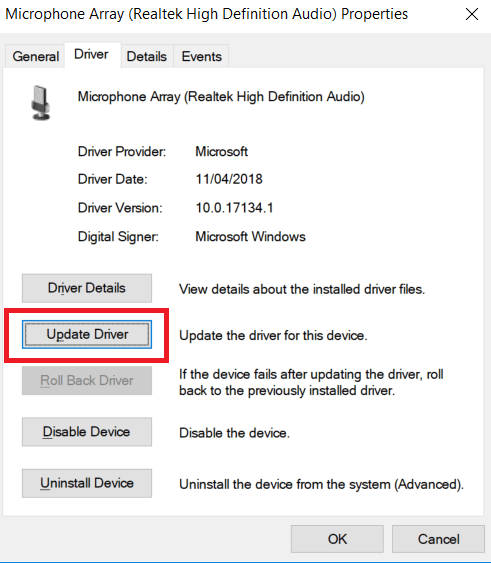
- Wait for the process to complete and follow any on-screen instructions if prompted.
- Restart your computer to apply the driver updates.

4. Disable Exclusive Mode
- Right-click on the speaker icon in the system tray and select “Sounds” from the context menu.
- In the “Playback” tab, select your default audio device and click on the “Properties” button.
- Navigate to the “Advanced” tab and uncheck the box next to “Allow applications to take exclusive control of this device”.
- Click “Apply” and then “OK” to save the changes.
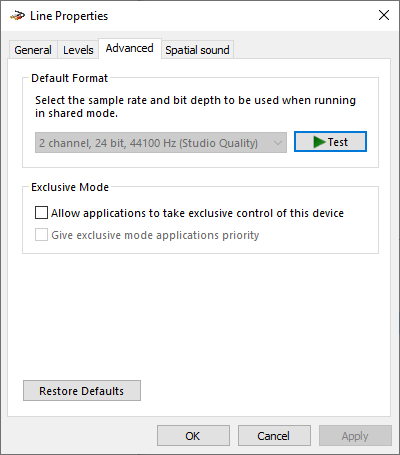
- Restart your computer to apply the settings.
5. Disable Other Sound Effects
- Open the “Sound” settings by right-clicking on the speaker icon in the system tray and selecting “Sounds” from the context menu.
- In the “Playback” tab, select your default audio device and click on the “Properties” button.
- Navigate to the “Enhancements” tab and check the box next to “Disable all sound effects”.
- Click “Apply” and then “OK” to save the changes.
- Restart your computer to apply the settings.
Outdated/Broken Audio Drivers and Updates
- Open Device Manager by pressing Win+X and selecting Device Manager from the menu.
- Expand the Sound, video and game controllers category.
- Right-click on your audio device and select Update driver.
- Choose the Search automatically for updated driver software option.
- Wait for Windows to search for the latest driver updates and install them.
- Restart your computer to apply the changes.
Repair Method: Roll Back Audio Drivers
- Open Device Manager by pressing Win+X and selecting Device Manager from the menu.
- Expand the Sound, video and game controllers category.
- Right-click on your audio device and select Properties.
- Go to the Driver tab and click on the Roll Back Driver button.
- Follow the on-screen instructions to complete the driver rollback process.
- Restart your computer to apply the changes.