Having trouble with Flash Player in Chrome? This complete guide will help you fix the problem quickly and easily.
Recently, Fortect has become increasingly popular as a reliable and efficient way to address a wide range of PC issues. It's particularly favored for its user-friendly approach to diagnosing and fixing problems that can hinder a computer's performance, from system errors and malware to registry issues.
- Download and Install: Download Fortect from its official website by clicking here, and install it on your PC.
- Run a Scan and Review Results: Launch Fortect, conduct a system scan to identify issues, and review the scan results which detail the problems affecting your PC's performance.
- Repair and Optimize: Use Fortect's repair feature to fix the identified issues. For comprehensive repair options, consider subscribing to a premium plan. After repairing, the tool also aids in optimizing your PC for improved performance.
Enabling Flash Player in Chrome
To enable Flash Player in Chrome, first open the Chrome browser and type “chrome://settings/content” into the address bar. Then, scroll down and click on “Flash.” Next, toggle the switch to allow sites to run Flash.
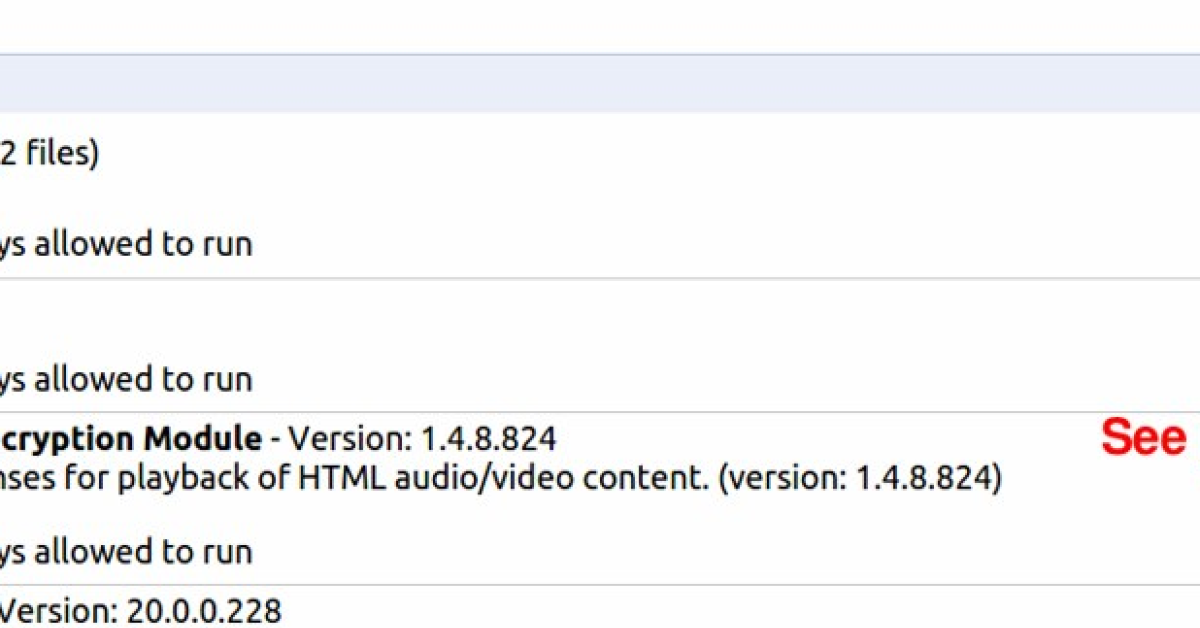
After enabling Flash, it’s important to keep the plugin updated to ensure security and performance. To do this, type “chrome://components” into the address bar and find “Adobe Flash Player.” Click on “Check for update” and let Chrome automatically update the plugin if a new version is available.
If you’re still having issues with Flash Player, try clearing the browser cache and cookies by going to “chrome://settings/clearBrowserData” in the address bar. Select “Cookies and other site data” and “Cached images and files,” then click “Clear data.”
Allowing Flash on Specific Websites
To allow Flash on specific websites in Google Chrome, you can follow these steps. First, open Chrome and go to the website where you want to enable Flash. Then, click on the lock icon next to the website’s URL in the address bar. Next, select Site settings from the drop-down list. In the site settings menu, scroll down to find Flash and change the setting to Allow.
Once you’ve done this, refresh the web page and Flash should now be enabled for that specific website. This can be helpful for accessing certain multimedia content or streaming media that still relies on Flash.
Updating Chrome and Flash Plugin
To update Chrome and the Flash plugin, first, open Chrome and type “chrome://components” in the URL bar. Scroll down to “Adobe Flash Player” and click “Check for update“. If there is an update available, click “Update“.
Next, type “chrome://settings/content/flash” in the URL bar and make sure “Ask first” is toggled on. This will prompt Chrome to ask for permission to run Flash on websites.
If you’re still experiencing issues with Flash, try clearing your browser cache. To do this, go to “chrome://settings/clearBrowserData“, select “Cached images and files“, and click “Clear data“.
If the problem persists, check for updates on your operating system and graphics card drivers. Keeping these up to date can help resolve compatibility issues with Flash.
Updating Graphics Card Drivers
To update your graphics card drivers, first, open your web browser Google Chrome. Then, go to the official website of your graphics card manufacturer and locate the drivers section. Download the latest version of the driver that is compatible with your operating system.
After downloading the driver, open the File Explorer and navigate to the location where the driver was saved. Double-click the driver file to initiate the installation process. Follow the on-screen instructions to complete the installation.
Once the installation is complete, restart your computer to apply the changes. After restarting, open Google Chrome and check if the Flash Player problem has been resolved. If not, consider troubleshooting other potential issues.
Reinstalling Flash Plugin
To reinstall the Flash plugin in Chrome, first, click on the three-dot menu in the top right corner of the browser window. Then, select “Settings” from the drop-down list. Scroll down and click on “Advanced” to reveal more options, then click on “Privacy and security. ” Next, click on “Site settings” and then “Flash. ” Toggle the switch to turn on the option that says “Ask first.
” Now, you can visit a website that uses Flash, and when prompted, click “Allow” to run Flash content. If this doesn’t work, you may need to reinstall the Flash plugin. To do this, first, type “chrome: //components/” into the address bar and press Enter. Scroll down to find “Adobe Flash Player” and click on “Check for update.
” If an update is available, click “Update. ” If this still doesn’t solve the problem, you may need to completely uninstall and then reinstall the Flash plugin.
Clearing Browser Cache
To clear the browser cache in Chrome, click on the three-dot menu in the top right corner of the browser window. Select Settings from the dropdown menu, then scroll down and click on Advanced. Under the Privacy and security section, click on Clear browsing data. In the popup window, select the time range for which you want to clear the cache and check the box next to Cached images and files. Click on Clear data to remove the cache from your browser.
After clearing the cache, restart Chrome and try running the Flash Player again to see if the problem has been resolved. If you continue to experience issues, consider updating your Flash Player or checking for any conflicting browser extensions that may be causing the problem.


