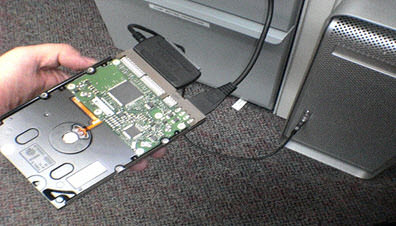
In today’s digital age, external hard drives have become a crucial component for storing large amounts of data. However, encountering the issue of not being able to access your external hard drive can be frustrating and worrisome. In this article, we will explore some solutions to help you regain access to your external hard drive.
Recently, Fortect has become increasingly popular as a reliable and efficient way to address a wide range of PC issues. It's particularly favored for its user-friendly approach to diagnosing and fixing problems that can hinder a computer's performance, from system errors and malware to registry issues.
- Download and Install: Download Fortect from its official website by clicking here, and install it on your PC.
- Run a Scan and Review Results: Launch Fortect, conduct a system scan to identify issues, and review the scan results which detail the problems affecting your PC's performance.
- Repair and Optimize: Use Fortect's repair feature to fix the identified issues. For comprehensive repair options, consider subscribing to a premium plan. After repairing, the tool also aids in optimizing your PC for improved performance.
Basic Troubleshooting Steps for Inaccessible External Hard Drive
- Check the connection cables between the external hard drive and your computer. Make sure they are firmly connected and not damaged.
- Try connecting the drive to a different USB port on your computer.
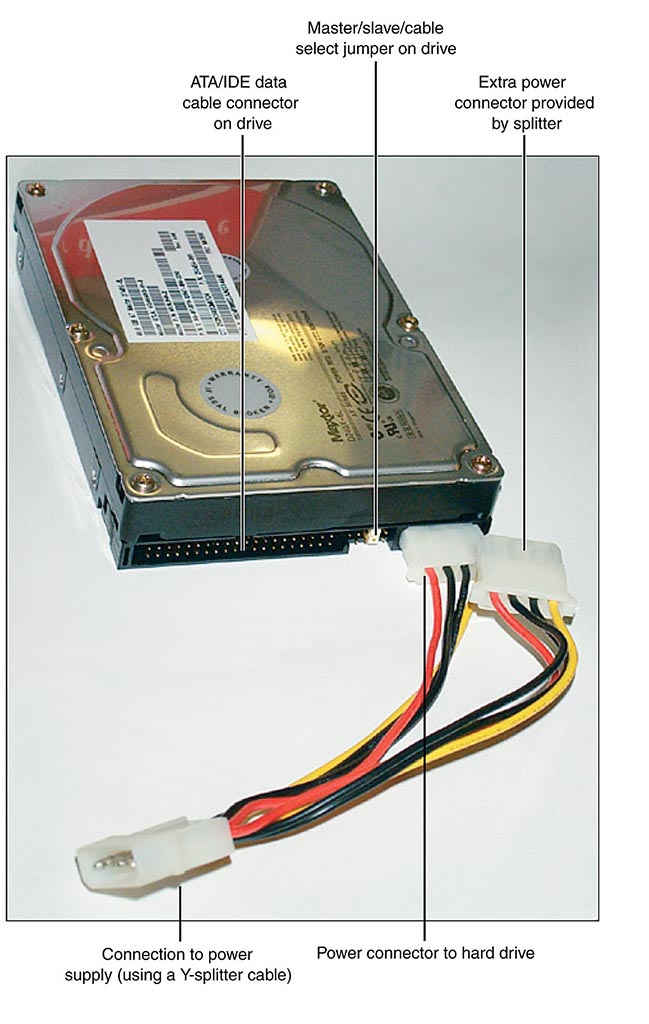
- If possible, try connecting the drive to a different computer to see if it works there.
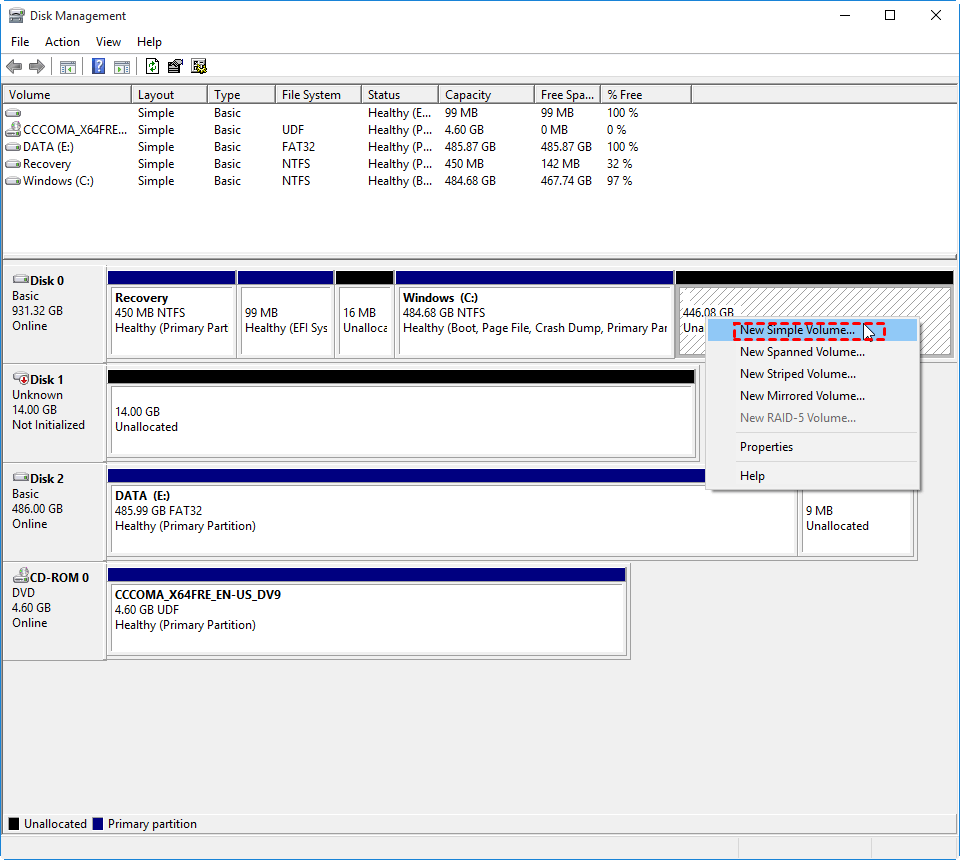
Check Disk Management
- Right-click on the Windows button and select Disk Management.
- Look for the external hard drive in the list of disks. It may be listed as “Unknown” or “Not Initialized.”
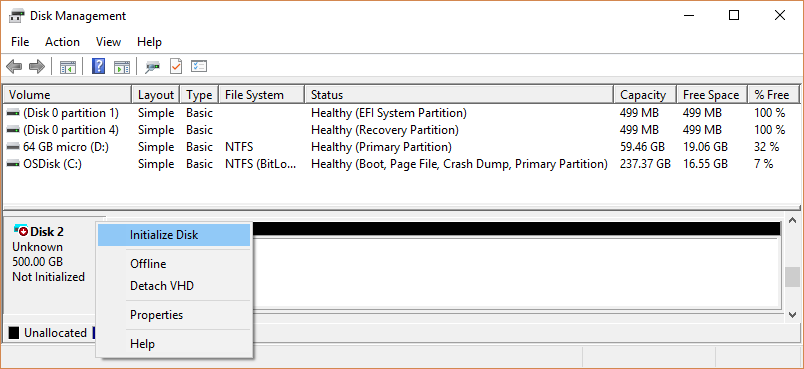
- If it is listed as “Not Initialized,” right-click on the disk and select Initialize Disk.
- Select the partition style for the disk (either MBR or GPT) and click OK.
- Right-click on the unallocated space on the disk and select New Simple Volume.
- Follow the prompts to create a new partition on the disk.
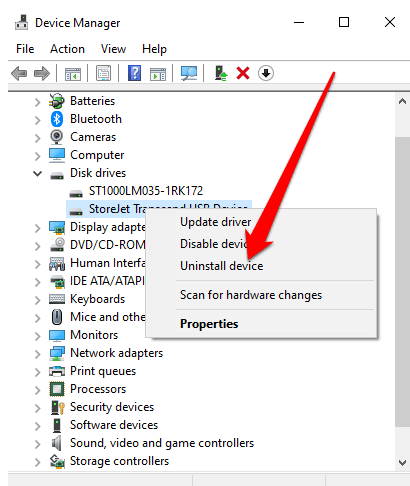
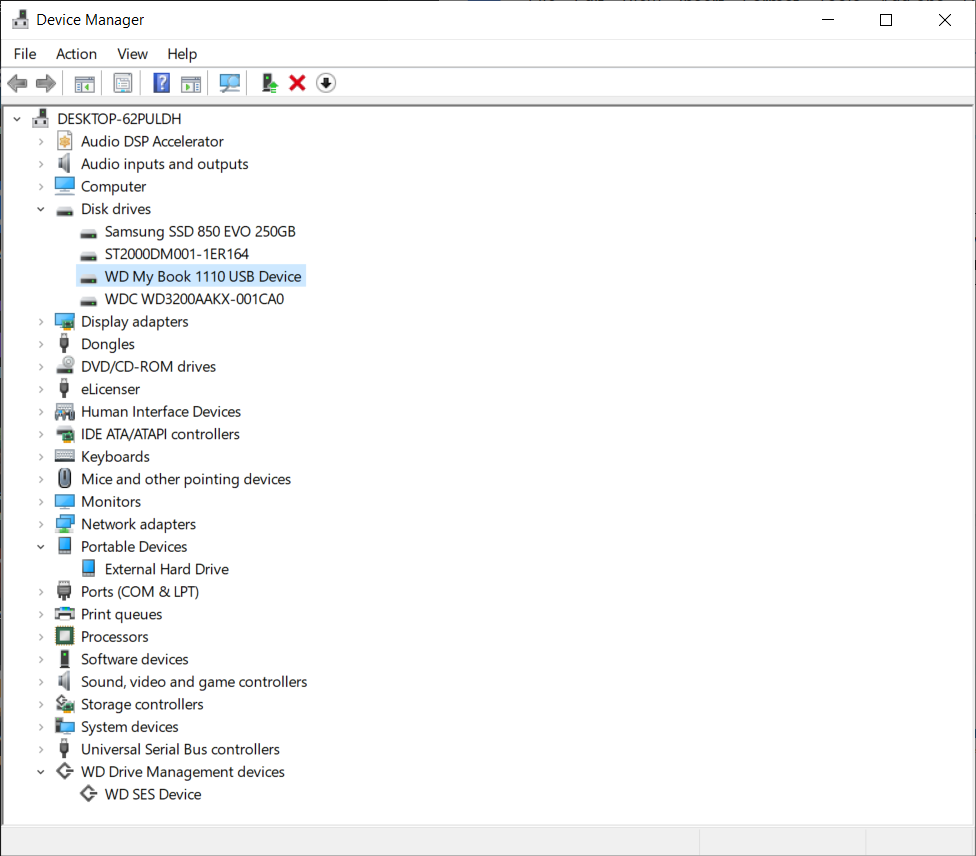
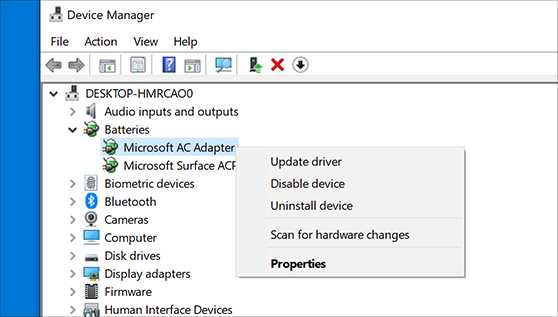
Check Device Manager
- Right-click on the Windows button and select Device Manager.
- Look for the external hard drive in the list of devices. It may be listed under “Disk drives” or “Universal Serial Bus controllers.”
- If it has a yellow exclamation mark next to it, right-click on the device and select Update Driver.
- Select “Search automatically for updated driver software” and follow the prompts.
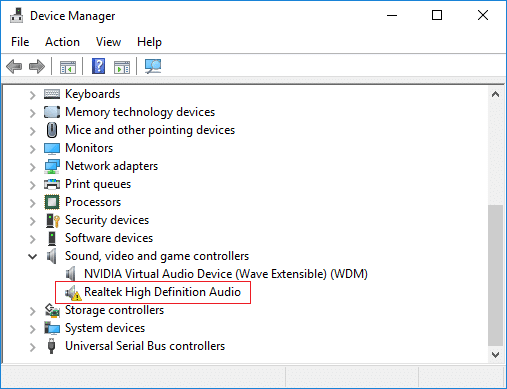
- If updating the driver does not work, right-click on the device and select Uninstall Device.
- Disconnect the external hard drive from your computer and restart your computer.
- Reconnect the external hard drive and Windows should automatically install the driver.
Check for File System Errors
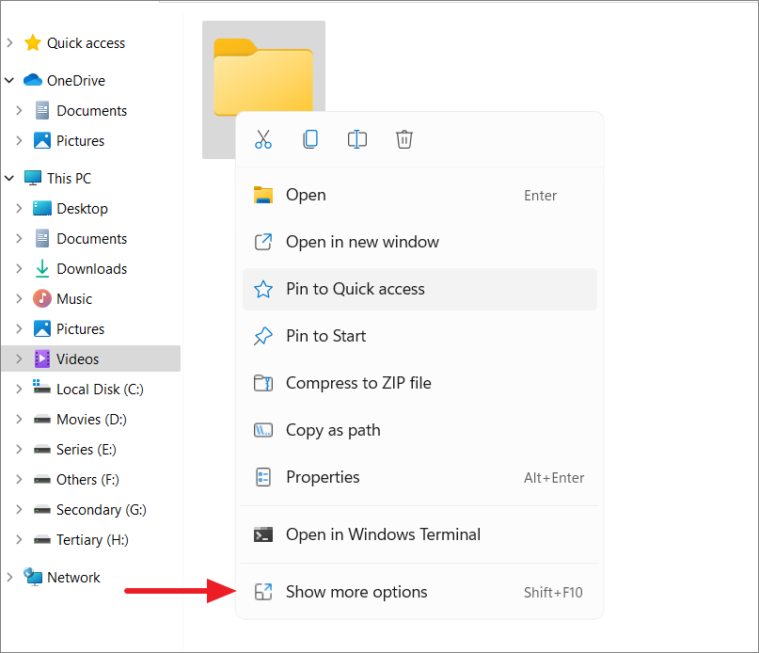
- Right-click on the external hard drive in File Explorer and select Properties.
- Click on the Tools tab and select Check under the Error checking section.

- Follow the prompts to scan the drive for errors.
- If errors are found, follow the prompts to repair the errors.
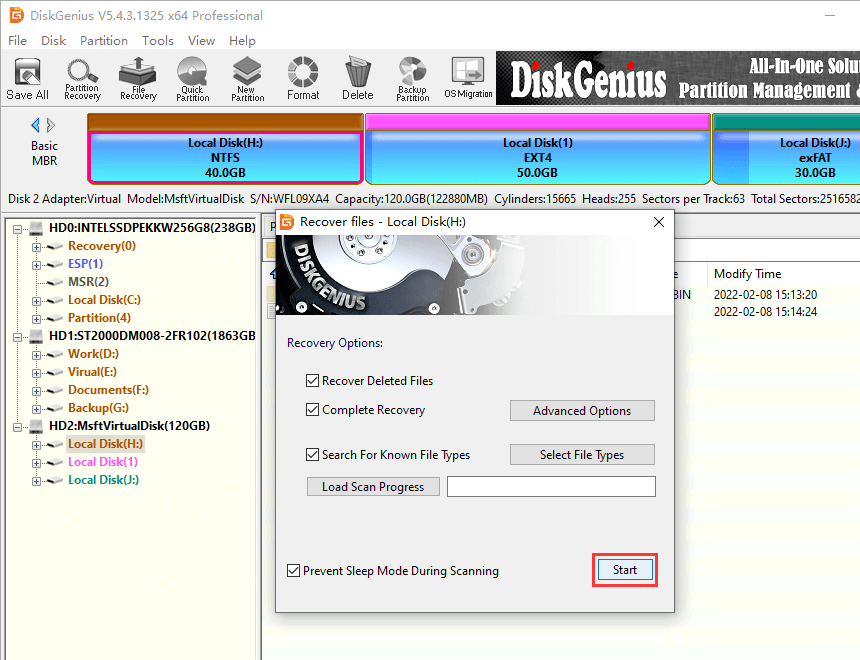
Use Data Recovery Software
- If none of the above steps work, you may need to use data recovery software to recover your data from the inaccessible external hard drive.
- Download and install a reputable data recovery program, such as EaseUS Data Recovery Wizard or Recuva.
- Follow the prompts to scan the external hard drive for recoverable data.
- Select the files you want to recover and follow the prompts to save them to a new location.
Update Disk Driver to Fix External Hard Drive Issues
To fix external hard drive issues, updating the disk driver is a priority thing to do. Here’s a step-by-step solution:
1. Plug the external hard drive into your PC’s USB port using the cable that came with the drive.
2. Go to the Windows 10 search box, type “Device Manager,” and click on it when it appears in the search results.
3. Locate the external hard drive in the list of devices and right-click on it.
4. Click on “Update driver” and follow the prompts to complete the process.
5. If this doesn’t resolve the issue, try using a different USB port or cable.
Updating the disk driver should be one of the first troubleshooting steps you take when encountering external hard drive issues. If this approach doesn’t solve the problem, other solutions may be necessary depending on the nature of the issue.
import os
# Check if the external hard drive is detected by the operating system
drive_letter = 'E:'
if os.path.exists(drive_letter):
print("External hard drive detected")
else:
print("External hard drive not detected")
# Check for any errors in the file system
os.system('chkdsk /f ' + drive_letter)
# Update the drivers for the external hard drive
os.system('devmgmt.msc')
# Scan for viruses that may be causing issues with the hard drive
os.system('Windows Defender')
# Attempt to recover any lost or corrupted data on the hard drive
os.system('sfc /scannow')
This code is not a complete tool and may not solve all issues with accessing an external hard drive. However, it provides some basic troubleshooting steps that could potentially help in resolving the issue.
Check and Fix Drive Errors to Access External Hard Drive
To access an external hard drive, it’s important to check and fix any drive errors. Connect the hard drive to your PC and open File Explorer. Right-click on the drive and select Properties, then click the Tools tab. Under Error checking, click Check. This will run a scan and fix any errors. If this doesn’t work, try using EaseUS Data Recovery Wizard to recover any lost files. If the drive is showing up as xxGB RAW, it means it’s not formatted correctly. Right-click on the drive and select Format. Be aware that this will delete everything on the drive. If you’re still having trouble accessing the drive, it could be due to driver issues or permission denied errors. Try using Disk Utility on a Mac to solve the problem.
Fix BitLocker Encryption Service to Access External Hard Drive
If you are unable to access your external hard drive, it may be due to BitLocker Encryption Service issues. To fix this, follow these steps:
1. Press the Windows key + R and enter “services.msc” to open the Services window.
2. Scroll down to locate the BitLocker Drive Encryption Service and double-click it.
3. Change the Startup type to “Automatic” and click on “Start” to start the service.
4. Click “OK” and restart your computer.
After restarting, try accessing your external hard drive again. If you still cannot access it, you may need to use a data recovery tool such as EaseUS Data Recovery Wizard to recover your files. It’s important to note that if your hard drive is showing up as RAW (xxGB RAW), this means that it’s formatted in a way that your computer system cannot recognize it. You will need to format the drive or use a data recovery tool to retrieve your data.
Reformat External Hard Drive to Solve Accessibility Issues
To solve accessibility issues with an external hard drive, reformatting the drive is a straightforward solution. First, connect the drive to your computer system and navigate to the Disk Management utility. Locate the external hard drive and right-click on it, then select “Format.” Choose the file system that fits your needs and click “OK” to begin reformatting.
It’s important to note that reformatting erases everything on the hard disk drive, so backup important files and documents before proceeding. If you cannot access the files, use a data recovery tool like EaseUS Data Recovery Wizard to recover everything. However, if the drive is not opening due to access denied or permission denied errors on Mac, try using Disk Utility to format the drive.
Reset Drive Permission to Access External Hard Drive
To reset drive permission to access an external hard drive, follow these steps:
1. Connect the hard drive to your computer.
2. Open the file explorer and locate the external hard drive.
3. Right-click the drive, select Properties, and click on the Security tab.
4. Click on the Advanced button, then click on the Change link next to the owner’s name.
5. Type “everyone” in the object name field and click on the Check Names button.
6. Click OK and select “Replace owner on subcontainers and objects.”
7. Click Apply and OK to save the changes.
This should reset the drive permission and allow you to access the external hard drive. If you still cannot access the drive, consider using a data recovery tool like EaseUS Data Recovery Wizard to recover your files.
Remember, it’s always a good idea to backup your data in case of situations like this.
Recover Data When External Hard Drive Can’t Open
- Check connections:
- Ensure that the external hard drive is properly connected to the computer
- Try connecting to a different USB port
- Try using a different USB cable
- Update drivers:
- Open Device Manager
- Find the external hard drive
- Right-click on it and select Update Driver Software
- Run disk check:
- Open File Explorer
- Find the external hard drive
- Right-click on it and select Properties
- Go to the Tools tab and click on Check under Error checking
- Follow the instructions to complete the disk check
- Use data recovery software:
- Download and install a reliable data recovery software
- Connect the external hard drive to the computer
- Launch the data recovery software and select the external hard drive
- Follow the software instructions to recover the data
Fix I/O Error on External Hard Drive to Open Files
- Check the Connection
- Make sure the external hard drive is correctly plugged into the computer.
- Try connecting the hard drive to another USB port.
- Use a different USB cable to connect the hard drive to the computer.
- Check for Driver Issues
- Open Device Manager by pressing Windows Key + X and selecting Device Manager.
- Expand the Disk Drives category.
- Right-click on the external hard drive and select Update Driver Software.
- Select Search automatically for updated driver software.
- Restart the computer and check if the I/O error is resolved.
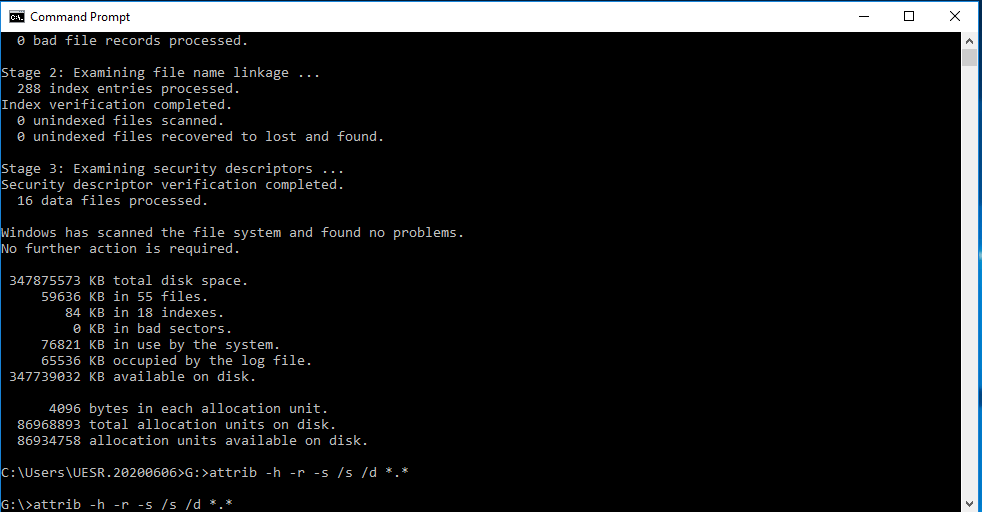
- Run CHKDSK Command
- Open Command Prompt by pressing Windows Key + X and selecting Command Prompt (Admin).
- Type chkdsk /f /r X: (replace X with the drive letter of the external hard drive) and press Enter.
- The command will scan and repair any errors on the hard drive.
- After the process is complete, check if the I/O error is resolved.
- Format the External Hard Drive
- Open File Explorer and right-click on the external hard drive.
- Select Format.
- Select the file system (NTFS or FAT32) and allocation unit size.
- Click on Start to begin the formatting process.
- Warning: Formatting the hard drive will erase all data on it. Make sure to backup any important files before proceeding.
Request Admin Privileges to Open External Hard Drive Files
If you’re unable to access your external hard drive files, requesting admin privileges may be the solution you need. To do this in Windows 10, right-click on the drive and select Properties. Then, go to the Security tab and click on Edit. From here, select the user and click on Full Control to grant admin privileges. If you’re using a Mac OS, open Disk Utility and select the drive. Then, click on the Erase tab and select the format that’s compatible with your system. Keep in mind that this will erase all data on the drive, so make sure to backup important documents beforehand. If you’re still unable to access the drive, using a data recovery tool like EaseUS Data Recovery Wizard is a viable option.


