Reviving the browsing experience: Tackling unresponsive pages in Google Chrome
Recently, Fortect has become increasingly popular as a reliable and efficient way to address a wide range of PC issues. It's particularly favored for its user-friendly approach to diagnosing and fixing problems that can hinder a computer's performance, from system errors and malware to registry issues.
- Download and Install: Download Fortect from its official website by clicking here, and install it on your PC.
- Run a Scan and Review Results: Launch Fortect, conduct a system scan to identify issues, and review the scan results which detail the problems affecting your PC's performance.
- Repair and Optimize: Use Fortect's repair feature to fix the identified issues. For comprehensive repair options, consider subscribing to a premium plan. After repairing, the tool also aids in optimizing your PC for improved performance.
Update Google Chrome
To keep your Google Chrome browser running smoothly and avoid unresponsive pages, it’s important to regularly update it with the latest patches and bug fixes. Here’s how to update your Google Chrome browser:
1. Open Google Chrome on your computer.
2. Click on the three vertical dots in the top-right corner of the browser window to open the menu.
3. From the menu, hover over “Help” and then click on “About Google Chrome.”
4. A new tab will open, and Chrome will automatically start checking for updates. If an update is available, it will begin downloading.
5. Once the download is complete, you’ll see a notification asking you to relaunch Chrome to apply the update.
6. Click on the “Relaunch” button, and Chrome will close and reopen with the updated version.
It’s important to note that updating Google Chrome may require you to close any open tabs or windows. Make sure to save any important work before proceeding with the update.
By keeping your browser up to date, you can ensure that you have the latest security patches, bug fixes, and performance improvements, which can help prevent unresponsive pages and other issues.
Remember, if you encounter an “Aw, Snap!” error or your browser becomes unresponsive, you can try the following troubleshooting steps:
1. Wait for a few moments to see if the page starts responding again. Sometimes, it may just be a temporary issue.
2. Close any unnecessary tabs or windows to free up system resources.
3. Clear your browser cache to remove temporary files that may be causing the issue. You can do this by going to the menu, selecting “Settings,” then “Privacy and security,” and finally, “Clear browsing data.”
4. Disable any extensions or plugins that might be causing conflicts. You can do this by going to the menu, selecting “More tools,” then “Extensions.” From there, you can disable or remove any problematic extensions.
5. If the issue persists, consider restarting your computer to refresh the system and clear any temporary glitches.
6. If you’re using Windows 10, you can also try using Microsoft Edge temporarily while troubleshooting the issue.
Restart PC or Mac
Restarting your PC or Mac can help resolve unresponsive pages in Google Chrome.
If you’re experiencing an unresponsive page, try these steps:
1. Close any unresponsive tabs or windows in Google Chrome.
2. Save any important work or data you have open in other applications.
3. Click on the “Start” button or Apple menu and select “Restart” to reboot your computer.
4. Wait for your PC or Mac to fully restart and then launch Google Chrome again.
5. Open the same web page that was giving you trouble and see if it is now responsive.
If the page is still unresponsive, you can try the following additional steps:
1. Clear your browsing data, including cache and cookies. Go to the Chrome menu, select “Settings,” then “Privacy and security,” and finally “Clear browsing data.” Choose the relevant options and click “Clear data.”
2. Disable any extensions or plugins that might be causing conflicts. Go to the Chrome menu, select “More tools,” then “Extensions.” Toggle off any extensions that are enabled.
3. Update Google Chrome to the latest version. Go to the Chrome menu, select “Help,” then “About Google Chrome.” If an update is available, Chrome will automatically download and install it.
4. Check for any available patches or updates for your operating system. Keeping your PC or Mac up-to-date can help resolve compatibility issues.
Remember, occasionally web pages can become unresponsive due to factors outside of your control, such as server issues or temporary network problems. In such cases, you may need to wait for the issue to be resolved or try accessing the page at a later time.
If you’re still experiencing issues, you can reach out to Google Chrome support or your computer manufacturer for further assistance.
Clear Cookies and Browser Cache
To clear cookies and browser cache in Google Chrome, follow these steps:
1. Open Google Chrome on your computer.
2. Click on the three dots in the top-right corner of the browser window to open the menu.
3. From the menu, select “Settings”.
4. Scroll down and click on “Privacy and security”.
5. Under the “Privacy and security” section, click on “Clear browsing data”.
6. In the pop-up window, select the time range for which you want to clear the data. If you want to clear everything, choose “All time”.
7. Check the boxes next to “Cookies and other site data” and “Cached images and files”.
8. Click on the “Clear data” button.
This will clear your browser’s cookies and cache, which can help resolve issues with unresponsive pages. If you encounter an “unresponsive relaunch now” or “aw snap” error, clearing the cookies and cache might fix the problem. Additionally, if a webpage becomes unresponsive or stops responding, clearing these data can often resolve the issue.
It’s worth noting that clearing cookies and cache will sign you out of websites and remove site preferences. However, it can also help improve browser performance and resolve issues caused by outdated or corrupted data.
Disable Third-party Cookies
To disable third-party cookies in Google Chrome and fix unresponsive pages, follow these steps:
1. Open Google Chrome.
2. Click on the three-dot menu icon in the top-right corner of the browser window.
3. Select “Settings” from the drop-down menu.
4. Scroll down and click on “Privacy and security” in the left-hand menu.
5. Under the “Privacy and security” section, click on “Cookies and other site data.”
6. Toggle the switch next to “Allow all cookies” to turn it off.
7. Scroll down and click on “Site settings.”
8. Under the “Permissions” section, click on “Cookies and site data.”
9. Toggle the switch next to “Block third-party cookies” to enable this setting.
By disabling third-party cookies, you can enhance your internet privacy and prevent certain websites from tracking your online activities. This can help fix unresponsive pages and improve your browsing experience.
Remember to periodically clear your browser cache to ensure optimal performance. To do this, press “Ctrl + Shift + Delete” on your keyboard to open the “Clear browsing data” menu. Select the appropriate time range and check the box next to “Cached images and files.” Then, click on the “Clear data” button.
If you continue to experience unresponsive pages or encounter errors like “Aw, snap!” or “Not responding,” try relaunching your browser. Close all Chrome windows and relaunch the browser to see if the issue persists.
Note: These instructions are specifically for Google Chrome on Windows. The steps may vary slightly for other operating systems or web browsers like Microsoft Edge, Firefox, or Safari. Consult the official documentation for those browsers for specific instructions.
Disable Hardware Acceleration
To disable hardware acceleration in Google Chrome and fix unresponsive pages, follow these steps:
1. Click on the three-dot menu icon at the top-right corner of Chrome.
2. Select “Settings” from the dropdown menu.
3. Scroll down and click on “Advanced” to expand the advanced settings.
4. Locate the “System” section and toggle off the “Use hardware acceleration when available” option.
5. Relaunch Chrome by closing it and opening it again.
Disabling hardware acceleration can help resolve issues with unresponsive pages, such as the “Aw, Snap!” error or pages not responding. It allows Chrome to rely more on software rendering rather than relying heavily on your computer’s hardware.
By disabling hardware acceleration, you may notice a slight decrease in graphics performance, but it can help troubleshoot various problems related to rendering or software bugs. If you encounter any issues after disabling hardware acceleration, you can easily enable it again by following the same steps.
Remove Harmful Software
If you’re experiencing unresponsive pages in Google Chrome, it could be due to harmful software on your computer. To fix this issue, follow these steps:
1. Scan for Malware:
– Download a trusted antivirus program like Windows Defender or Malwarebytes.
– Install the program and run a full system scan to detect and remove any malware or harmful software.
– Ensure that your antivirus software is regularly updated to stay protected against the latest threats.
2. Clear Browsing Data:
– Open Google Chrome and click on the three-dot menu icon in the top-right corner.
– Select “Settings” from the drop-down menu and scroll down to find “Privacy and security.”
– Click on “Clear browsing data” and choose the time range for which you want to clear the data.
– Check the boxes for “Browsing history,” “Cookies and other site data,” and “Cached images and files.”
– Click on “Clear data” to remove the selected items.
3. Disable Suspicious Extensions:
– In Google Chrome, type “chrome://extensions” in the address bar and press Enter.
– Review the list of extensions and remove any that you don’t recognize or suspect to be causing the issue.
– To remove an extension, click on the trash bin icon next to it.
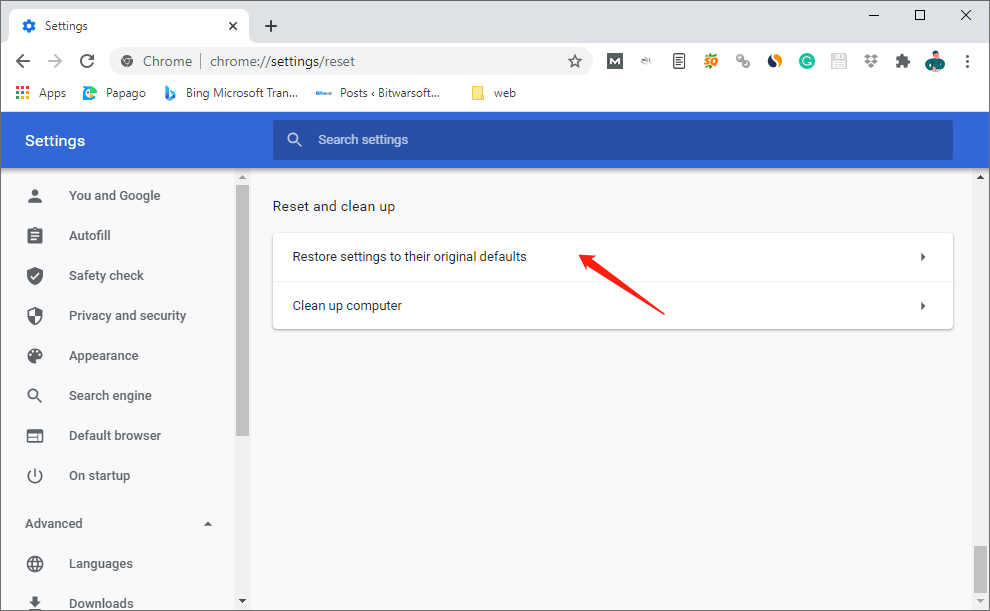
4. Reset Google Chrome:
– If the problem persists, you can reset Chrome to its default settings.
– Open the Chrome menu and select “Settings.”
– Scroll down and click on “Advanced” to expand the advanced settings.
– Under the “Reset and clean up” section, click on “Restore settings to their original defaults.”
– Confirm the reset by clicking on “Reset settings.”
5. Update Google Chrome:
– Outdated versions of Chrome may have bugs or compatibility issues causing unresponsiveness.
– Open Chrome and click on the three-dot menu icon in the top-right corner.
– Select “Help” and then “About Google Chrome.”
– Chrome will automatically check for updates and install them if available.
– Relaunch Chrome once the update is complete.
Create New Chrome Profile
If you’re experiencing unresponsive pages in Google Chrome, creating a new Chrome profile can help resolve the issue.
To create a new Chrome profile, follow these steps:
1. Open Google Chrome on your computer.
2. Click on the profile icon in the top-right corner of the browser window.
3. From the drop-down menu, select “Manage People.”
4. In the “People” section, click on “Add Person.”
5. A new window will appear. Enter a name for the new profile and choose an icon if desired.
6. Click on “Add” to create the new profile.
Once you’ve created a new profile, you can switch between profiles by clicking on the profile icon again and selecting the desired profile.
Creating a new profile can help isolate any issues specific to your previous profile, such as corrupt settings or extensions. By starting fresh with a new profile, you may find that the unresponsive page issue is resolved.
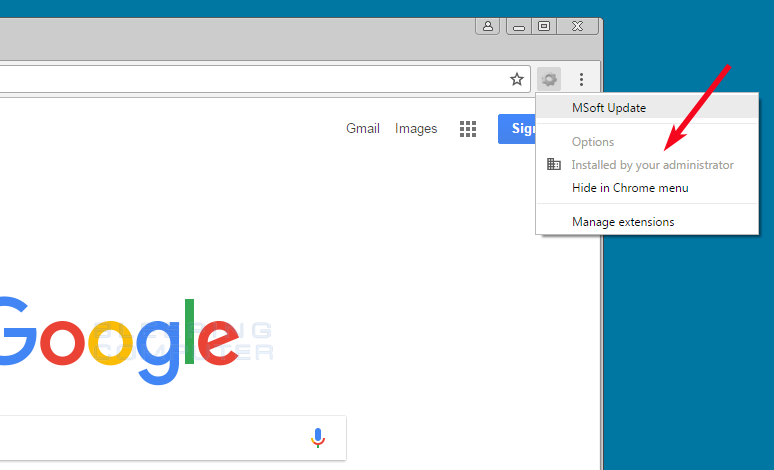
Check Extensions and Security Software
- Disable Extensions:
- Click on the three-dot menu in the top-right corner of Chrome.

- Select More Tools, then Extensions.
- Toggle off the switch next to each extension to disable them one by one.
- Reload the page to see if the issue is resolved.
- Remove Suspicious Extensions:
- Follow steps 1 and 2 from the previous method.
- Click on the trash bin icon next to suspicious extensions to remove them.
- Restart Chrome and check if the problem persists.
- Temporarily Disable Security Software:
- If you have antivirus or firewall software, temporarily disable it.
- Access the settings or control panel of the security software.
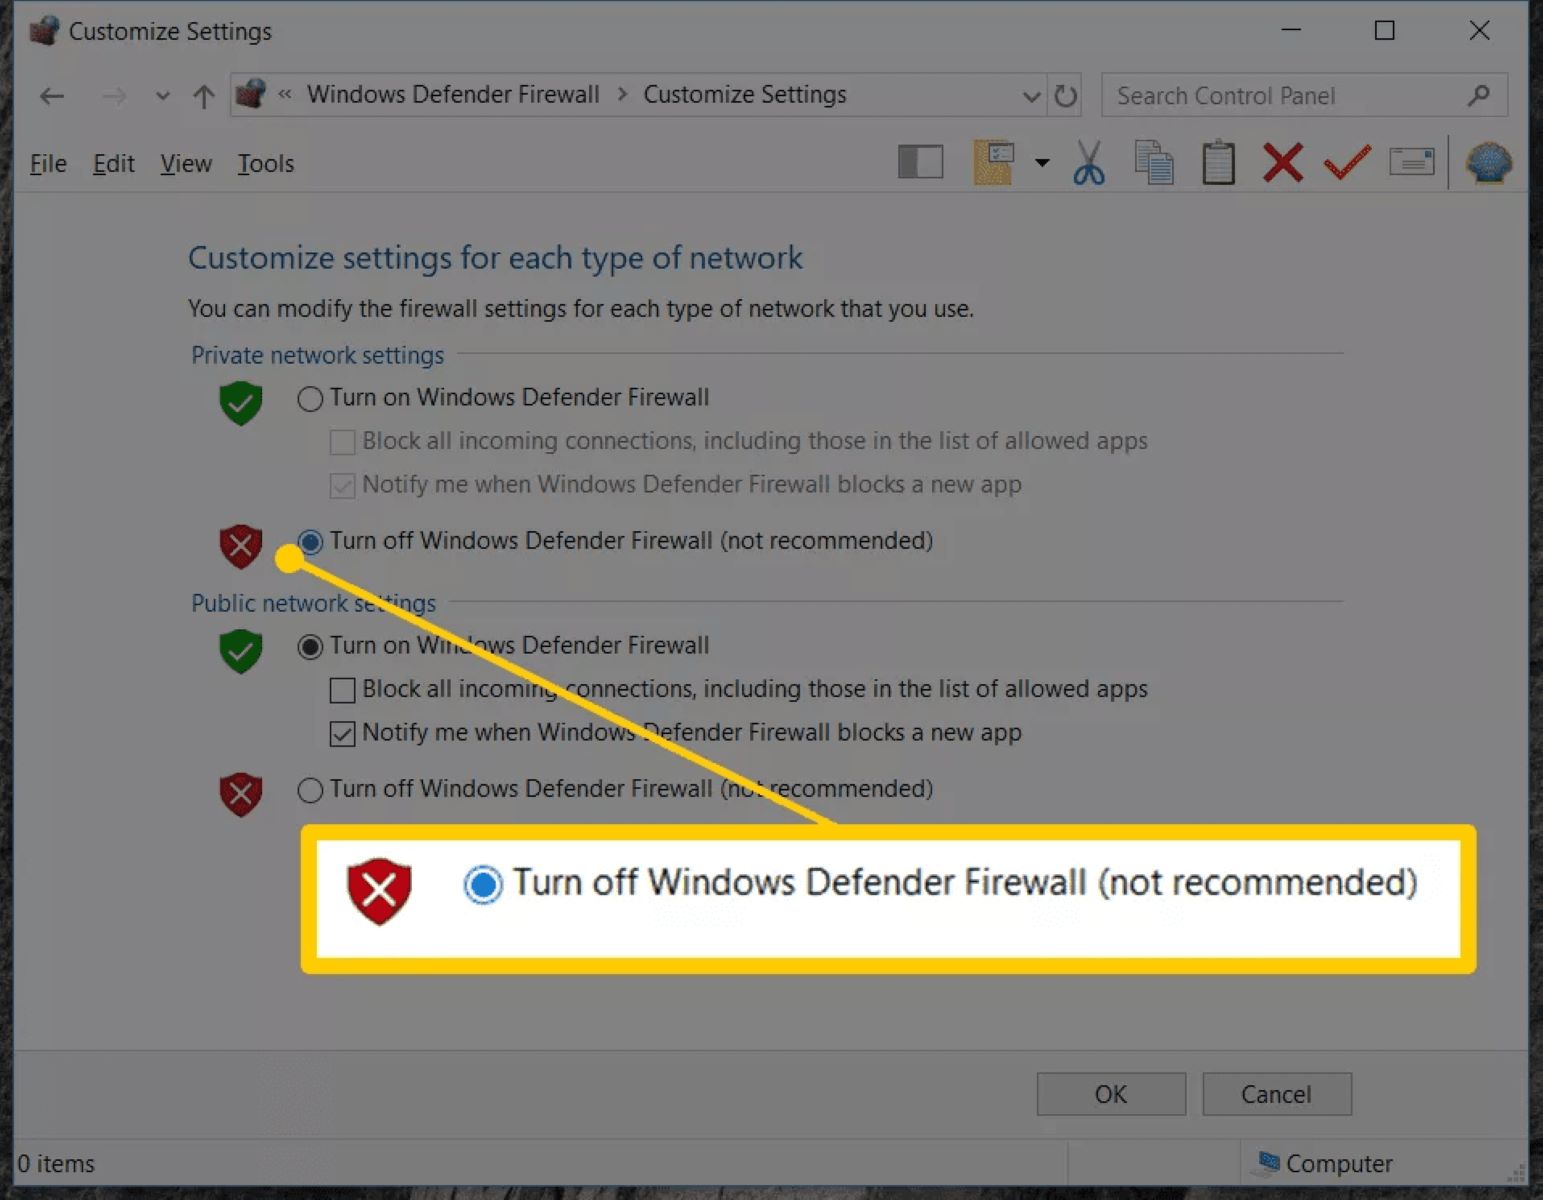
- Look for options to disable real-time protection or firewall.
- Disable the software and try loading the page again.
- Reset Chrome Settings:
- Open Chrome’s settings by clicking on the three-dot menu and selecting Settings.
- Scroll down and click on Advanced.
- Under the “Reset and clean up” section, click on Restore settings to their original defaults.
- Confirm the reset and wait for Chrome to restore its default settings.
- Restart Chrome and check if the unresponsive page issue is resolved.


